Unexpected double output in setup() - Why???

Hi folks,

I'm on my first steps on programming arduino and I found an unexpected problem doing a ridiculous easy sketch:

void setup() {
  Serial.begin(9600);
  Serial.println("Serial Monitor initialized...");
}

void loop() { }

Why is "Serial Monitor initialized..." printed twice in the serial monitor? It seems that the arduino reboots on its own, because if I to print an incremented variable in the loop, this variable is not printed twice. Only the initializing text.

I'm using Arduino IDE 1.8.5 on macOS Sierra (Version 10.12.6). I also had to install the CH340/CH341 driver to provide a port.

I hope you have any idea, because I didn't get any help in the german section of this forum. Thanks.

Mike

Yes, it appears that your Arduino is getting reset, but why that is happening and why that is happening only once is a mystery to me.

Power supply issue? Problem with some other device? There is insufficient information to provide additional help.

vaj4088:
Power supply issue? Problem with some other device?

Power is supplied via USB cable directly to my Arduino Nano. No other devices are connected to my MacBook Pro and up to now I hadn't any problem with my MacBook.

If I connect another Nano and upload the sketch above, the result is the same.

The problem occurred also, if I use a separate power supply to the Nano (like a powered rc receiver which provides the arduino with 5V).

Which information do you need more?

That is the information that I was seeking. ( I am going to assume that there is nothing else connected to the Nano.) I am mystified.

However, If you "print an incremented variable in the loop, this variable is not printed twice. Only the initializing text", then perhaps the Arduino does not reboot. Driver issue? Not sure. Sorry.

Sorry vaj4088, I was just thinking of my rc receiver project reading a transmitter switch position... The position ist printed only once!

So I extended my sketch in this way:

int i = 0;

void setup() {
  Serial.begin(9600);
  Serial.println("Serial Monitor initialized...");
}

void loop() {
  Serial.println(i++);
  delay(500);
}

The result is:

Serial Monitor initialized...
0
1
Serial Monitor initialized...
0
1
2
3
4
5
6
7
... and so on ...

Try making your set-up this and let us know what your result is.

   void setup() {
  Serial.begin(9600);
while (!Serial); // wait for serial monitor to open
  Serial.println("Serial Monitor initialized...");
}

cyclegadget:
Try making your set-up this and let us know what your result is.

Should I only use the expanded setup-function without the loop-function??? I guess not.

If I expand the setup-function and having an printout of an incremented variable loop-function, the result is the same as mentioned in #4.

I thought about suggesting this, but the Nano is based on the AtMega328 like the Uno is, so if (!Serial) should not be needed.

It might be interesting to try

void setup() {
  Serial.begin(9600);
  delay(3000) ;
  Serial.println("Serial Monitor initialized...");
}

void loop() {}

[I hate delay(...) but it is useful for this experiment.]

Note that the program will run when the code is uploaded to the Arduino, when the Arduino is reset or when it is powered up. Opening the Serial monitor causes the Arduino to reset and the program to run again.

Under exactly what circumstances are you see the double messages ?

1 Like

vaj4088:
It might be interesting to try

void setup() {

Serial.begin(9600);
 delay(3000) ;
 Serial.println("Serial Monitor initialized...");
}

void loop() {}


[I hate delay(...) but it is useful for this experiment.]

OK, the result is different by using the delay of 3 seconds!!! The initializing text is only printed once! I tried it by printing the increment in loop-function, so I can clearly state this new result.

UKHeliBob:
Note that the program will run when the code is uploaded to the Arduino, when the Arduino is reset or when it is powered up. Opening the Serial monitor causes the Arduino to reset and the program to run again.

Under exactly what circumstances are you see the double messages ?

Bob, the double printout comes only, when uploading the sketch (without any delay in setup). Once the sketch is uploaded and I press the rest-button on the Arduino, initializing text is printed a single time!

But why does this problem does not appear on other (not mine) environments???

the double printout comes only, when uploading the sketch

At what point do you open the Serial monitor to see the output ? If you simply upload the code you will not see any output.

Which Arduino board are you using ?

UKHeliBob:
At what point do you open the Serial monitor to see the output ? If you simply upload the code you will not see any output.

Which Arduino board are you using ?

I usually open the Serial monitor window before uploading the sketch and I use an Arduino Nano with CH340G chipset (China clone).

I usually open the Serial monitor window before uploading the sketch and I use an Arduino Nano with CH340G chipset

When I do that on my similar Nano the Serial monitor window closes as compilation starts.

This is on a PC with Windows 7. I am surprised that your Serial monitor window stays open, particularly whilst the compiled code is being uploaded.

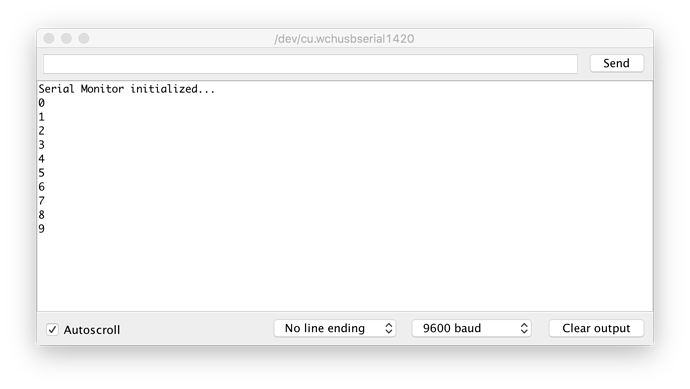
Here some screenshots of my Serial Monitor:

  1. screen: SM right after pressing the upload button (buttons inactive)

  2. screen: upload unfortunately completed, but sketch not running (buttons active)

  3. screen: sketch running

I found out, that if I use a delay below 804 millisecs, the output will be twice. 805 and above will print it only once. (I suspect this delay is only valid in my environment).

It would be very nice if someone else could check this general behavior on his macOS environment.

Besides getting this information is the question, why the monitor actually reboots without delay on my environment and unfortunately not on Windows PC.

It could still be a double reset of the COM port on the PC/Mac

Babbsack:
I usually open the Serial monitor window before uploading the sketch and I use an Arduino Nano with CH340G chipset (China clone).

Try this:

int main (void)
{
    init(); // performs timer and interrupt setup
    Serial.begin (9600); // setup serial port
    while (!Serial); // probably don't need this
    Serial.println ("Serial Monitor initialized..."); // print message
    while (1); // forever loop (main has nowhere to "exit" to).
}

krupski:
Try this:

int main (void)

{
    init(); // performs timer and interrupt setup
    Serial.begin (9600); // setup serial port
    while (!Serial); // probably don't need this
    Serial.println ("Serial Monitor initialized..."); // print message
    while (1); // forever loop (main has nowhere to "exit" to).
}

Double output...

Babbsack:
Double output...

Well that's strange. Do you have an oscilloscope? If so, try looking at the 5V supply pin and see if it glitches when the Arduino resets. Also take a look at the reset pin and see if it drops to logic low upon reset (it should stay high). If your scope has decent triggering and storage, use it because in free run mode it's almost impossible to see a single glitch that may only last a microsecond or less.

Lastly, is there ANYTHING connected to your Arduino? Try running it bare (nothing connected to it except the USB cable). Also, try using a terminal program (like Hyperterm in Windoze or Minicom in Linux or whatever a MAC uses... see if maybe your Arduino IDE serial monitor is sending garbage to the Arduino somehow.

Another thing... what is the Arduino board lying on? Hopefully a clean dry, non conductive surface (and don't handle it when testing - this won't hurt anything but it can cause erratic operation).

Another lastly... maybe you have a flakey crystal (the 16 MHz oscillator for the Arduino). Try setting your board's low fuse to run the oscillator in full swing mode. This is done by changing the low 4 bits (CKSEL3 to CKSEL0) of the LOW FUSE.

In your Arduino IDE directory, find the file "boards.txt" in [b]..../arduino-1.8.5/hardware/arduino/avr/boards.txt[/b] and open it with a text editor. Find the entry [b]nano.menu.cpu.atmega328.bootloader.low_fuses [/b]it should be set to "0xFF". Change it to "0xF7" and save the file (make a backup of the file first).

Then, restart the IDE and re-install your bootloader. Although you don't NEED to re-write the bootloader, the process will also write the fuses, thereby changing your low fuse from "0xFF" to "0xF7".

Then try it again and see if the board now works properly. All this change does is run the crystal oscillator in "full swing" mode so that the signal across the crystal is almost 4 to 5 volts P-P instead of the default which is a weak and pathetic 1 to 2 volts P-P (it makes the clock oscillator more robust).

Another thing.... your USB power may be weak (less than 5 volts). So, another thing you can try is disabling the "Brownout Detector" (this normally resets the Arduino if the voltage goes too low). This is controlled by the extended fuse. If you want to try it, find the entry in boards.txt [b]nano.menu.cpu.atmega328.bootloader.extended_fuses[/b] which should be set to "0xFD". Change this to "0xFF" to disable the brownout detector. If you have a low voltage issue, then maybe this will fix it up for you.

Good luck... if none of this works, buy a new board, 'cause I'm out of ideas!!! :slight_smile: