i have problems with the dht11 sensor. I soldered it but nothing works and i do not receive any readable data.
#include <Wire.h>
#include <Adafruit_GFX.h>
#include <Adafruit_SSD1306.h>
#include <DHT.h>

// Definiere den Pin und den Sensortyp
#define DHTPIN 2      // Digitaler Pin, an dem der DHT11 angeschlossen ist
#define DHTTYPE DHT11 // DHT11 Sensor

DHT dht(DHTPIN, DHTTYPE);

// Definiere die Bildschirmabmessungen
#define SCREEN_WIDTH 128
#define SCREEN_HEIGHT 64

// Erstelle ein Objekt für das OLED-Display
Adafruit_SSD1306 display(SCREEN_WIDTH, SCREEN_HEIGHT, &Wire, -1);

void setup() {
  // Starte serielle Kommunikation für Debugging
  Serial.begin(9600);
  Serial.println(F("DHT11 Sensor Test"));

  // Starte DHT11 Sensor
  dht.begin();

  // Starte das OLED-Display
  if(!display.begin(SSD1306_I2C_ADDRESS, 0x3C)) { // Adresse kann 0x3C oder 0x3D sein
    Serial.println(F("SSD1306 Allocation failed"));
    for(;;); // Hält das Programm an
  }

  // Display initialisieren
  display.clearDisplay();
  display.setTextSize(1);      // Textgröße einstellen
  display.setTextColor(SSD1306_WHITE); // Textfarbe einstellen
  display.setCursor(0, 0);     // Startposition einstellen
  display.println(F("DHT11 Sensor"));
  display.println(F("Initialisieren..."));
  display.display();
  delay(2000);  // Warte 2 Sekunden
}

void loop() {
  delay(2000); // Warte 2 Sekunden zwischen den Messungen

  // Temperatur und Luftfeuchtigkeit einlesen
  float h = dht.readHumidity();
  float t = dht.readTemperature();

  // Prüfen, ob der Sensor korrekt gelesen wurde
  if (isnan(h) || isnan(t)) {
    Serial.println(F("Fehler beim Lesen des DHT-Sensors!"));
    display.clearDisplay();
    display.setCursor(0, 0);
    display.println(F("Lesefehler"));
    display.display();
    return;
  }

  // Ausgabe der Werte auf dem OLED-Display
  display.clearDisplay();
  display.setCursor(0, 0);
  display.println(F("Temperatur:"));
  display.setTextSize(2);
  display.setCursor(0, 20);
  display.print(t);
  display.println(F(" C"));

  display.setTextSize(1);
  display.setCursor(0, 45);
  display.println(F("Luftfeuchtigkeit:"));
  display.setTextSize(2);
  display.setCursor(0, 55);
  display.print(h);
  display.println(F(" %"));

  display.display();
}
thats the used code
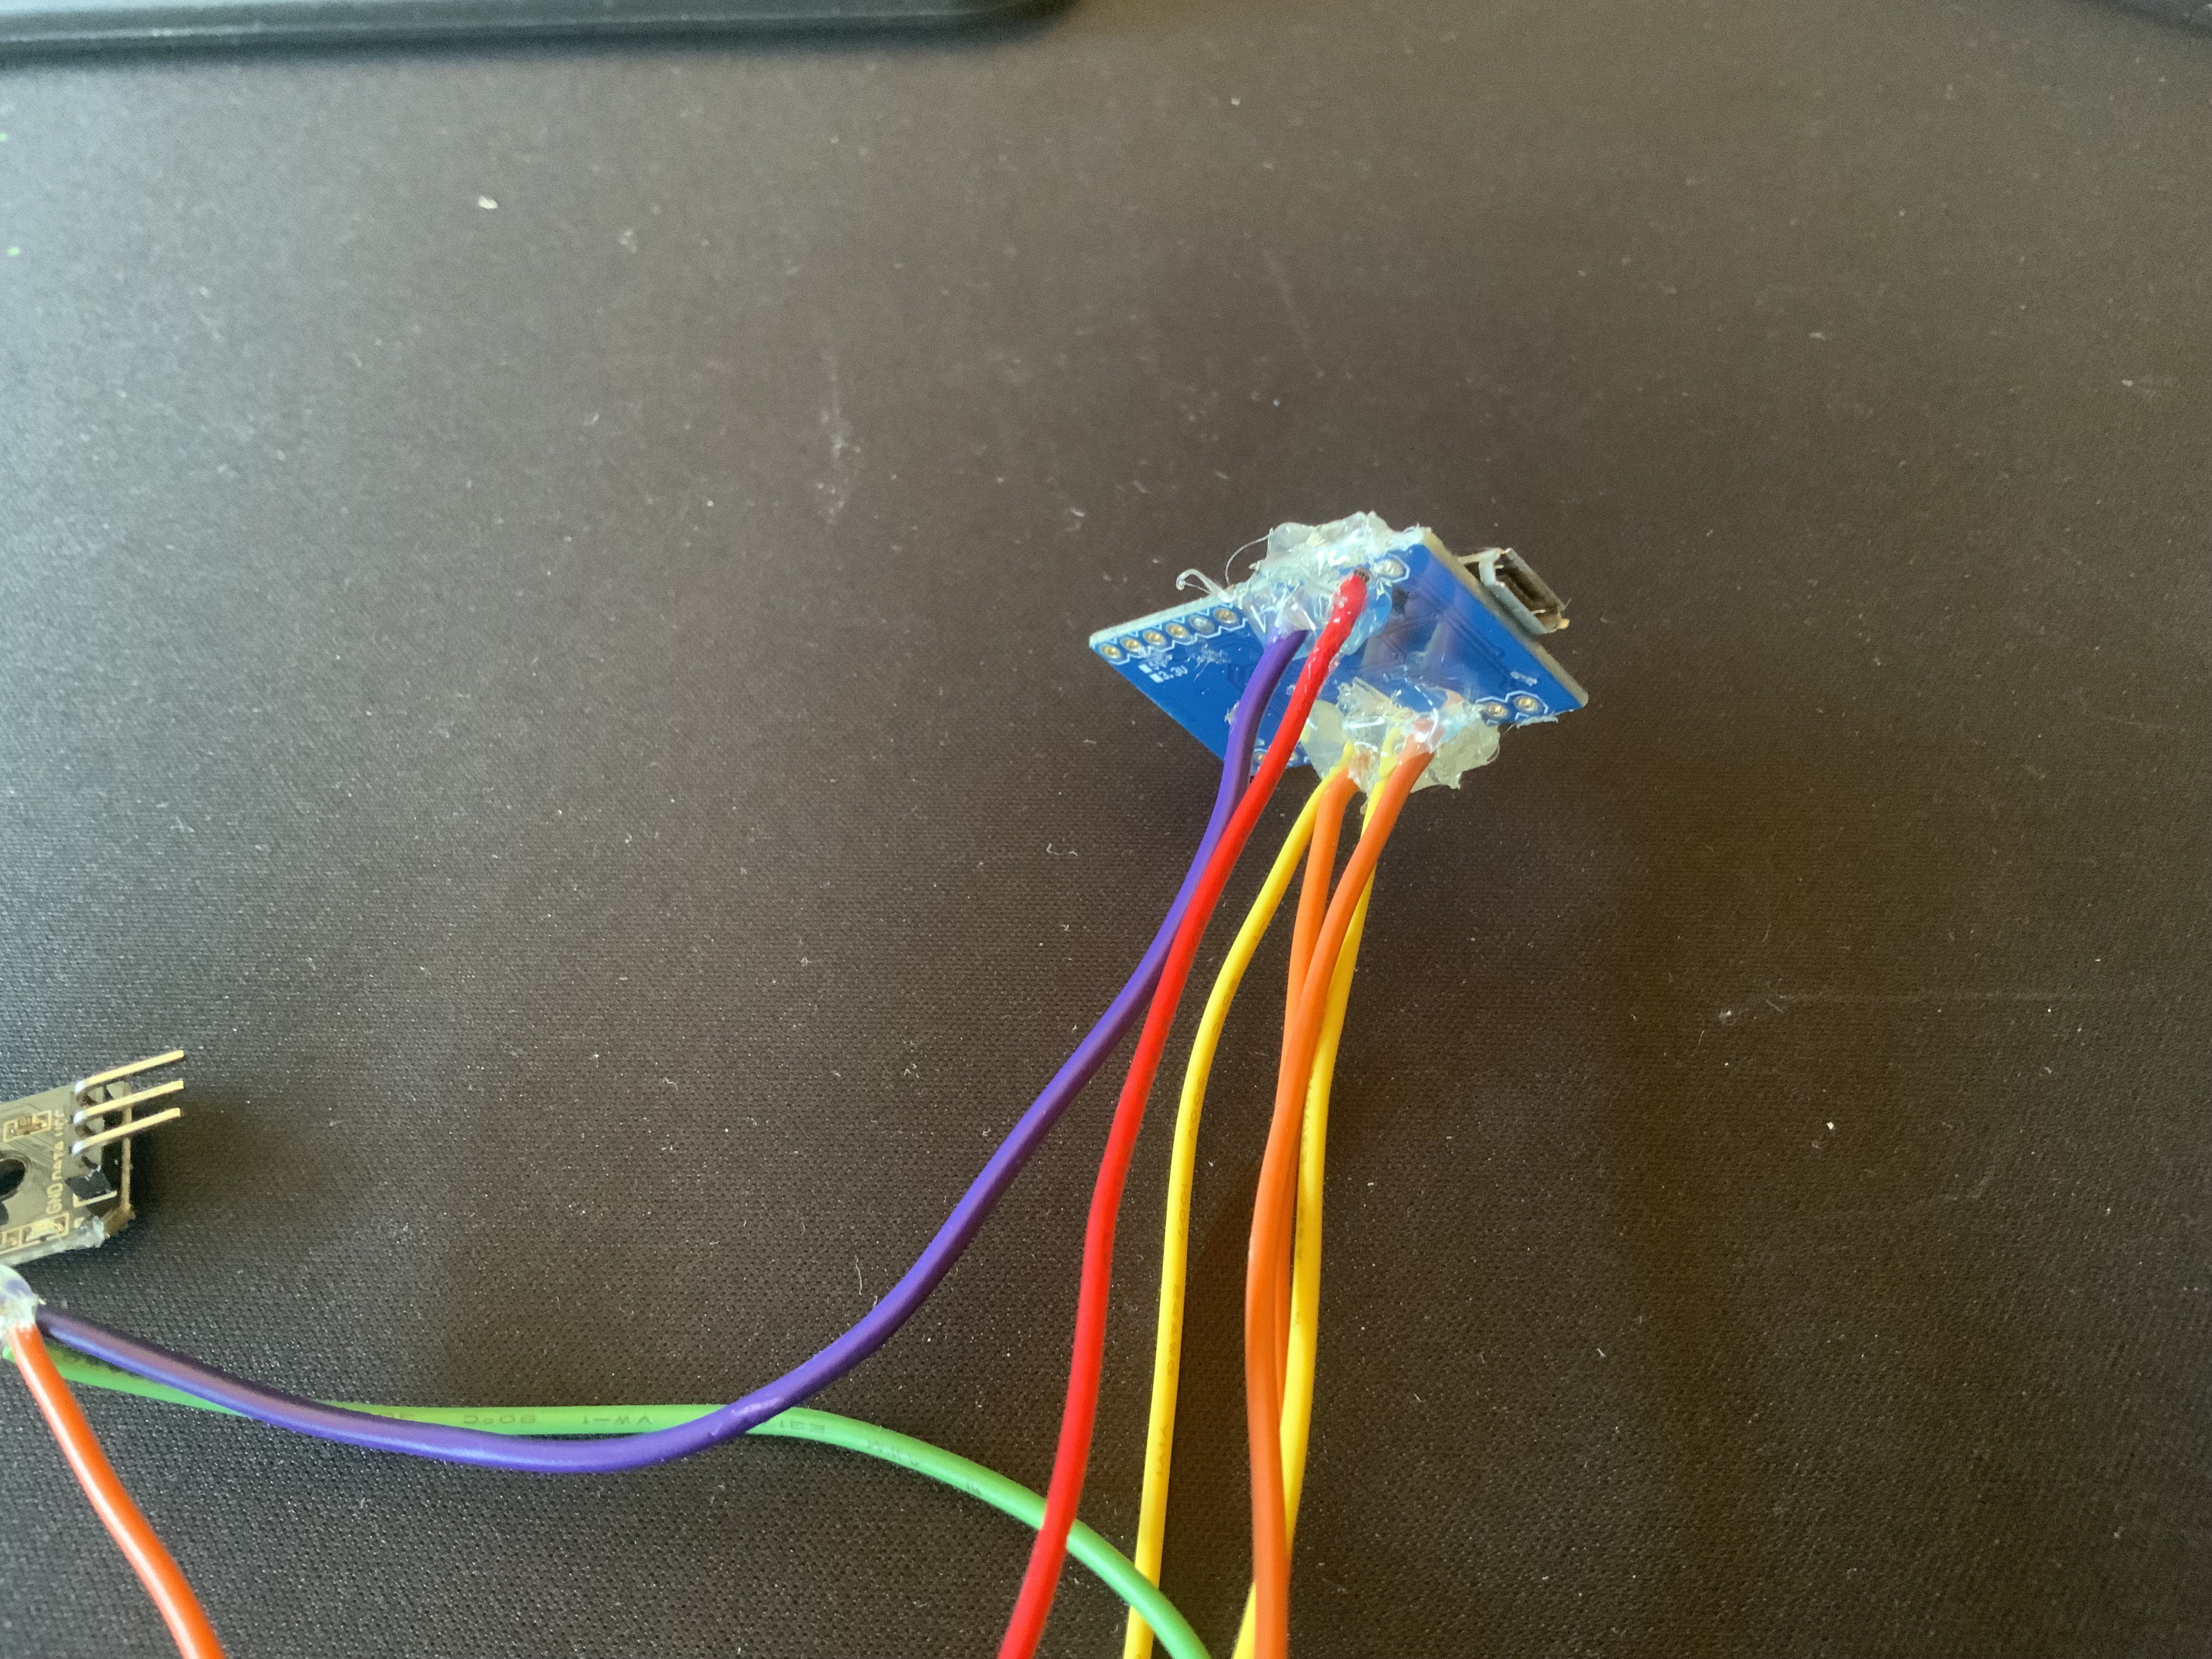
Please show a schematic of your project and a good photograph that clearly shows how everything is connected. Upload the code you're running and describe what behavior it exhibits, and what the intended behavior is.
I just prepared it a bit and soldered it again and the sensor is attached to the cable again. With soldering everything is fine, I think. The code checks whether the sensor is working and if there is no response from the sensor it gives a reading error. The code is from chtgpt because unfortunately I'm not familiar with it


I don't think so.
You used hot glue. That has nothing to do with soldering.

Where is the common GND and how is this sensor supposed to be powered?
So in addition to soldering, you'll have to learn the basics of coding in C++. There are plenty of examples and tutorials; start studying!
Only one wire connected to the DHT11?
Have you tried a simple example from the DHT11 library that you use.
Maybe solder underneath it?
But you have a very valid point that I did not even think about.
I considered that, but it doesn't look like it. I'm afraid it's hot glue all the way - which, coincidentally, is a pretty good electrical insulator.
its not soldert it only look like so
but why the sensor doesnt work
Yep, so that's why it doesn't work. There needs to be an electrical contact on those joins. Hot glue doesn't do the trick. You'll have to remove it and use a soldering iron and actual solder; I recommend regular solder, not the lead-free stuff. Use flux-core solder, and/or apply additional flux as well. Keep in mind that plumber's solder is not appropriate here either; you'll need to use materials specifically for electronics. The good news is that all this is cheap and easy to purchase.
1: it has no electrical contact with the rest of the system
2: it doesn't share a GND connection with the Arduino
3: it doesn't have a power supply.
That's just the hardware side; let's focus on that first. Keep in mind it's not an either/or situation - you need to fix all three aspects.
I'll do it and then I'll get back to you

Yes, well, of sorts. I can't guaranteed those connections are reliable, though. The quality of the soldering leaves something to be desired. Keep practicing!
Can you show how the sensor is connected to the Arduino?
Don't worry about the display for now; we'll get to that later.
What about the Pro Micro? Also soldered?
If yes, I suggest that you start with an example that comes with the DHT library that you use.
The cables are also soldered to the Aruino, what does the code look like now?
Is there an example from the library?
Look under file/examples in the IDE; as it is a 3rd party library, it will probably be in the last part of the examples.
nop there is nothing
Which DHT11 library did you install?