This is a project that I have been working on for some time. The goal is to heat/cool any fermentation vessel easily using a solid-state peltier device.
To accomplish this, I used an Arduino and some computer cooling components along with simple plumbing and brewing accessories.
If you're interested in creating something like this, please view the project details on this page. Total cost is about $150. Please let me know what you think.
Thanks and happy brewing!

This is the whole setup. Yes, it's very prototype-y, but it works great! The XBee, Arduino, and relay module is in the foreground. The CPU cooler/pump/fan/heatsink is in the mid-ground and the carboy insulator with tubing is in the background. The mini-barrel is just for demo purposes.

The Arduino, XBee, and SainSmart 4-Relay Module. Note that the pump/fan relay is wired in series with the heat/cool relays. This ensures that the pump and fan are running if the peltier device is running. Yes, this should probably be on a breadboard, but this was just a proof-of-concept.

The peltier device is sandwiched between the Antec Kühler H2O 620 and the CPU cooler. Some long bolts and wing nuts hold the three components together.
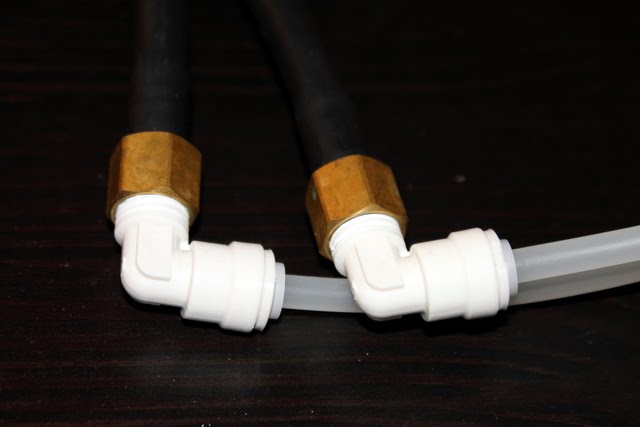
Two adapters (1/4" barb to 1/4" MPT and 1/4" MPT to quick connect) are used to allow the flexible tubing to mate to the Kühler 620 native tubing.
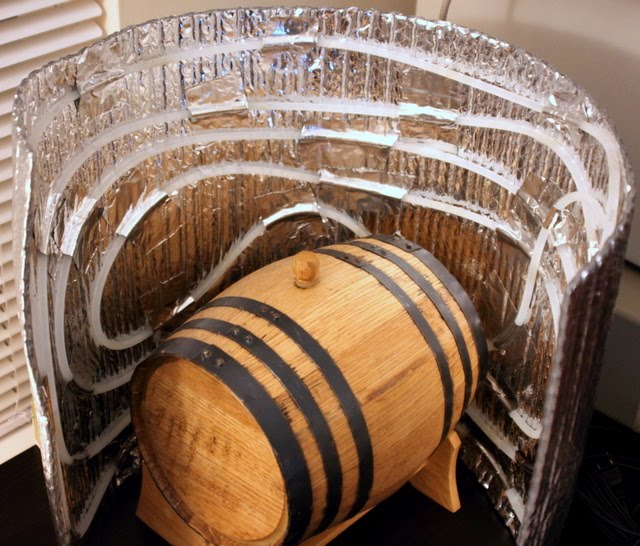
The carboy insulator is lined with the flexible plastic tubing and taped to the inside with foil tape. The mini-barrel was just a convenient prop, not an actual fermentation vessel. Hold the insulator closed around a carboy or plastic bucket using tape or a bungee cord. The tubing will transfer heat either to or from the vessel based on heating or cooling mode.
Usage
Download the two files attached. You'll need to update the paths in the #include statements to match your system. Then upload the sketch to your Arduino.
To set the target temperature, type 's' followed by the desired temperature. The default temperature scale is Centigrade, although it can be changed to Fahrenheit by typing 'f'. For example, to set the target temperature to 20°C, type 's20' and then press Enter. The default target as 25°C. Your settings will be saved in the EEPROM so that a power failure will not affect your settings.
The hysteresis can also be set by typing 'h' followed by the hysteresis value. To turn the system off, type 0 followed by Enter. To turn it back on, type 1 followed by Enter. For help, type '?' Enter.
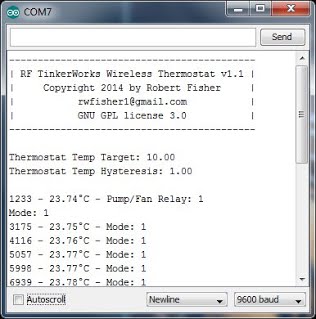
The startup as seen form the Arduino IDE serial interface. The interface will update with the current temperature and heating/cooling mode every second.
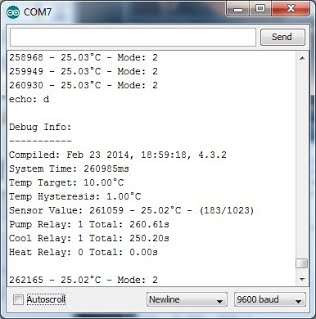
The debug screen showing the temperature settings, total cooling and heating time. This can be seen by using an XBee module wirelessly connected to the device or directly connected to the Arduino via a USB cable. Simply type 'd' followed by Enter to see this info.
Please let me know what you think.
Thermostat.ino (10.8 KB)
EEPROMplus.h (589 Bytes)