I’ve searched for a long time on how to wire a four pin button, and now that I think I have it, I simply can’t connect it to my servo motor. This is driving me crazy! I will send A picture of my wiring and code, so if anyone knows what the problem is please tell me.
In the IDE, right click and select "Copy for forum" then paste the clipboard contents into a new reply to this topic. The copy from the IDE will have added code tags to the start and end of the code to make it easier to read and copy for examination
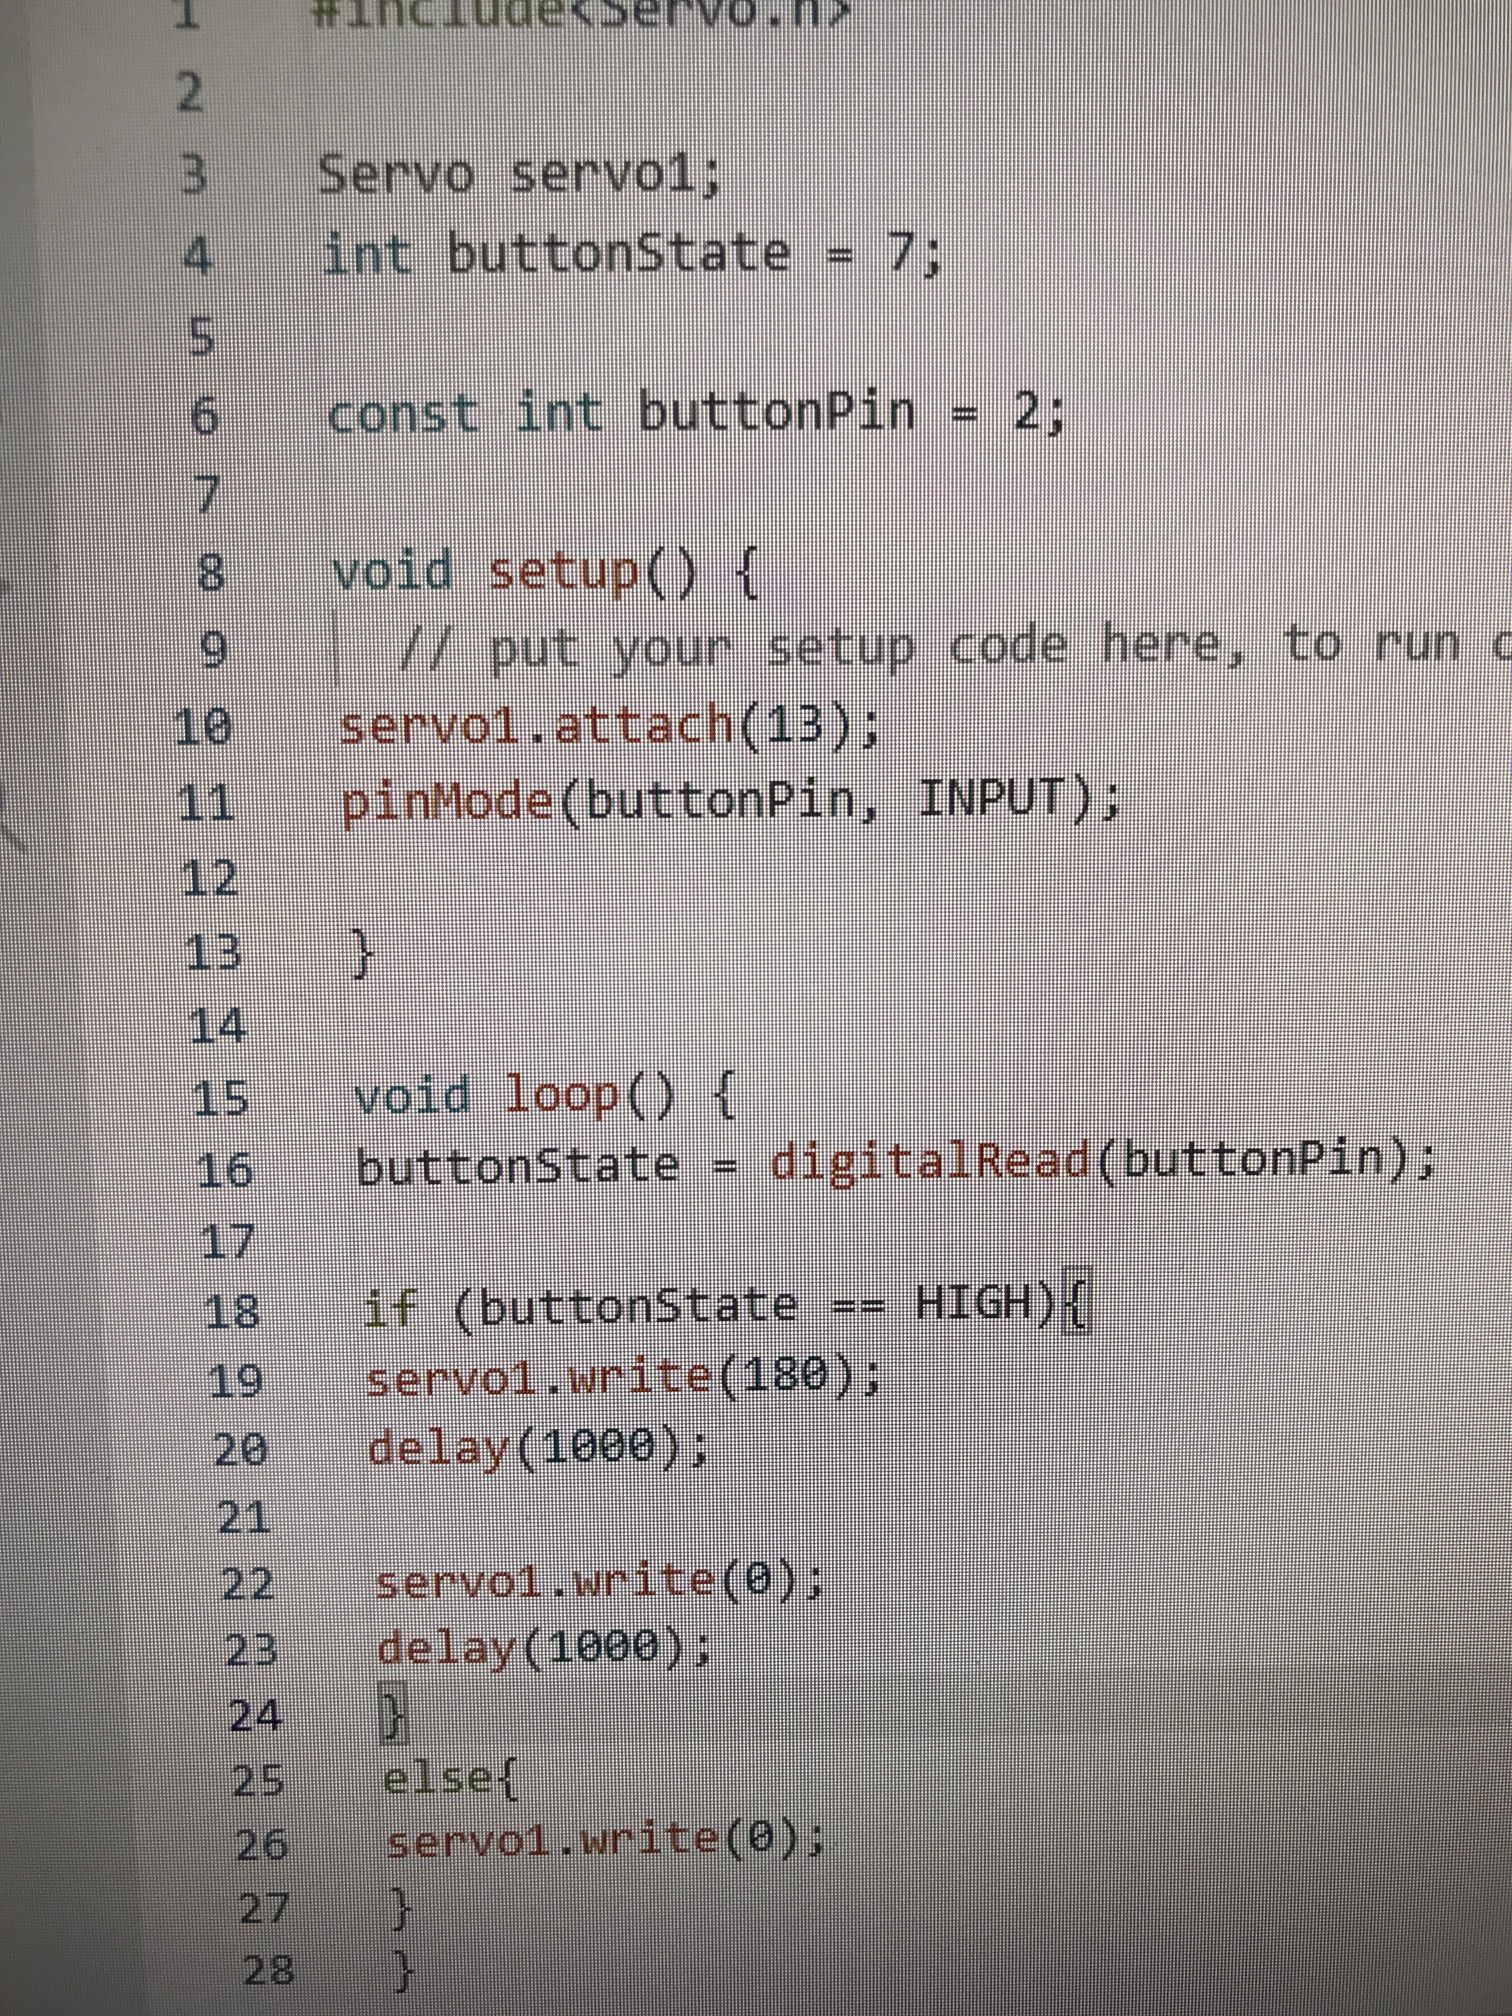
Your picture of the wiring is also not very clear. It would be better if you drew a schematic of your project with pencil and paper and posted a picture of that
Can I suggest that you use red wires for 5V connections, black wires for GND connections and other colours for connections to pins and switches. The electrons won't care but those colours are more conventional
As to your circuit, what is keeping the button pin LOW when the button is not pressed ?
It is not a good idea to power a servo from the Arduino 5V pin as it almost certainly cannot supply enough current to drive the servo under all conditions and you may damage the Arduino. Consider using an external power supply for the servo
buttons are typically connected between the pin and ground, the pin configured as INPUT_PULLUP to use the internal pullup resistor which pulls the pin HIGH and when pressed, the button pulls the pin LOW.
for testing if the switch is opening / closing of the button
These buttons look this way internally
This means of you connect to the wrong pins there is always permanent contact
watch the simulation until CONTINUE microcontroller goes on appears
I have build two WOKWI-simulations that rebuild your exercise
one to one like you did using the blocking command delay()
delay() means:
stop microcontroller comletely until delay-time is over.
and then a second version that uses non-blocking timing.
This second version does blink in LED all the time
Even in case the program keeps the servo in position 180 and is waiting for
turning the servo back to position 0
As soon as you want your program to be responsive to button-presses or if you want to do
a second, third, fourth action in parallel to some other action non-blocking timing is required
It will take some time to understand this second code-version but it shows a somehow advanced functionality as it blinks the LED continiously in parallel to the waiting
additionally here is a demo where the LED-blinking and the servo have timing in a blocking way
through the use of delay()
The wait-times are 2 seconds and 3 seconds long to make it easier to realise what is happening.
You have to keep the button pressed down until the LED goes of
in all other cases the program does not detect the button-press