Hey everyone,
i have seen that some of us having problems to upload files to their arduino nano esp32. And to be honest i was on the same bumpy road but finally found a solution that is working for me. And here i would like to share my process with you. Maybe some of you can use it too
What do we need?
- Arduino IDE 2.x
- Visual Studio Code (https://code.visualstudio.com/)
- The Visual Studio Code extension platformio
- The correct partition.csv file for the Arduino nano esp32
Lets start:
-
Download and install the Arduino IDE 2.x (https://www.arduino.cc/en/software)
We need that for the partition.csv file later -
Download an install Visual Studio Code (https://code.visualstudio.com/)
This will be our main IDE to generate the image and also to create our sketches. The last one could also be done in IDE 2.X after we generated the image file and uploaded it to the nano esp32. But why changing if Visual Studio Code is doing the same job that the Arduino IDE and even better. -
After installing Visual Studio Code install the extension platformio
platformio will also install c/c++ for you. So dont worry about that. -
Open the platformio Home (if not already opened)
-
Create a new Project
-
Give your Project a name and select the Arduino Nano ESP32 board. Framework Arduino and hit finisch. Give Visual Studio a few moments to setting everything up for you

-
After a while you should see the following screen and the content of the platform.ini file
This is where we need to adjust a few things to get things done. Add following lines to your platformio.ini


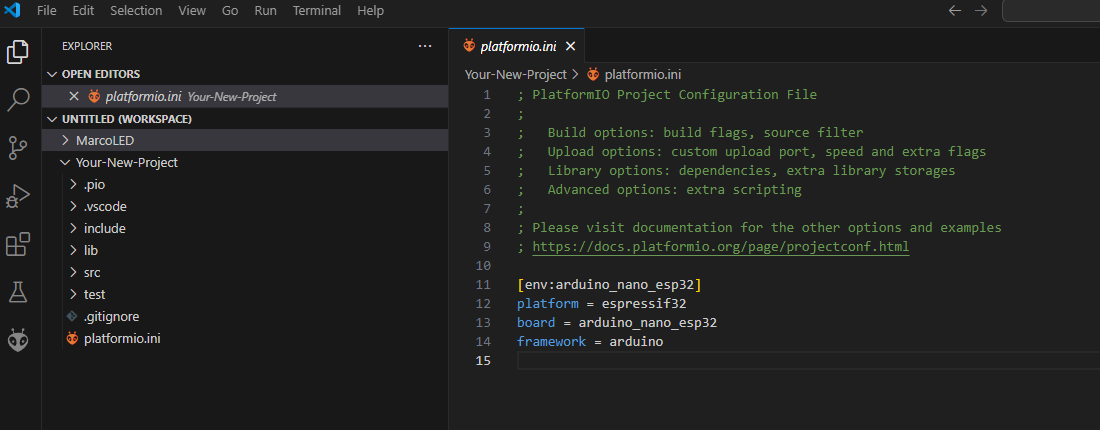
board_build.filesystem = spiffs
;upload_protocol = esptool
board_build.partitions = app3M_spiffs9M_fact512k_16MB.csv
monitor_speed = 115200
board_build.mcu = esp32s3
lib_deps = bblanchon/ArduinoJson@^7.0.4
- Time to get the original partition.csv file from the Arduino IDE 2.x
- press windows-key + r and enter %Appdata% and hit enter
- Follow the Path(the segment 2.0.13 could be different if you are using a older or newer IDE 2.X Version): Local>Arduino15>packages>arduino>hardware>esp32>2.0.13>tools>partitions
- copy the file: app3M_spiffs9M_fact512k_16MB.csv
- Go back to Visual Studio Code and rightclick on your project name and click "Reveal in File Explorer"
You should see your project folder. Enter it and paste the app3M_spiffs9M_fact512k_16MB.csv into it
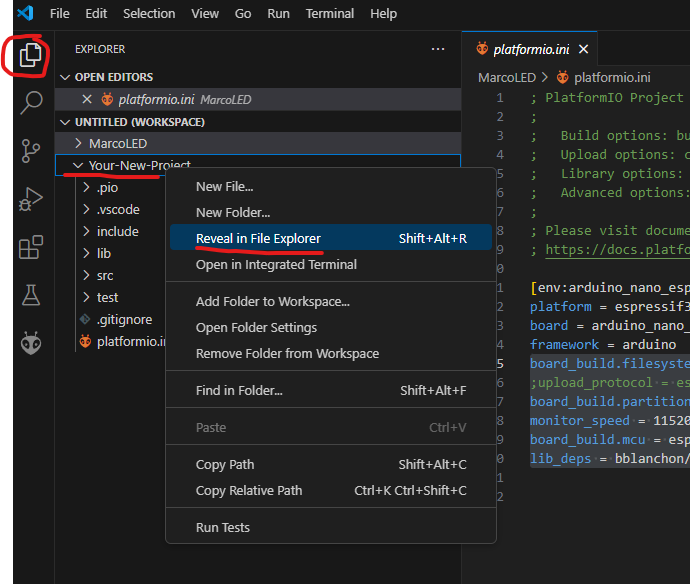
If you switch back to visual studio code, you should see the .csv file in your project root
-
right click again on your project within visual studio code and create a new folder called: data. All files within the data folder will be uploaded to the ESP32.
-
right click the new folder data and create a new file within that folder. In my example i called the file test.txt. click the file and enter whatever you want into that textfile and save it (ctrl + s)
-
plugin your Arduino Nano ESP32
-
switch to the platformio.ini file
-
remove the ";" infront of the line ";upload_protocol = esptool"

-
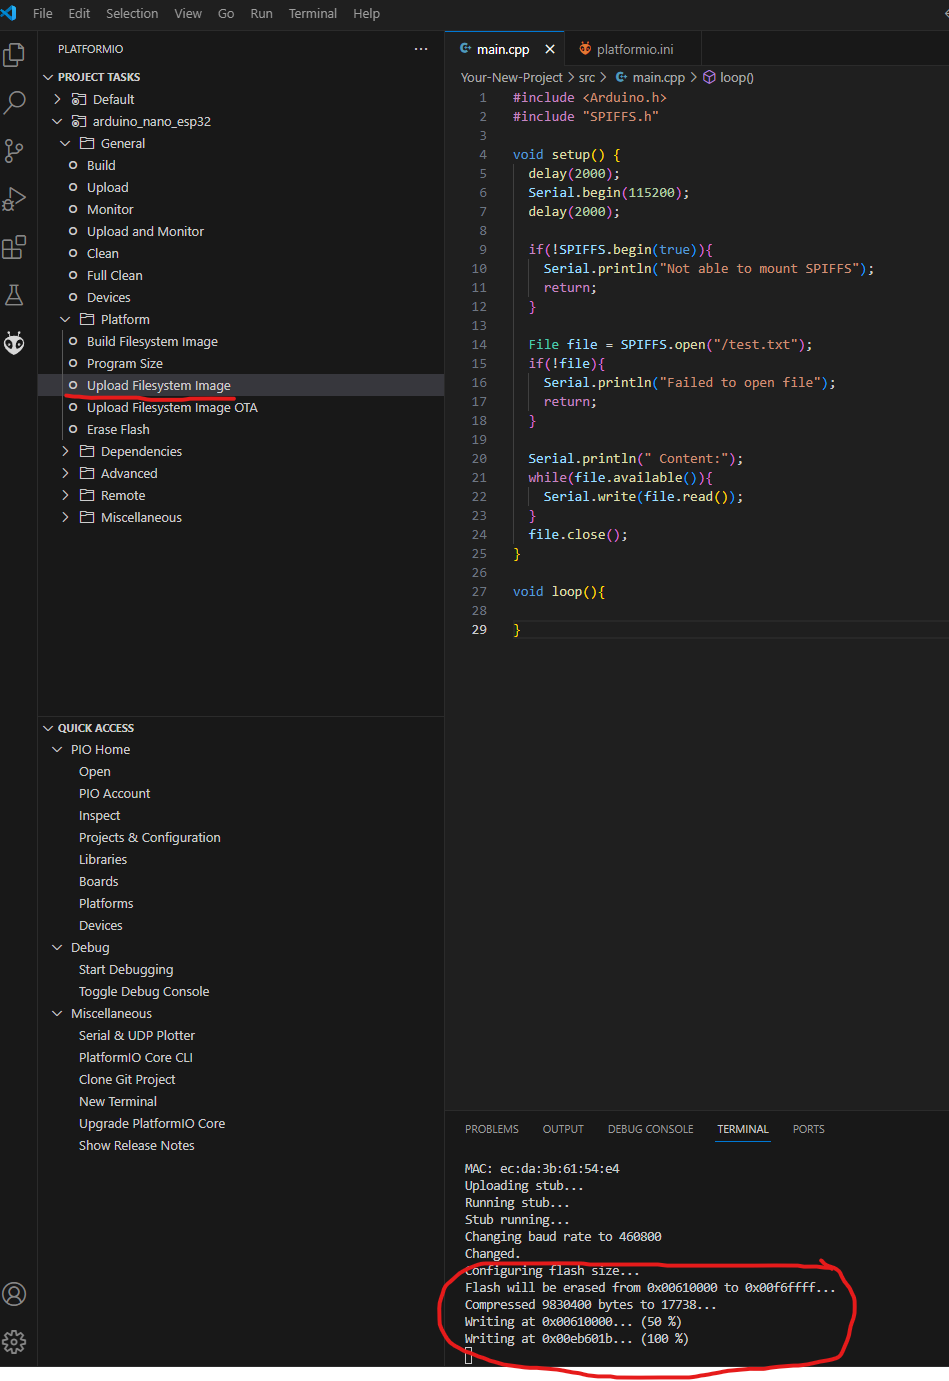
open the file main.cpp in the src folder to add a simple snippet for testing. Save the main.cpp

#include <Arduino.h>
#include "SPIFFS.h"

void setup() {
  delay(2000);
  Serial.begin(115200);
  delay(2000);

  if(!SPIFFS.begin(true)){
    Serial.println("Not able to mount SPIFFS");
    return;
  }

  File file = SPIFFS.open("/test.txt");
  if(!file){
    Serial.println("Failed to open file");
    return;
  }

  Serial.println(" Content:");
  while(file.available()){
    Serial.write(file.read());
  }
  file.close();
}

void loop(){

}
-
click the little alien icon on the left and the select Build Filesystem Image
Platform is building the Filesystem Image based on or data folder. This shouldnt take too long.
-
after that click Upload Filesystem Image. This will take a while. Sometimes platformio is mixing things up a bit.If you get an error that board is not available, check if you havent opend another terminal in visual studio code.
-
After a some seconds you should get the follow message in your terminal. And your Arduino Nano ESP32 led should be purple
-
Hit the reset button on your Arduino Nano ESP32. The purple led should be off now
-
Switch back to your platformio.ini file and add the ";" infront of the line "upload_protocol = esptool". Dont forget to save the file
-
finally upload the code to your board. click the arrow right icon in the bottom menu
.


Take care that no other terminals are still open or in progress (left side of the screenshot). Close them by clicking the bin icon and make sure that right port is selected (always choose the comport where it says serial usb device). Bottom part of the screenshot

- Switch to the Serial Monitor and you should see the following

You are done. When ever you make any changes to the data folder go back to step 13 and repeat.
I hope this will help some people here.