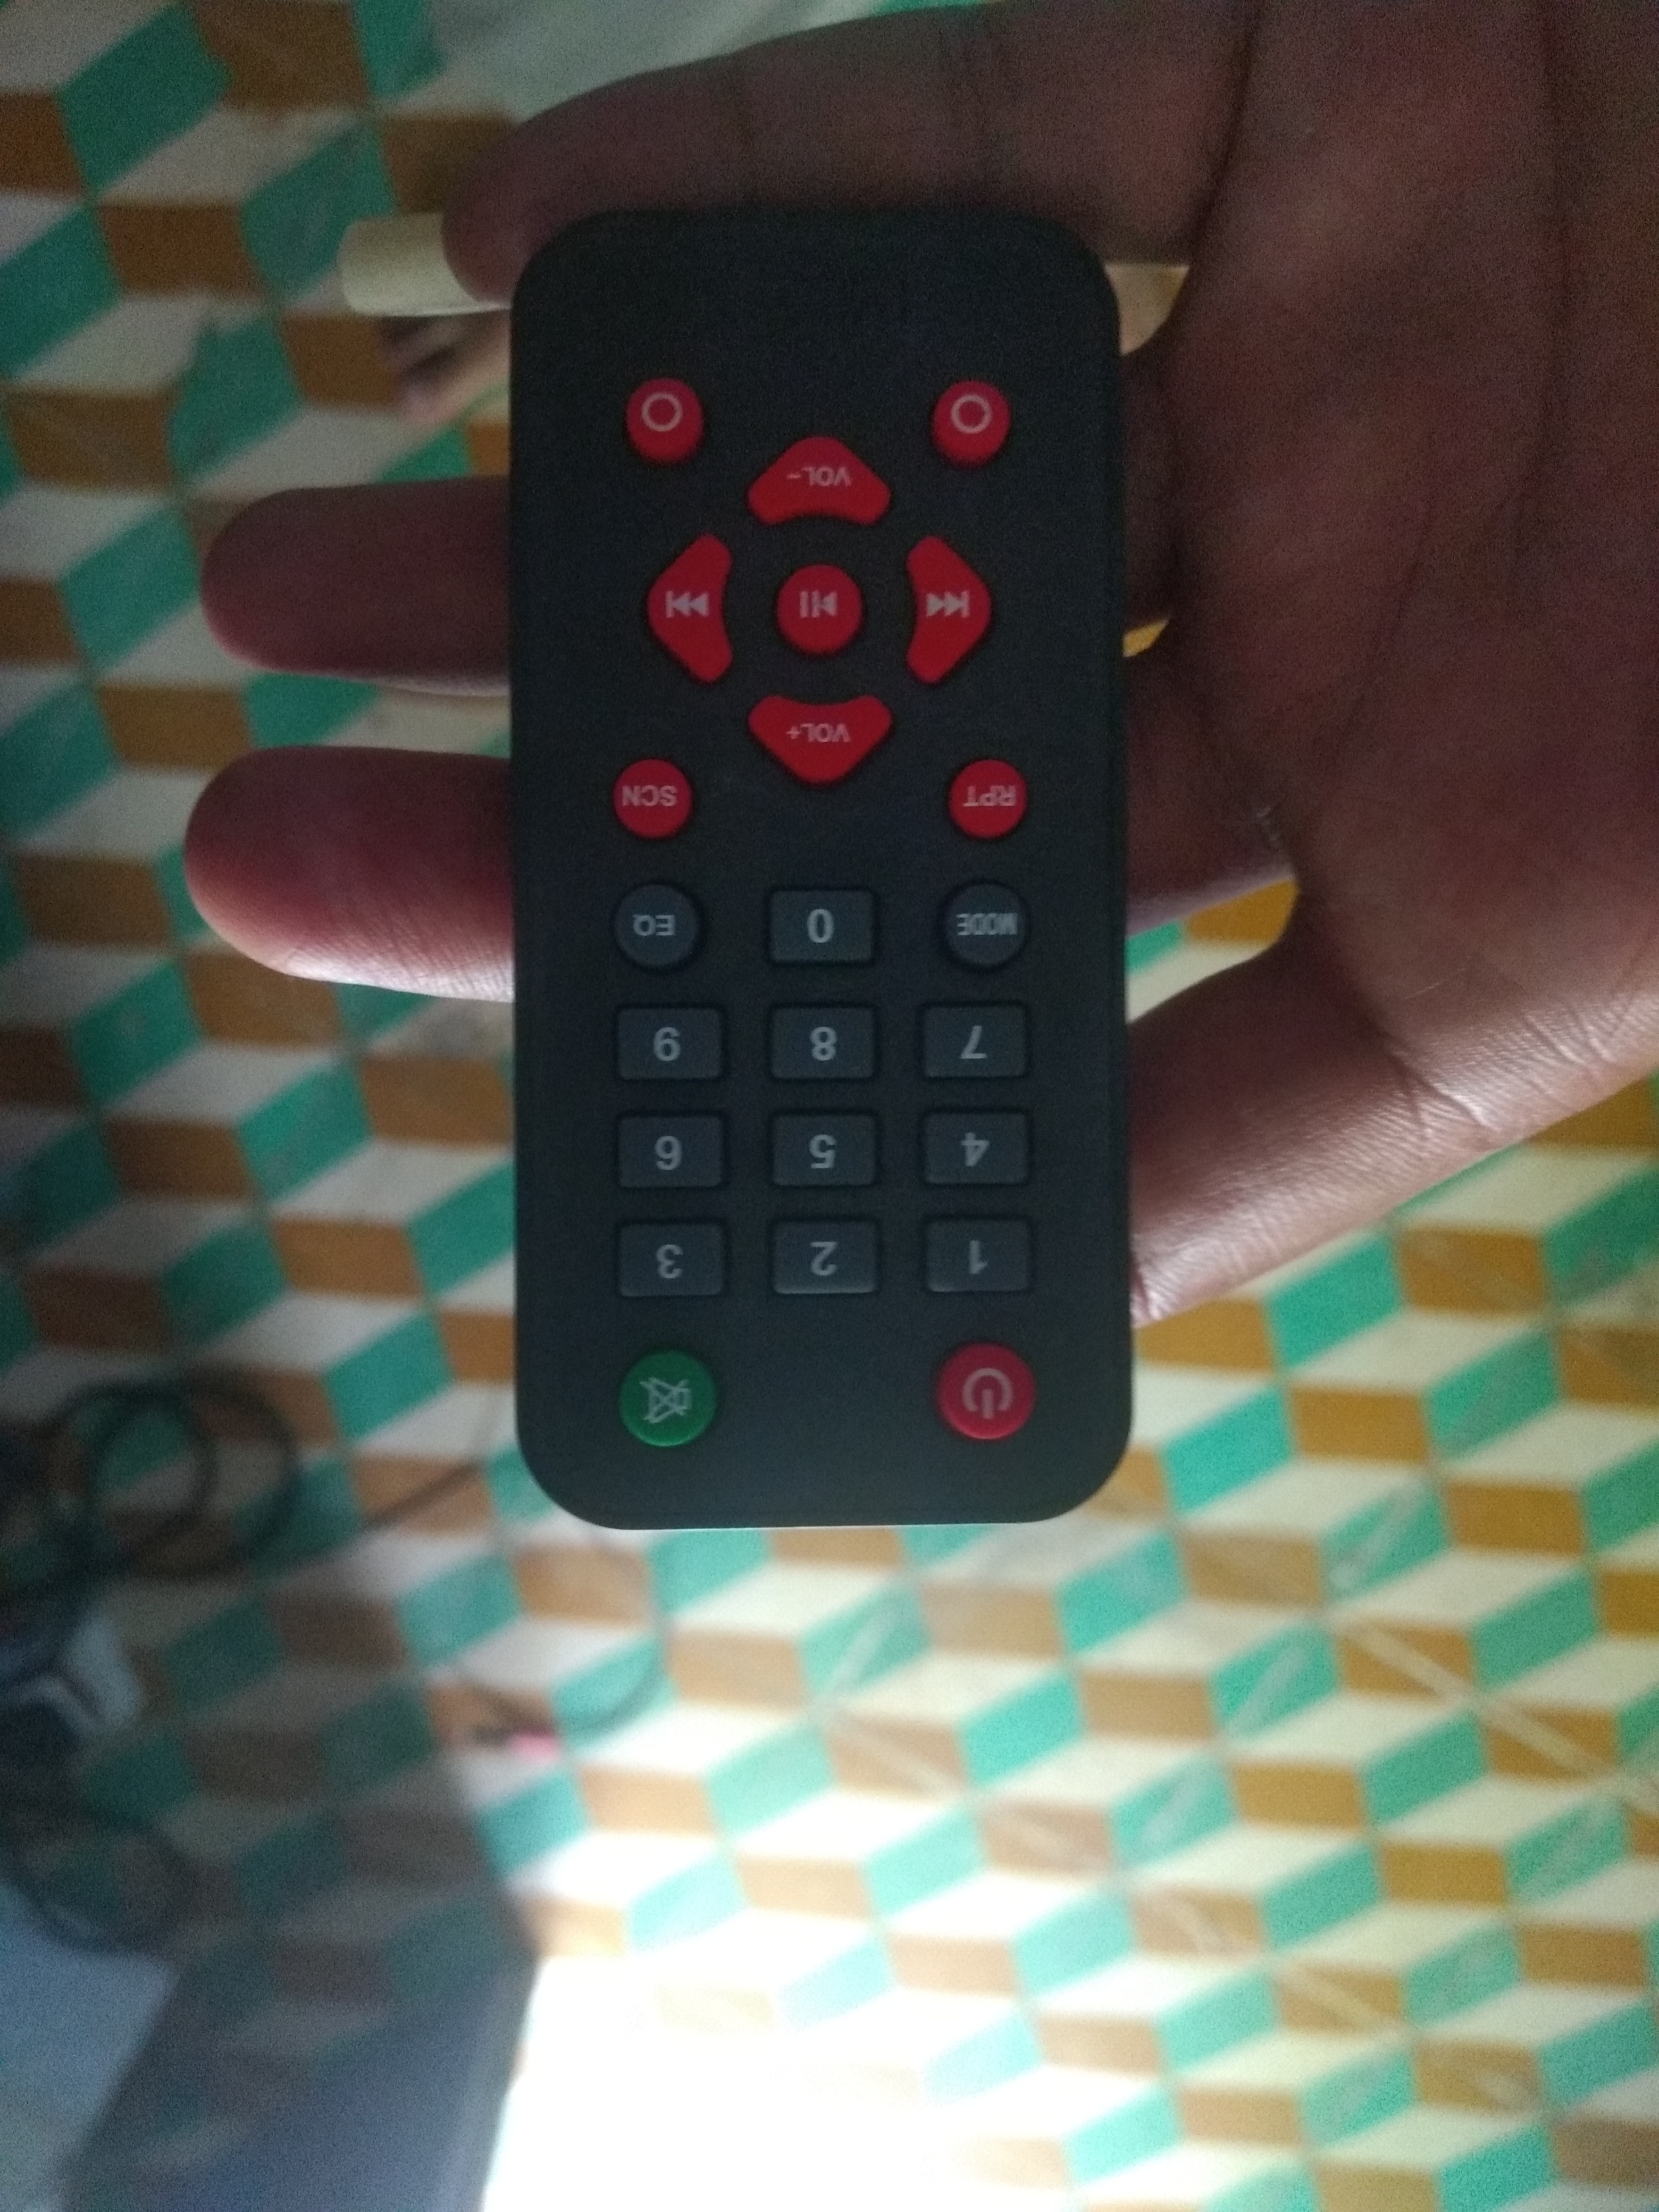
i try diffrent code with different library's some of them i share here
pin2 to D2
**first code**

 #include <IRremote.h>
#include <EEPROM.h>
const int RECV_PIN = 2;
IRrecv irrecv(RECV_PIN);
decode_results results;

#define Relay1 2  // Load1 Pin Out
#define Relay2 3  // Load2 Pin Out
#define Relay3 4  // Load3 Pin Out
#define Relay4 5  // Load4 Pin Out

int load1, load2, load3, load4, power;

void setup() { // put your setup code here, to run once

  Serial.begin(9600);

  pinMode(Relay1, OUTPUT); // declare as output for Load1 Pin Relay1
  pinMode(Relay2, OUTPUT); // declare as output for Load2 Pin Relay2
  pinMode(Relay3, OUTPUT); // declare as output for Load3 Pin Relay3
  pinMode(Relay4, OUTPUT); // declare as output for Load4 Pin Relay4

  digitalWrite(Relay1, 1); // Turn Off Load1
  digitalWrite(Relay2, 1); // Turn Off Load2
  digitalWrite(Relay3, 1); // Turn Off Load3
  digitalWrite(Relay4, 1); // Turn Off Load4

  irrecv.enableIRIn(); // Start the receiver
  irrecv.blink13(true);

  load1 = EEPROM.read(1);
  load2 = EEPROM.read(2);
  load3 = EEPROM.read(3);
  load4 = EEPROM.read(4);

  power = EEPROM.read(5);
}

void loop() {

  if (irrecv.decode(&results)) {
    Serial.println(results.value, HEX);


    if (results.value == 0xFFB04F) { // For Load1 On
      load1 = 0;
      EEPROM.write(1, load1);
    }
    else if (results.value == 0xFF6897) { // For Load1 Off
      load1 = 1;
      EEPROM.write(1, load1);
    }

    else if (results.value == 0xFF7A85) { // For Load2 On
      load2 = 0;
      EEPROM.write(2, load2);
    }
    else if (results.value == 0xFF30CF) { // For Load2 Off
      load2 = 1;
      EEPROM.write(2, load2);
    }

    else if (results.value == 0xFF5AA5) { // For Load3 On
      load3 = 0;
      EEPROM.write(3, load3);
    }
    else if (results.value == 0xFF10EF) { // For Load3 Off
      load3 = 1;
      EEPROM.write(3, load3);
    }

    else if (results.value == 0xFF52AD) { // For Load4 On
      load4 = 0;
      EEPROM.write(4, load4);
    }
    else if (results.value == 0xFF42BD) { // For Load4 Off
      load4 = 1;
      EEPROM.write(4, load4);
    }

    else if (results.value == 0xFFE21D) { // For Power On
      power = 0;
      EEPROM.write(5, power);
    }
    else if (results.value == 0xFFA25D) { // For Power Off
      power = 1;
      EEPROM.write(5, power);
    }

    irrecv.resume(); // Receive the next value
    delay(100);
  }

  if (power == 1) {
    digitalWrite(Relay1, 1); // Turn Off Load1
    digitalWrite(Relay2, 1); // Turn Off Load2
    digitalWrite(Relay3, 1); // Turn Off Load3
    digitalWrite(Relay4, 1); // Turn Off Load4
  } else {
    digitalWrite(Relay1, load1);
    digitalWrite(Relay2, load2);
    digitalWrite(Relay3, load3);
    digitalWrite(Relay4, load4);
  }

  delay(500);
}
pin5 to D5
**second code**

int input_pin = 5;
IRrecv IRR (input_pin);

void setup () {
  Serial.begin (9600);
  IRR.enableIRIn ();
  Serial.print ("IR Ready ... @Pin");
  Serial.println (input_pin);
}

void loop () {
  if (IRR.decode ()) {
  Serial.println (IRR.results.value, HEX);
  IRR.resume ();
 }
}
pin2 to d2
**third code**

/* dump.ino Example sketch for IRLib2
   Illustrates how to receive an IR signal, decode it and print
   information about it to the serial monitor.
*/
//This includes everything. Not generally recommended.
//It's better to include only the parts of library you really need.
//But for this example it's quick and easy. See "comboDump" example
//for a more efficient way.
#include <IRLibAll.h>

IRrecvPCI myReceiver(2); //create receiver and pass pin number
IRdecode myDecoder;   //create decoder

void setup() {
  Serial.begin(9600);
  delay(2000); while (!Serial); //delay for Leonardo
  myReceiver.enableIRIn(); // Start the receiver
  Serial.println(F("Ready to receive IR signals"));
}

void loop() {
  //Continue looping until you get a complete signal received
  if (myReceiver.getResults()) {
    myDecoder.decode();           //Decode it
    myDecoder.dumpResults(true);  //Now print results. Use false for less detail
    myReceiver.enableIRIn();      //Restart receiver
  }
}


/*
  Copyright (c) 2014-2015 NicoHood
  See the readme for credit to other people.

  IRL Receive

  Receives IR signals from different protocols and prints them to the Serial monitor.
  Choose your protocols that should be decoded. Remove the not used ones to save flash/ram/speed.
  You can choose a custom debounce time to not trigger a button two times in a row too fast.

  The following pins are usable for PinInterrupt or PinChangeInterrupt*:
  Arduino Uno/Nano/Mini: All pins are usable
  Arduino Mega: 10, 11, 12, 13, 50, 5
pinLed LED_BUILTIN to D13
**fourth code**
1, 52, 53, A8 (62), A9 (63), A10 (64),
              A11 (65), A12 (66), A13 (67), A14 (68), A15 (69)
  Arduino Leonardo/Micro: 8, 9, 10, 11, 14 (MISO), 15 (SCK), 16 (MOSI)
  HoodLoader2: All (broken out 1-7) pins are usable
  Attiny 24/44/84: All pins are usable
  Attiny 25/45/85: All pins are usable
  Attiny 13: All pins are usable
  Attiny 441/841: All pins are usable
  ATmega644P/ATmega1284P: All pins are usable

  PinChangeInterrupts* requires a special library which can be downloaded here:
  https://github.com/NicoHood/PinChangeInterrupt
*/

// include PinChangeInterrupt library* BEFORE IRLremote to acces more pins if needed
//#include "PinChangeInterrupt.h"

#include "IRLremote.h"

// Choose a valid PinInterrupt or PinChangeInterrupt* pin of your Arduino board
#define pinIR 2

// Choose the IR protocol of your remote. See the other example for this.
CNec IRLremote;
//CPanasonic IRLremote;
//CHashIR IRLremote;
//#define IRLremote Sony12

#define pinLed LED_BUILTIN

void setup()
{
  // Start serial debug output
  while (!Serial);
  Serial.begin(115200);
  Serial.println(F("Startup"));

  // Set LED to output
  pinMode(pinLed, OUTPUT);

  // Start reading the remote. PinInterrupt or PinChangeInterrupt* will automatically be selected
  if (!IRLremote.begin(pinIR))
    Serial.println(F("You did not choose a valid pin."));
}

void loop()
{
  // Check if we are currently receiving data
  //if (!IRLremote.receiving()) {
    // Run code that disables interrupts, such as some led strips
  //}

  // Check if new IR protocol data is available
  if (IRLremote.available())
  {
    // Light Led
    digitalWrite(pinLed, HIGH);

    // Get the new data from the remote
    auto data = IRLremote.read();

    // Print the protocol data
    Serial.print(F("Address: 0x"));
    Serial.println(data.address, HEX);
    Serial.print(F("Command: 0x"));
    Serial.println(data.command, HEX);
    Serial.println();

    // Turn Led off after printing the data
    digitalWrite(pinLed, LOW);
  }
}
i try some other codes tooo from YouTube and github
here is diagram
**
note:-
according code pin are changed also i try changing different pin in code and change in Arduino nano like pin2 to d2,pin3 to d3,pin11 to d11 and so on same for analog pin as par possibility 6 and it's testing in main post.
**
one more thing i aslo check twice serial monitor for correct com port and baud rate are matching with code so no problem with that also