Hi everyone, just know Blynk and Arduino for one month.
I operate some sewage treatment small plant with fully automation.
I would like to create a alert system using IOT, so I choose blynk and ESP8266 board.
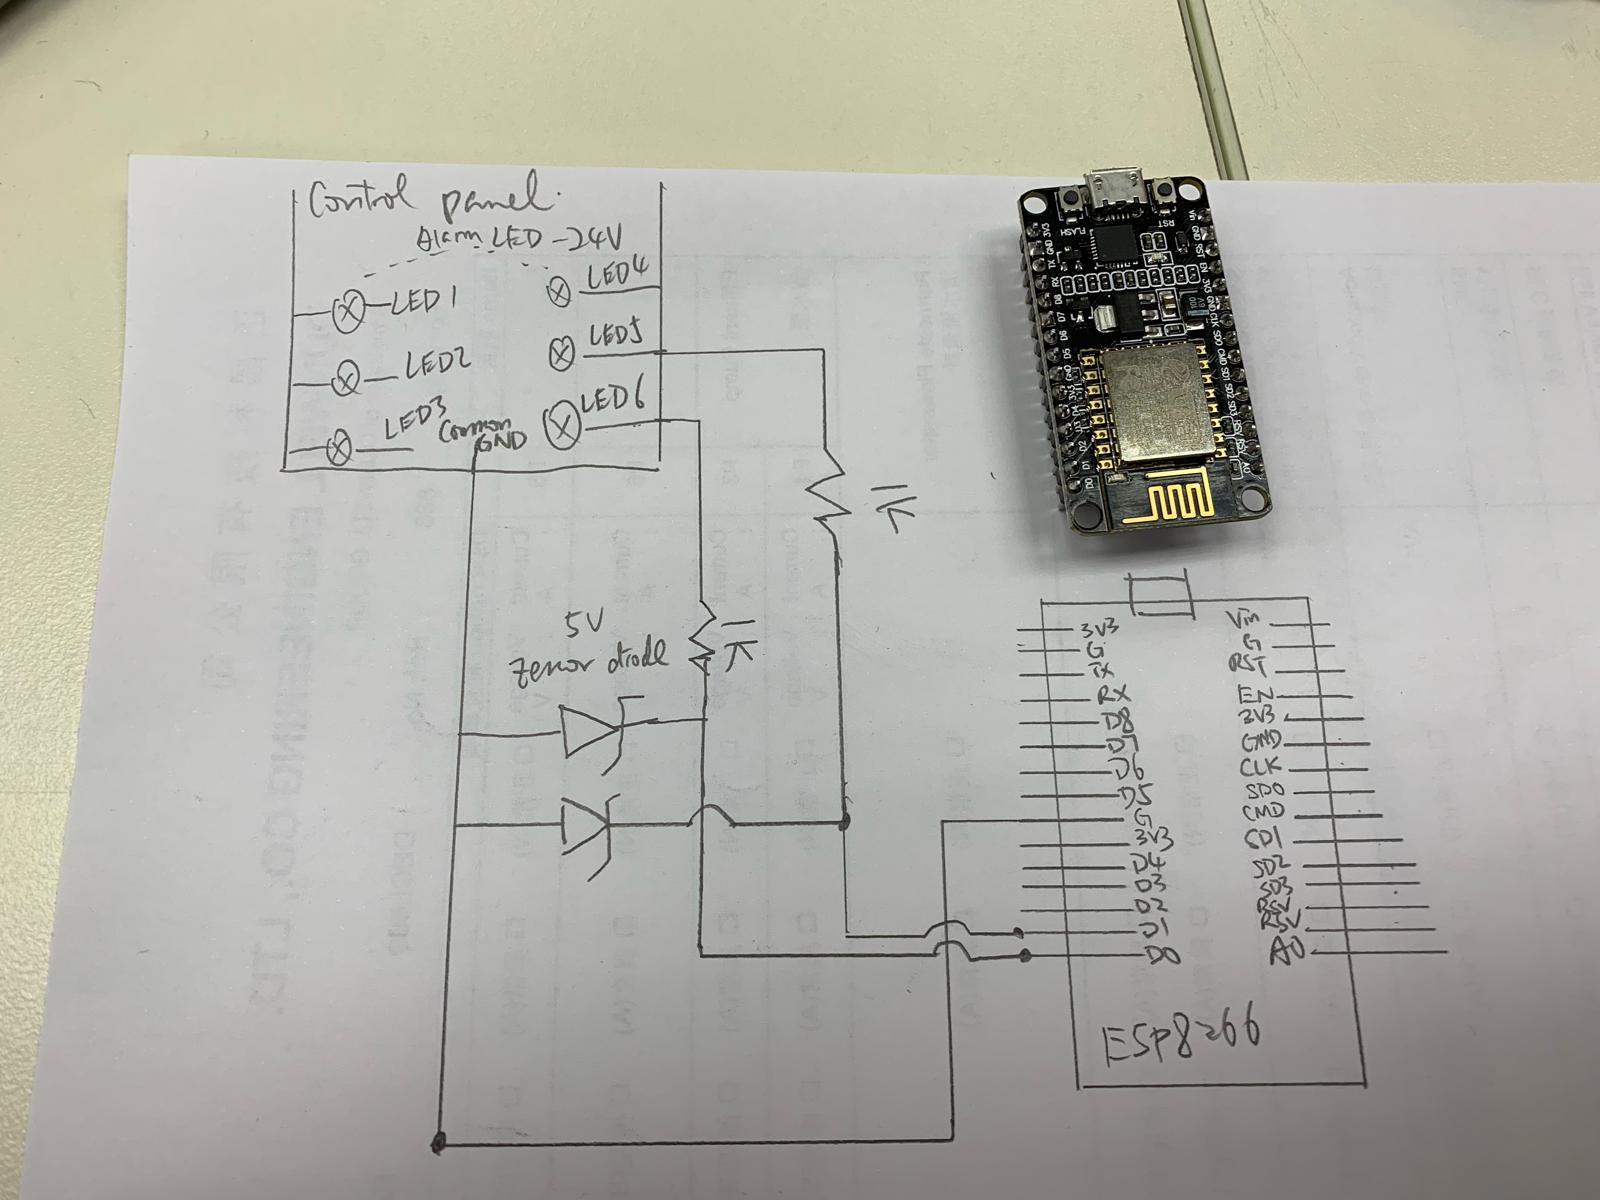
A control panel operated with 24VDC circuit contains 6 indication LED, when alarm triggered (e.g. pump overload), its LED will ON.
I would like to put the 24V signal into ESP8266 DI/O, by using a 5V zenor diode and resistor.
However, if the pin (e.g. D1) has setup the pin mode (INPUT), even I input a 5V signal to D1, the D1 is still 0V (measured by meter)
Do I still need to create the widget layout if I would not use Remote Control?
My code and circuit connect are as follow,
#define BLYNK_PRINT Serial
/* Set this to a bigger number, to enable sending longer messages */
//#define BLYNK_MAX_SENDBYTES 128

#include <ESP8266WiFi.h>
#include <BlynkSimpleEsp8266.h>

// You should get Auth Token in the Blynk App.
// Go to the Project Settings (nut icon).
char auth[] = "xxx";
//unsigned count = 0;
// Your WiFi credentials.
// Set password to "" for open networks.
char ssid[] = "xxx";
char pass[] = "xxx";

const String SiteNo = "SK54";

void emailOnButtonPress()
{
  // *** WARNING: You are limited to send ONLY ONE E-MAIL PER 5 SECONDS! ***

  // Let's send an e-mail when you press the button
  // connected to digital pin 2 on your Arduino

  int isButtonPressed = !digitalRead(16); // Invert state, since button is "Active LOW"

  if (isButtonPressed = HIGH) // You can write any condition to trigger e-mail sending
  {
    String body = "Pump1 fault";
    Serial.println("Button is pressed.");
    Blynk.email("xxx.com", String(SiteNo) + "Alarm triggered", body);

    // Or, if you want to use the email specified in the App (like for App Export):
    //Blynk.email("Subject: Button Logger", "You just pushed the button...");
  }

}
void emailOnButtonPress1()
{
  // *** WARNING: You are limited to send ONLY ONE E-MAIL PER 5 SECONDS! ***

  // Let's send an e-mail when you press the button
  // connected to digital pin 2 on your Arduino

  int isButtonPressed1 = !digitalRead(5); // Invert state, since button is "Active LOW"

  if (isButtonPressed1 = HIGH) // You can write any condition to trigger e-mail sending
  {
    Serial.println("Button is pressed.");

    String body = "Pump2 fault";

    Blynk.email("xxx.com", String(SiteNo) + "Alarm triggered", body);

    // Or, if you want to use the email specified in the App (like for App Export):
    //Blynk.email("Subject: Button Logger", "You just pushed the button...");
  }

}
void setup()
{
  // Debug console
  Serial.begin(115200);

  Blynk.begin(auth, ssid, pass);
  // You can also specify server:
  //Blynk.begin(auth, ssid, pass, "blynk-cloud.com", 80);
  //Blynk.begin(auth, ssid, pass, IPAddress(192,168,1,100), 8080);

  // Send e-mail when your hardware gets connected to Blynk Server
  // Just put the recepient's "e-mail address", "Subject" and the "message body"
  Blynk.email("xxx.com", String(SiteNo) + "Online", "My Blynk project is online.");

  // Setting the button
  pinMode(16, INPUT_PULLUP);
  pinMode(5, INPUT_PULLUP);
  // Attach pin 2 interrupt to our handler
  attachInterrupt(digitalPinToInterrupt(16), emailOnButtonPress, CHANGE);
  attachInterrupt(digitalPinToInterrupt(5), emailOnButtonPress1, CHANGE);
}

void loop()
{
  Blynk.run();
}