RS485 Soil Moisture and Temperature Sensor with ESP32

Also note that you are right at the bottom end for supply voltage for your sensor if you are powering it from the 5V of your UNO. Your photo in post #1 indicates that the supply voltage range is 5-24V DC.

I would advise you power the sensor from an external DC bench supply - somewhere around 12VDC should be fine. Just make sure that you have a common ground (0V) between your sensor, the RS485 module and the UNO.

Looking back at your photo in post #9, I assume that you may be on an Electrical Engineering course? Can your tutor provide the user manual for the sensor?

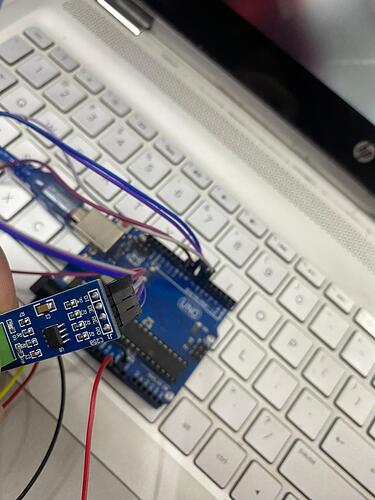
my connections,

I did connect it with 12 volts external battery and got that null output same as before. my tutor didn't provide me with the datasheet as they didn't have it either. I've been searching the datasheet for this specific sensor for quite some time now but didn't get successful and posted it here.

noted.

That's going to make it interesting! What does your tutor want you to do with the sensor? What's the purpose of the exercise?

But first, correct your wiring as @jim-p advised back in post #20.

so they only told me this sensor will measure soil moisture and temperature, i need to configure it with ESP 32.

wiring has been corrected as advised by @jim-p.

Ok, but I would suggest sticking with the UNO for now as the MAX485 module you appear to have uses a 5V RS485 device. Lets get you communicating with your sensor first before introducing more issues.

With your wiring altered as suggested, are you getting any response from the sensor?

no, it's same as before.

This website explains everything fairly well.
Make sure your wiring is like that shown.
Your sensor may need 12V to work but some only need 5V

this site is about NPK sensor, mine is just moist& temp.

@markd833 I also have this sensor and managed to find this sensors datasheet.

UM-MS10-Soil-Moisture-and-Temperature-Sensor (1).pdf (1.1 MB)

Change the Serial.begin() value to something faster like 115200. Don't forget to also change the baud rate in your IDE serial monitor.

The manual you provided says the default baud rate for the sensor is 9600. Change mod,begin from 4800 to 9600.

what about the addresses?
const byte moist[] = {0x3C, 0x61, 0x05, 0x11, 0xDD, 0xA4};
const byte temp[] = {0x01, 0x03, 0x00, 0x01, 0x00, 0x01, 0xD5, 0xCA};
//const byte EC[] = {0x01, 0x03, 0x00, 0x02, 0x00, 0x01, 0x25, 0xCA};
//const byte PH[] = {0x01, 0x03, 0x00, 0x03, 0x00, 0x01, 0x74, 0x0A};

The obvious parameter to try and read is temperature - because you have a pretty good idea of what value to expect.

The manual you provided says that temperature is located at register address 0000. The canned modbus message to read it should be something like:

const byte temp[] = {0x01, 0x03, 0x00, 0x00, 0x00, 0x01, 0x84, 0x0A};

Once you get a correct response to 1 message, I would suggest moving away from these canned modbus messages as it's a pain to keep calculating new CRC16 checksums every time you change a message. The Arduino ModbusMaster library handles all the low level work for you. The example that comes with the library called RS485_HalfDuplex.ino is the starting point, BUT only once you have figured out the wiring and comms parameters.

Yes but the wiring is the same.
Is your wiring the same as shown on the website?

#include <Arduino.h>

#define TAG      "RS485_MODB_APP"
#define mod      Serial2
#define TXD      17
#define RXD      16
#define RE       2
#define DE       4
#define BUF_SIZE 11

#define NITRO 0
#define PHOS  1
#define POTA  2

const uint32_t TIMEOUT = 500;

const byte moist[] = {0x3C, 0x61, 0x05, 0x11, 0xDD, 0xA4};
const byte temp[] = {0x01, 0x03, 0x00, 0x01, 0x00, 0x01, 0xD5, 0xCA};
const byte EC[] = {0x01, 0x03, 0x00, 0x02, 0x00, 0x01, 0x25, 0xCA};
//const byte PH[] = {0x01, 0x03, 0x00, 0x03, 0x00, 0x01, 0x74, 0x0A};

byte values[11];

void setup() {
  // Serial.begin(9600);
  Serial.begin(9600);
  mod.begin(9600);
  pinMode(RE, OUTPUT);
  pinMode(DE, OUTPUT);

  delay(500);
}

void loop() {
  uint16_t val1, val2, val3, val4, val5, val6, val7;

  Serial.println("Moisture: ");
  val1 = moisture();
  float Val1 = val1 * 0.1;
  delay(1000);
  //Serial.print(val1);
  Serial.print(Val1);
  Serial.println(" %");
  Serial.println("-----");
  //delay(1000);

  Serial.println("Temperature: ");
  val2 = temperature();
  float Val2 = val2 * 0.1;
  delay(1000);
  //Serial.print(val2);
  Serial.print(Val2);
  Serial.println(" *C");
  Serial.println("-----");
  //delay(1000);

  Serial.println("EC: ");
  val3 = conductivity();
  delay(1000);
  Serial.print(val3);
  Serial.println(" us/cm");
  Serial.println("-----");

//  Serial.println("Ph: ");
//  val4 = ph();
//  float Val4 = val4 * 0.1;
//  delay(1000);
//  //Serial.print(val4);
//  Serial.print(Val4);
//  Serial.println(" ph");
//  Serial.println("-----");

  delay(5000);
}

int16_t moisture() {
  uint32_t startTime = 0;
  uint8_t byteCount = 0;

  digitalWrite(DE, HIGH);
  digitalWrite(RE, HIGH);
  delay(10);
  mod.write(moist, sizeof(moist));
  mod.flush();
  digitalWrite(DE, LOW);
  digitalWrite(RE, LOW);

  startTime = millis();
  while ( millis() - startTime <= TIMEOUT ) {
    if (mod.available() && byteCount < sizeof(values) ) {
      values[byteCount++] = mod.read();
      printHexByte(values[byteCount - 1]);
    }
  }
  Serial.println();
  return (int16_t)(values[4] << 8 | values[5]);

}

int16_t temperature() {
  uint32_t startTime = 0;
  uint8_t byteCount = 0;

  digitalWrite(DE, HIGH);
  digitalWrite(RE, HIGH);
  delay(10);
  mod.write(temp, sizeof(temp));
  mod.flush();
  digitalWrite(DE, LOW);
  digitalWrite(RE, LOW);

  startTime = millis();
  while ( millis() - startTime <= TIMEOUT ) {
    if (mod.available() && byteCount < sizeof(values) ) {
      values[byteCount++] = mod.read();
      printHexByte(values[byteCount - 1]);
    }
  }
  Serial.println();
  return (int16_t)(values[4] << 8 | values[5]);

}

int16_t conductivity() {
  uint32_t startTime = 0;
  uint8_t byteCount = 0;

  digitalWrite(DE, HIGH);
  digitalWrite(RE, HIGH);
  delay(10);
  mod.write(EC, sizeof(EC));
  mod.flush();
  digitalWrite(DE, LOW);
  digitalWrite(RE, LOW);

  startTime = millis();
  while ( millis() - startTime <= TIMEOUT ) {
    if (mod.available() && byteCount < sizeof(values) ) {
      values[byteCount++] = mod.read();
      printHexByte(values[byteCount - 1]);
    }
  }
  Serial.println();
  return (int16_t)(values[4] << 8 | values[5]);

}

//int16_t ph() {
//  uint32_t startTime = 0;
//  uint8_t byteCount = 0;
//
//  digitalWrite(DE, HIGH);
//  digitalWrite(RE, HIGH);
//  delay(10);
//  mod.write(PH, sizeof(PH));
//  mod.flush();
//  digitalWrite(DE, LOW);
//  digitalWrite(RE, LOW);
//
//  startTime = millis();
//  while ( millis() - startTime <= TIMEOUT ) {
//    if (mod.available() && byteCount < sizeof(values) ) {
//      values[byteCount++] = mod.read();
//      printHexByte(values[byteCount - 1]);
//    }
//  }
//  Serial.println();
//  return (int16_t)(values[4] << 8 | values[5]);
//
//}

void printHexByte(byte b)
{
  Serial.print((b >> 4) & 0xF, HEX);
  Serial.print(b & 0xF, HEX);
  Serial.print(' ');
}
I tried your code with Esp32 try exactly this code you will get like this.

Can I use modbusmaster.h instead of arduino.h?

Also..want to ask..did u provide 12v external for the sensor and not using 5v by direct connect vcc and gnd from esp32?

Yes 12V to 24V need for NPK sensor