I have some car gauges I want to control with my arduino and when I power up the gauge it gets pegged at full sweep and decreases to 0 when the signal line(which has 5 volts on it at full sweep) is ground what code do I use to control that?
What sensor was it connected to?
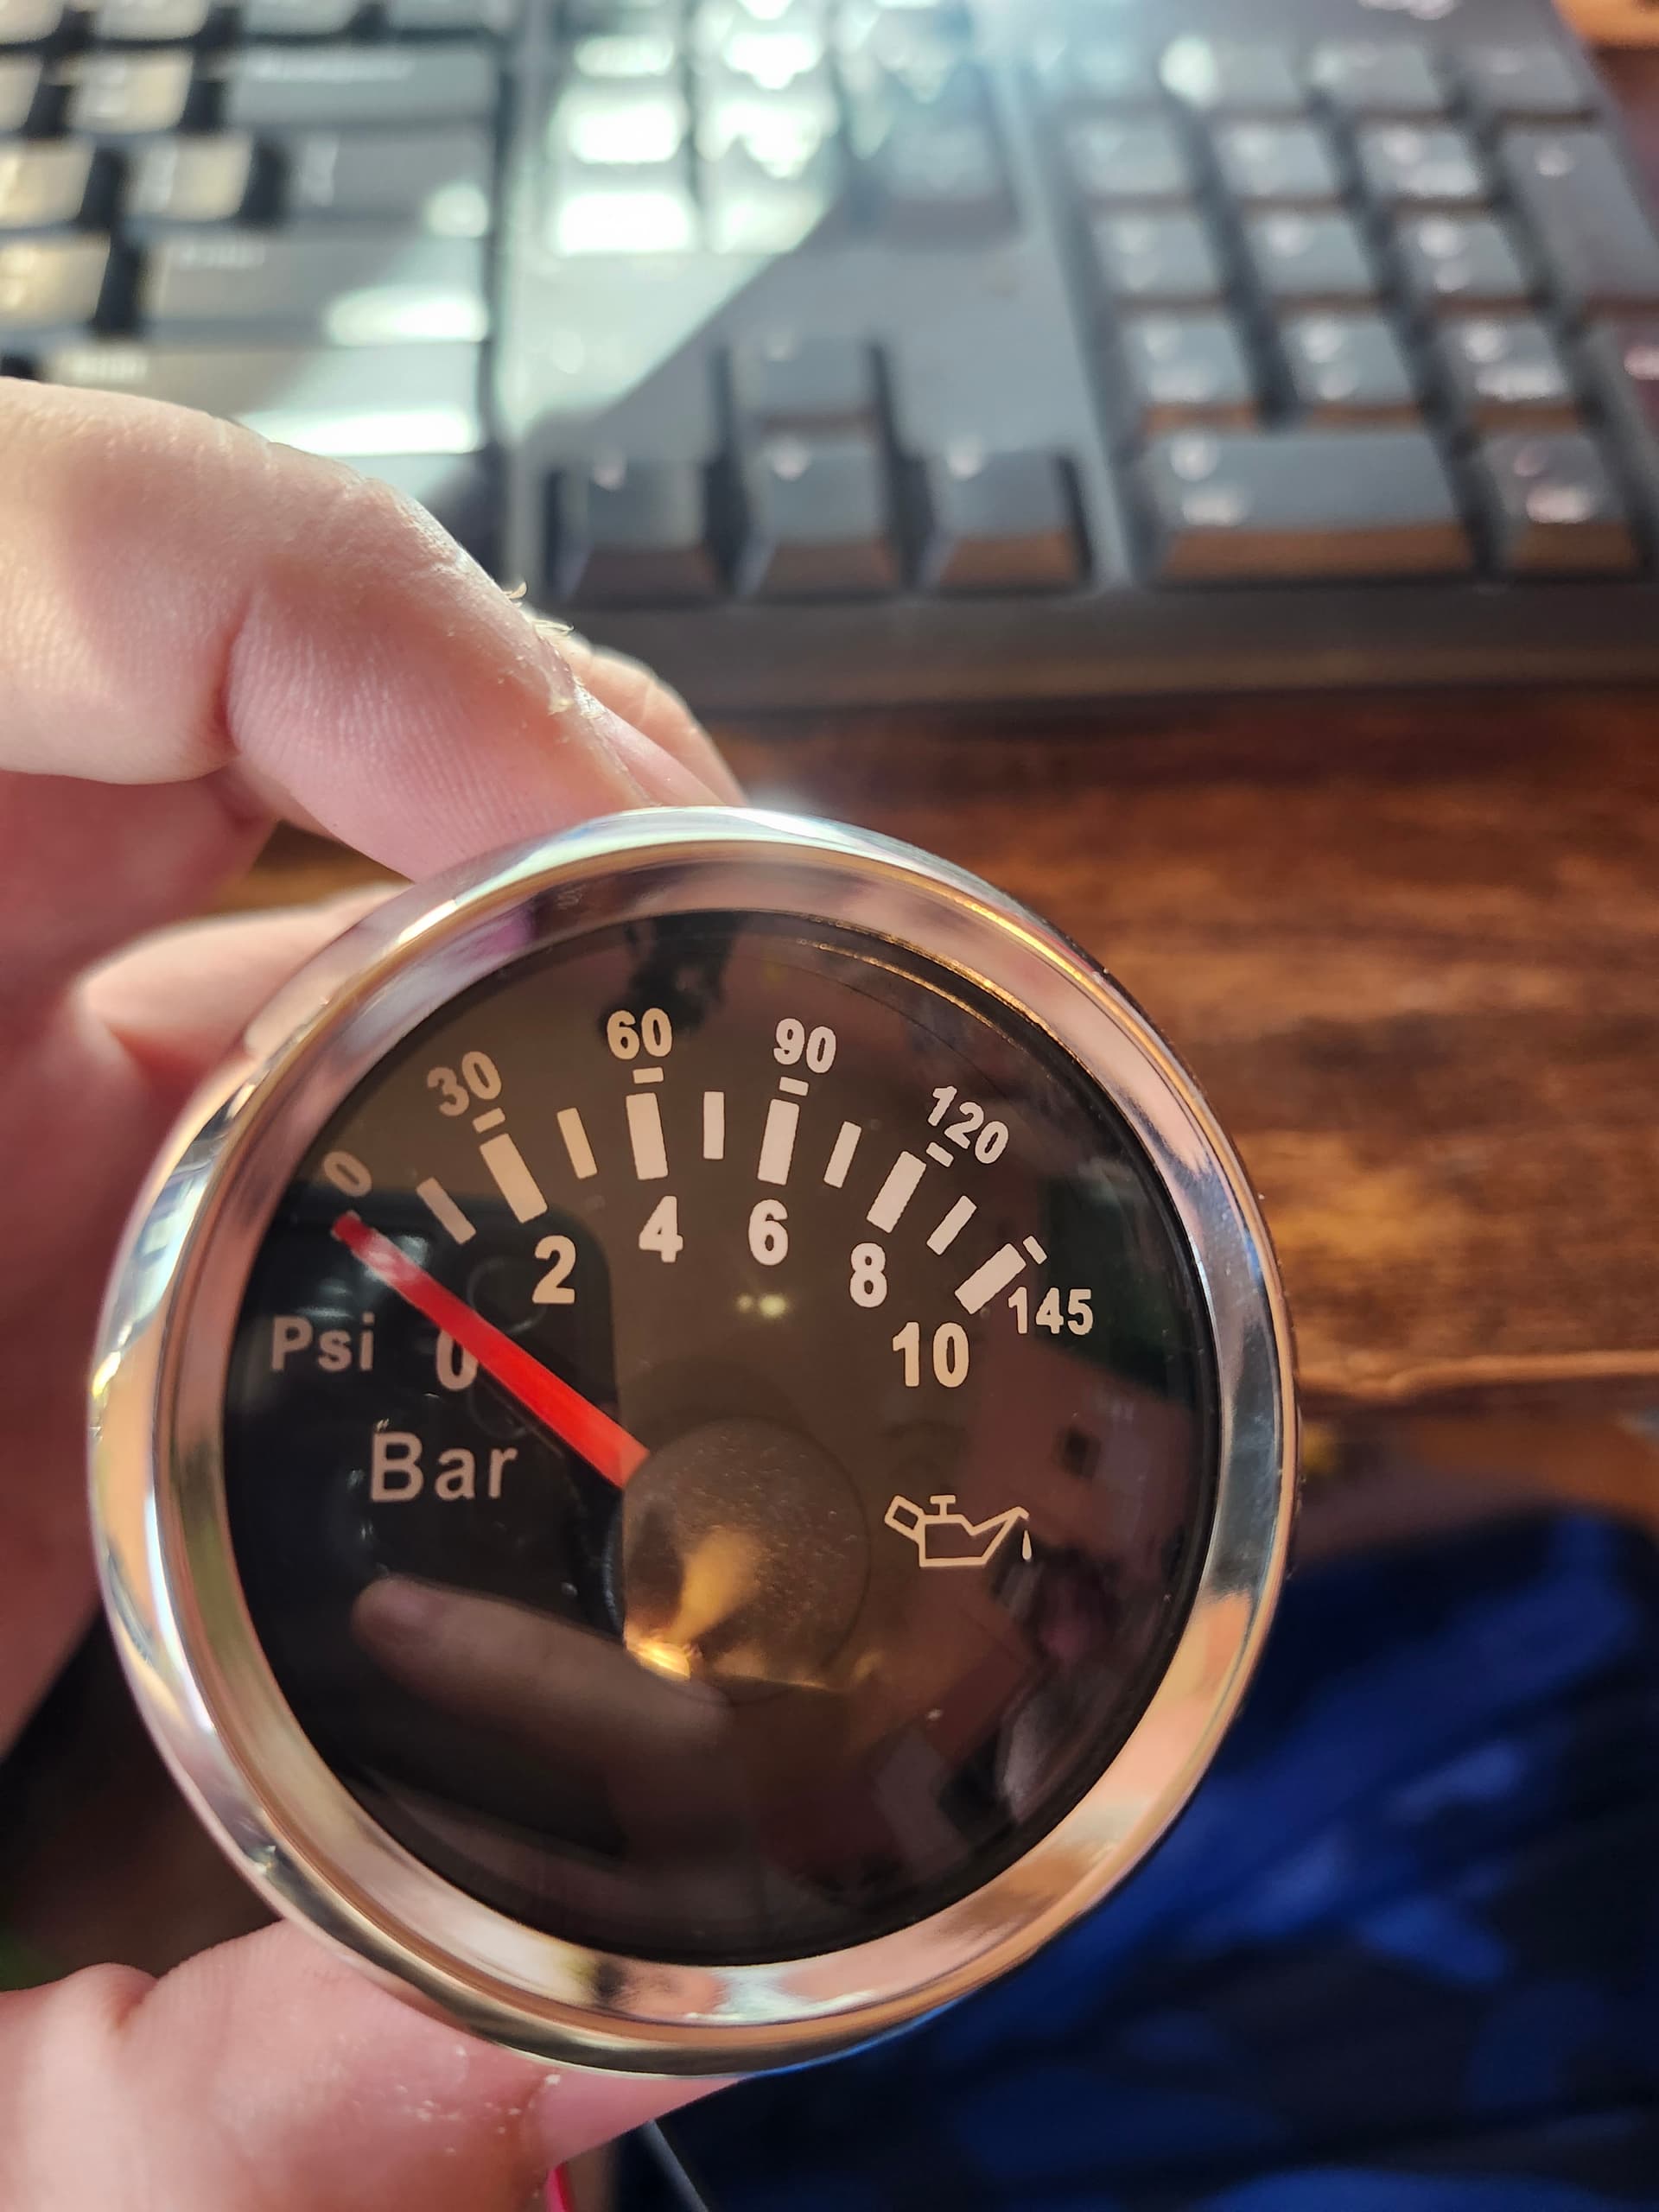
oil pressure
And is the oil pressure sensor a switch that opens and closes or is it a resistor that changes value with pressure?
resistor I believe is a two wire sensor
Sorry its a three wire sensor
Hi, @Squid90
What sort of gauges?
Air Cored Stepper as in most vehicles over the past 15 to 20 years.
OR
Meter movement type used previously to Air Cored.
Lets establish the hardware type first.
Can you please post some images?
What vehicle did they come from?
Do you have a DMM? (Digital MultiMeter)?
Thanks.. Tom.. ![]()
![]()
![]()
![]()

Try the Examples>Basic>Fade sketch that comes with the IDE, but set the delay from 30 to 500.
See if that works.
Instrument of course powered from >9volt, and signal/ground connected to the Arduino.
Leo..
Didn't work ![]() so it is a resistive signal when I ground the sensor wire it goes to E from F and when I leave the wire open its at F and there is 5v on the signal wire
so it is a resistive signal when I ground the sensor wire it goes to E from F and when I leave the wire open its at F and there is 5v on the signal wire
If you put a 100Ω resistor between black wire and ground, what does it read? A 50Ω?
100ohms puts it a little over 1/2
What about 51Ω or 220Ω? Do you have a 500Ω or 1kΩ pot? What voltage do you read across the 100Ω resistor?
at 100 ohms voltage across the resistor is 1.253 volts
So, 1.253V / 100Ω = 12.53 milliAmps (mA) is a little over half. So, full should be about 24 ~ 25mA? 51Ω should be close.
What is the brand name of the gauge?
Strange, because an Arduino pin does the same as putting a switch/resistor to ground.
Did you also connect the grounds? There must be two wires between instrument and 12volt supply, and two wires between instrument and Arduino. Please repeat the test again. Note that with a delay of 500 and steps of 5 it will take almost a minute to cycle.
Leo..
The wiring on the gauge is 4 wires marked, Positive, Negative, Signal, Backlight.
Negative needs to go to the battery as well as Arduino ground.
Leo..
This topic was automatically closed 180 days after the last reply. New replies are no longer allowed.