Update: i was able to "rollback" to 8/8/14. but i still get the "not connected" message when plugging in the mega 2560. the driver is labeled as USB-SERIAL CH340 (COM4).
@jasonmscofield, did you select COM4 in the IDE under tools → ports?
PS
FYI, it's not the driver that is labeled "USB-SERIAL CH340 (COM4)", it's the port.
I am facing the same issue . I have Node MCU V3 which requires CH340 C driver. All I could find was CH340 or CH341 ( without 'C' ) . I tried to install them one by one after seeing if any of it works . I reached to the point where it says "The best driver is already installed " but I still see CODE 34 with an exclamatory mark on the COM PORT 3 .
P.S. I am using Windows 11 Home edition and has two USB 3.0 ports on the machine . Please Help !
Hi @vik_88.
I have found that when the driver installation gets into this state, it can be solved by uninstalling and then reinstalling the drivers. After that, the "roll back" option should be enabled.
I'll provide instructions:
- Close Arduino IDE if it is running.
- Connect the Arduino board to your computer with a USB cable.
- Open the Windows Device Manager.
- Select View > Devices by type from the Device Manager menus.
- Open the "View" menu.
- If there is a ✓ to the left of the "Show hidden devices" menu item, click on "Show hidden devices" to disable it.
- Open the "Ports (COM & LPT)" section of the Device Manager tree.
- You should see a port identified as "USB-SERIAL CH340 (COMn)" under the "Ports (COM & LPT)" section (where "COMn" is some serial port e.g., COM4). Double click on that item.
The "USB-SERIAL CH340 (COMn) Properties" dialog will open. - Select the "Driver" tab of the "USB-SERIAL CH340 (COMn) Properties" dialog.
- Click the "Uninstall Device" button.
The "Uninstall Device" dialog will open. - Check the box next to "☐ Attempt to remove the driver for this device.".
- Click the "Uninstall" button.
The "Uninstall Device" and "USB-SERIAL CH340 (COMn) Properties" dialogs will close. - Disconnect the USB cable of the Arduino board from your computer.
- Reconnect the USB cable of the Arduino board to your computer.
- Wait for the "USB-SERIAL CH340 (COMn)" device to appear under the "Ports (COM & LPT)" section of the Device Manager tree.
 This will take a couple of minutes as Windows must first automatically reinstall the driver.
It might appear first as a "USB2.0-Serial" device under the "Other devices section of the tree. Just wait for a little longer and it will appear in its final place under the "Ports (COM & LPT)" section. - Click the following link to download the previous version of the driver from the chip manufacturer's website:
https://www.wch-ic.com/downloads/file/65.html?time=2023-03-16%2022:57:59 - Wait for the download to finish.
- Run the downloaded
CH341SER.EXEfile. - A "User Account Control" dialog may now appear asking "Do you want to allow this app to make changes to your device?". Click the "Yes" button.
- A "DriverSetup(X64)" dialog will appear. Click the "INSTALL" button in the dialog.
- Wait for the driver installation to finish, as indicated by the appearance of a "Driver install success!" dialog.
- Click the "OK" button in the "Driver install success!" dialog.
- Click the X icon at the top right of the "DriverSetup(X64)" dialog to close it.
- Switch back to the Windows "Device Manager".
- Double click on the "USB-SERIAL CH340 (COMn)" device under the "Ports (COM & LPT)" section.
The "USB-SERIAL CH340 (COMn) Properties" dialog will open. - Select the "Driver" tab of the "USB-SERIAL CH340 (COMn) Properties" dialog.
- Click the "Update driver" button.
An "Update Drivers Device - USB-SERIAL CH340 (COMn)" dialog will open. - Click on "Search automatically for drivers" in the "Update Drivers Device - USB-SERIAL CH340 (COMn)" dialog.
- You should now see the driver installation wizard update the driver. Wait for the update to finish, as indicated by the message "Windows has successfully updated your drivers" in the dialog.
- Click the "Close" button in the "Update Drivers Device - USB-SERIAL CH340 (COMn)" dialog.
The dialog will close. - Click the "Roll Back Driver" button in the "USB-SERIAL CH340 (COMn) Properties" dialog.
The "Driver Package rollback" dialog will open. - Click the radio button next to "My apps don't work with this driver" in the "Driver Package rollback" dialog .
- Click the "Yes" button.
The "Driver Package rollback" dialog will close. - Click the "Close" button in the "USB-SERIAL CH340 (COMn) Properties" dialog.
Now start Arduino IDE again and repeat whatever you were doing before when you encountered that error before. Hopefully this time you will not encounter that "can't set com-state" error during the sketch upload.
Hi ,
Thank you for the quick reply.
My case looks a little different.
This is the first time I am trying to install the driver after getting a fresh NodeMCU by following the instructions on Silabs .
When I download and install the driver manually I do not see anything under PORTS section in device manager even when I connect the MCU with usb cable to the computer. In fact the port section is not visible at all ( even when I enable or disable 'show hidden devices' )
I had followed some discussion to see COM PORTS for which one has to do : :
Action > Add legacy Harware > Install Manually > select from list > PORTS ( COM and LPT ) > Standard port type > communication port .
After this I see the PORTs section in the list with newly added port with "!" mark and CODE 34.
Then I try to update the driver for this with above method ( by update > search manually from list > ( path for CH340 driver ) > update
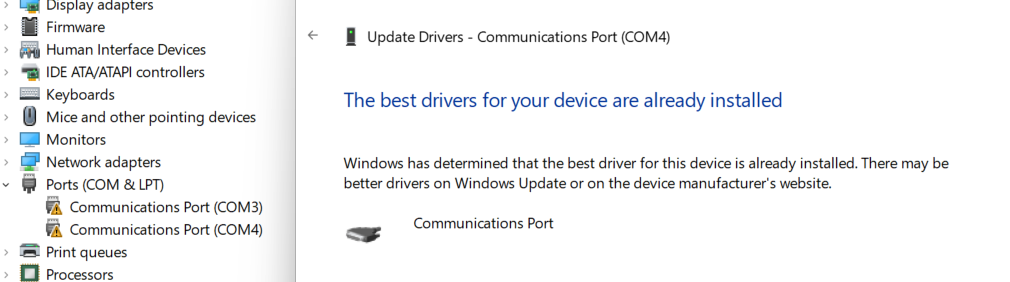
but it shows the best driver is already installed .
In a gist , I dont see anything detected by computer when I connect the board manually and wait nor do I see any update on the PORT device list.
The MCU I am using is NODE MCU V3 with ESP8266MOD 12F model and CH340 driver requirement.
Just an update :
I now changed the PORT number from COM PORT 3 to COM PORT 11 and tried to "update driver "
by right click on COM PORT 11 > update driver > brows my computer for drivers > let me pick up from the list .. > path for .inf file from CH340 driver folder .
Now I see the port name changed to USB SERIAL CH340 ( COM11) but the properties show CODE 10 ( This device can not start )

I'm not sure what instructions you are referring to, but you should be aware that Silicon Labs does not manufacture the CH340 chip and does not provide drivers for the chip. The manufacturer of the CH340 chip is a completely different company named WCH.
Make sure the USB cable is completely plugged into both the Arduino board and the PC.
If that doesn't help, you may have a damaged/defective or charge-only USB cable. Try a different cable.
Either of the above can result in the power connections being made (and thus LEDs lit on the board), but no data connections (and thus no port for the board).
I have followed your steps on trying to rollback the driver and after uninstalling and then reinstalling the driver, the rollback button is still not clickable.