I am working on a CameraWebServer project using an ESP32 Cam board, and I am encountering the following error:
E (47) camera: Camera probe failed with error 0x105 (ESP_ERR_NOT_FOUND)
Camera init failed with error 0x105
I am uploading the code via Arduino Uno R3.
Here are the details of my setup and the steps I have taken:
Board Used:
ESP-32S cam board
Versions:
Latest version of ESP32 board manager installed
Arduino IDE version 2.3.4
Camera Module:
OV2640 camera
Troubleshooting Steps Taken:
Ensured the latest version of the board manager and Arduino IDE were
used.
Removed and reattached the OV2640 camera multiple times.
Reset the esp32 board multiple times, but still encountering the same
error.
Checked for any loose connections and made sure all connections are secure
Used multiple ESP32 boards in Arduino IDE, including ESP32 Dev Module, AI Thinker ESP32 Cam, and ESP Wrover Module, but the issue persists
Despite these efforts, I am still receiving the same error. I can provide photos of the connections, screenshots of the error, the code I am using and the board I am using.
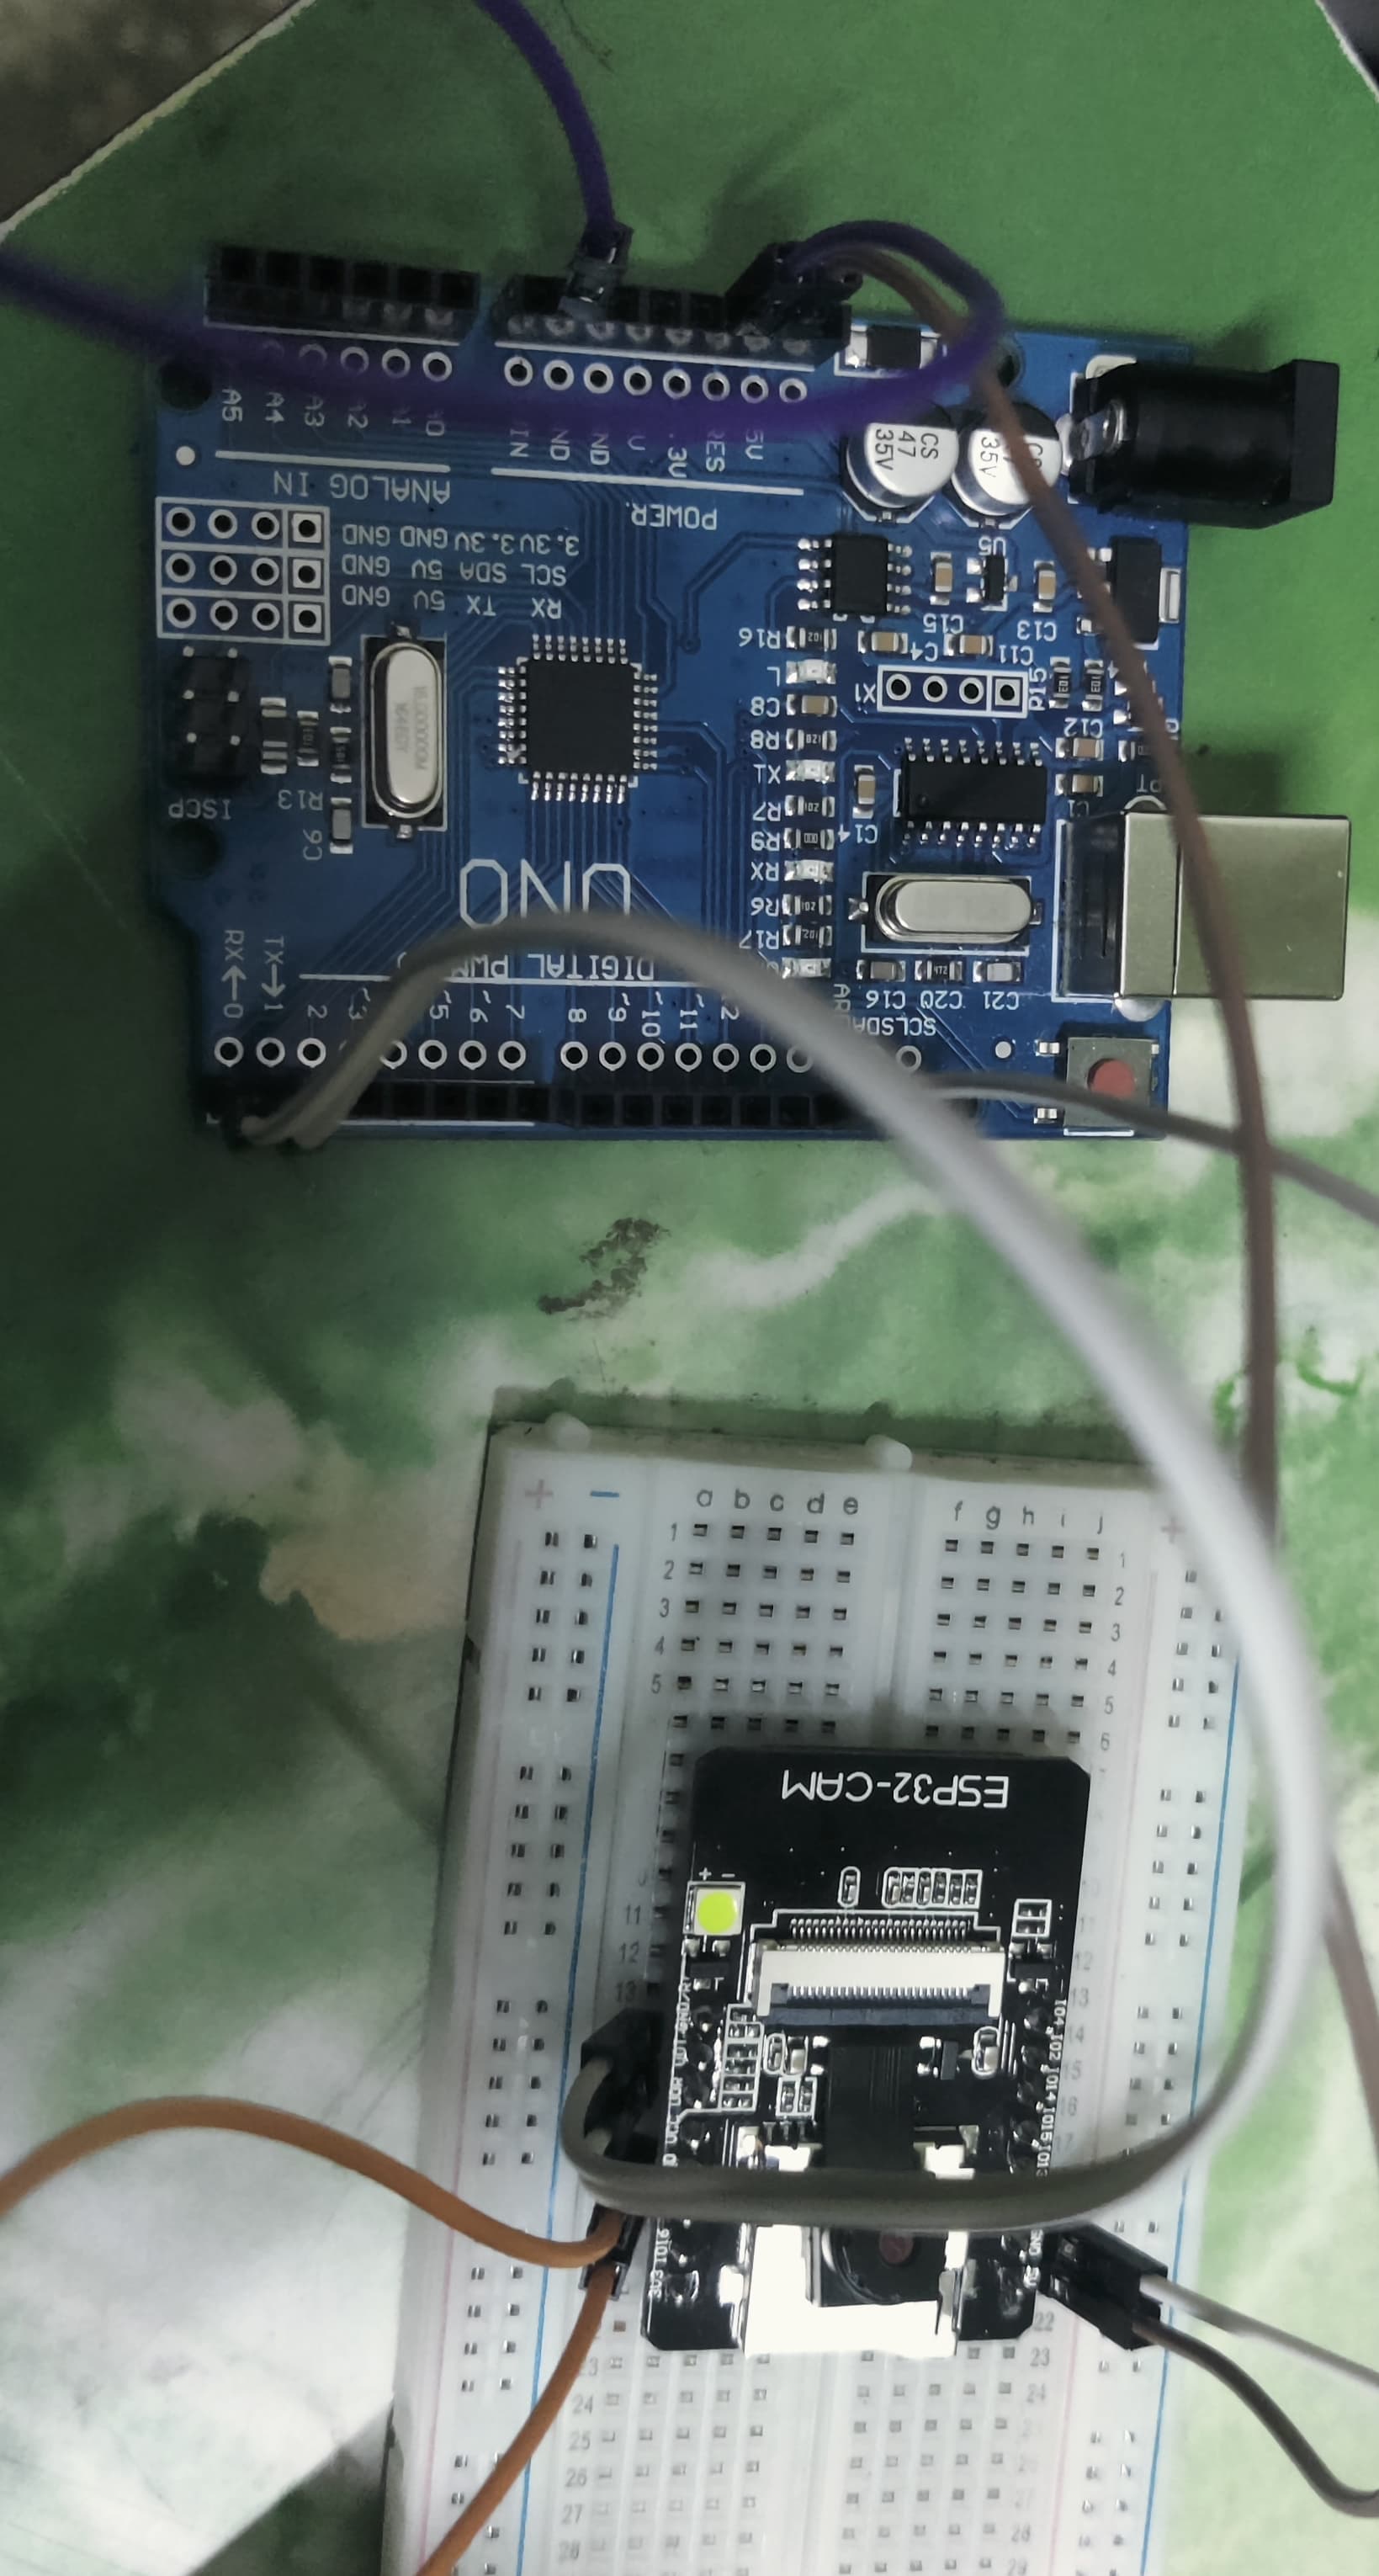
Hi @learner999. Please provide a list of the exact connections you made between the UNO and the ESP32-CAM. It is just too difficult to determine them from looking at the picture you provided.
Your topic has been moved to a more suitable location on the forum. The Arduino Nano ESP32 category is specific to that board and should not be used for the generic ESP32 boards.
Could be a faulty ESP32CAM or a faulty OV2640 camera.
But unless you have a good working ESP32CAM and OV2640 camera, or can borrow one, its going to prove real difficult to work out if your bits are actually faulty.
i tried replacing both and same thing. if you look at my esp32 s cam image , there is no mention of espressif or ai tinker. if someone can help me in selecting which camera module i need to select and how to determine that it will be really helpful. i doubt if it is config related to camera_pins.h and somehow board is not matching it.
thanks. i tried that and it didn't worked. if you look at most of the tutorials and videos on various websites, they select AIThinker as camera module. If you look at image of Esp32 cam as that I am using , it nowhere mentions AIthinker. Also, if you look at the error, it mentions about config as well. So, I need help in understanding if pin configuration of my esp-32s cam, matches that of AIthinker. If there is a way to match pin configs mentioned in camera_pins.h, it will help, so that we can rule out config mismatch issues. i already bought another esp32s with ov camera and it also is showing same issue.
I'll provide instructions you can follow to do that:
If you are using Arduino IDE: select Tools > Auto Format from the menus.
Click on the window that contains your sketch code.
Press the Ctrl+A keyboard shortcut (Command+A for macOS users).
This will select all the text.
Press the Ctrl+C keyboard shortcut (Command+C for macOS users).
This will copy the selected text to the clipboard.
Open a forum reply here by clicking the "Reply" button.
Click the <CODE/> icon on the post composer toolbar.
This will add the forum's code block markup (```) to your reply to make sure the error messages are correctly formatted.
The "CameraWebServer" example that comes with the "esp32" boards platform is configured for use with the "ESP Eye", like this:
#define CAMERA_MODEL_ESP_EYE // Has PSRAM
and that configuration doesn't work with the common ESP32-CAM board, and so when the example is used without any modification it causes the "Camera probe failed with error 0x105 (ESP_ERR_NOT_FOUND)" error reported by @learner999. However, I see that your sketch is already configured correctly for use with the ESP32-CAM, so assuming you are using ESP32-CAM board, then your sketch is correctly configured.
I notice you are using a very old version of the example sketch, likely because you have a very old version of the "esp32" boards platform installed. Unless you have a specific reason for using that old platform version, I recommend you update to the latest version. I'll provide instructions you can follow to do that:
Copy the URL shown under the "Stable release link" section of that page.
Select File > Preferences... (or Arduino IDE > Settings... for macOS users) from the Arduino IDE menus.
The "Preferences" dialog will open.
If there is already a URL for the ESP32 boards platform in the "Additional Boards Manager URLs" field of the "Preferences" dialog, delete it.
Add the URL you copied from the ESP32 boards platform installation instructions to the "Additional Boards Manager URLs" field. ⓘ If there are other URLs in the field, separate them with commas (,).
Click the "OK" button on the "Preferences" dialog.
The "Preferences" dialog will close.
You will now see a "Downloading index: ..." notification at the bottom right corner of the IDE window. Wait for that notification to close.
Select Tools > Board > Boards Manager... from the Arduino IDE menus to open the "Boards Manager" view in the left side panel.
Scroll down through the list of boards platforms until you see the "esp32 by Espressif Systems" entry.
Click the "UPDATE" button at the bottom of the entry.
Wait for the update process to finish, as indicated by a notification at the bottom right corner of the Arduino IDE window:
Successfully installed platform ...
B. Use Latest Example Sketch
Select File > Examples > ESP32 > Camera > CameraWebServer from the Arduino IDE menus.
The "CameraWebServer" sketch will open in a new Arduino IDE window.
Change line 17 of the sketch from this:
#define CAMERA_MODEL_ESP_EYE // Has PSRAM
to this:
#define CAMERA_MODEL_AI_THINKER
Replace the ********** placeholders on lines 39 and 40 of the sketch with your Wi-Fi access point credentials: