Hi, I am trying to setup 1 too 1 connection with my HC 05. so first of all I had to set up one as slave and the other as master and that worked perfectly fine. I did this using the same arduino.
Now I tried connecting each HC 05 to a Arduino so I have 2 Adruinos connected to my PC with HC 05 at each one. Then using the serial monitor I tried to send text like 'hello'
nothing came out on the serial monitor for the other arduino. I then disconnected to recheck my settings using AT commands and now I am not even getting a response when in the AT command mode for either of my HC 05s Not even 'OK' when inputting AT
I don't know what have done wrong and I am hoping I didn't brick them. I am a beginner so this my first time dealing with Bluetooth modules. (the lights are flashing so that's good sign at least)
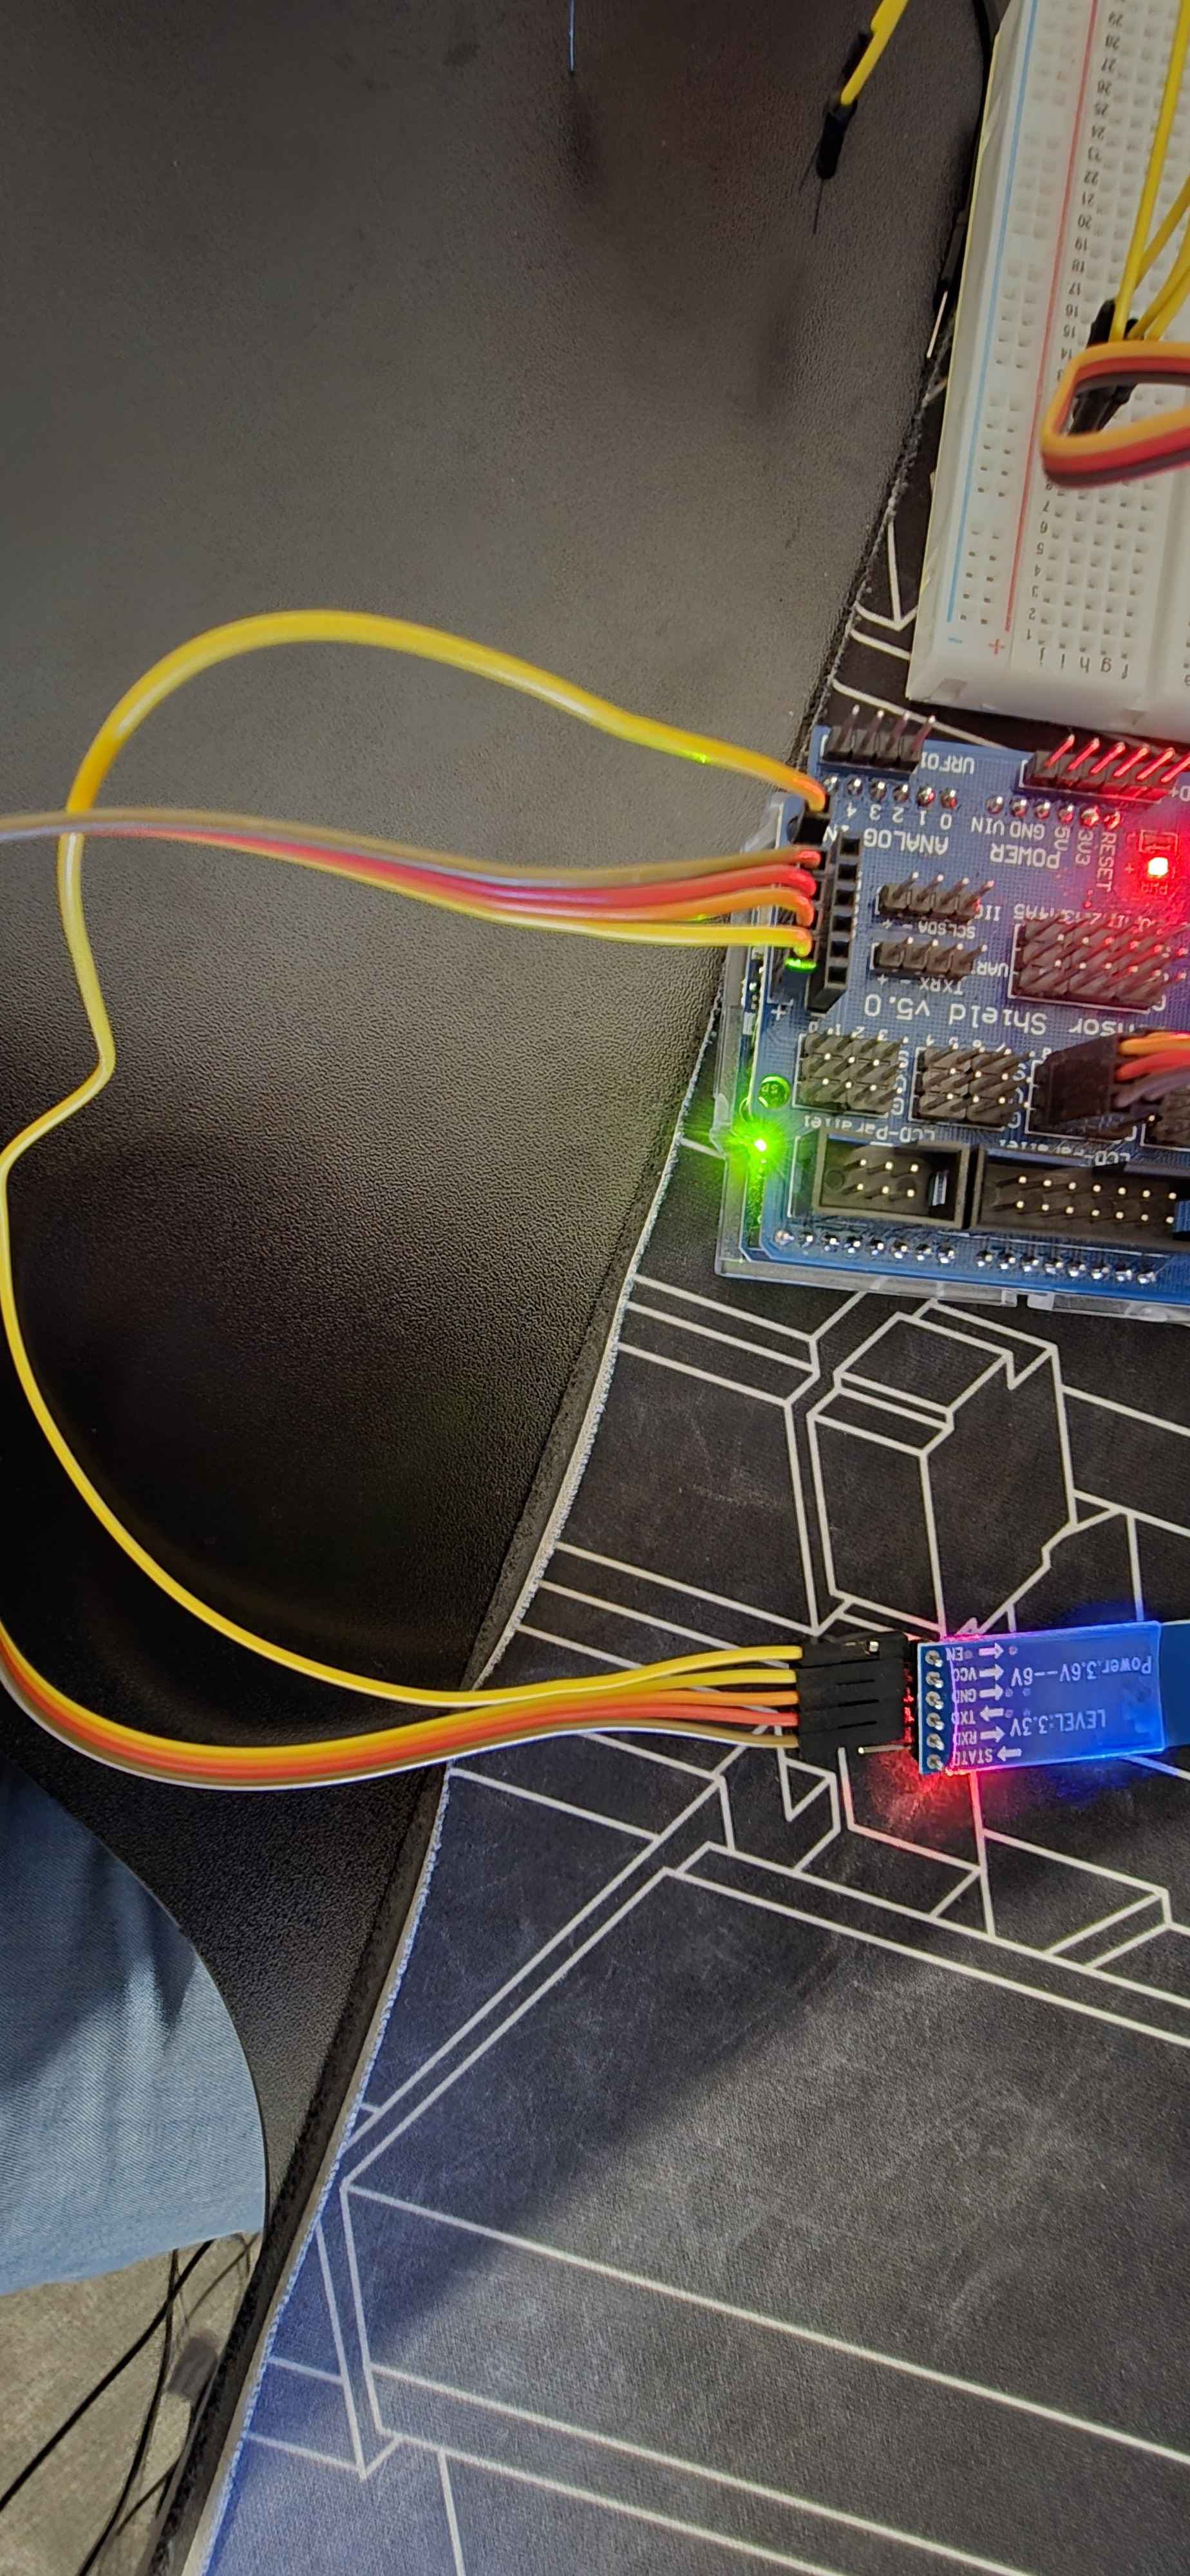
Also the boards I am using are an ELEGOO UNO R3 with a sensor shield (I used this to alter the properties of the HC 05 in the AT command window) and an Arduino R4 Wifi.
one thing I did notice that was weird is when I connected the slave HC 05 the lights were not flashing at the exact same time as the Master HC 05. I am pretty sure I did connect them
Could you please provide a wiring diagram for the HC-05 and Arduino boards? It is unclear to me how you are using the R3s and the R4 WiFi in relation to one another. Perhaps you could provide some more detail.
Just to be clear, the HC-05 utilizes classic Bluetooth, while the UNO R4 WiFi does not support classic Bluetooth, only BLE.
In addition, could you please provide the Arduino code within code tags so that we can easily read the code?
Can you get an HC-05 into AT mode (slow blinking of its LED)?
If yes, and you type AT into the Arduino Serial Monitor and hit send, do you see anything?
If no, set the serial monitor to a slow baud rate and try again. Do you see anything? If it is unreadable, you must match the speed between the monitor and the HC-05. The default baud rate is 38400.
Perhaps you modified that to something else while you were experimenting.
Also, the HC-05 is a 3.3v part. This is described in the Article.
Here is the quote:
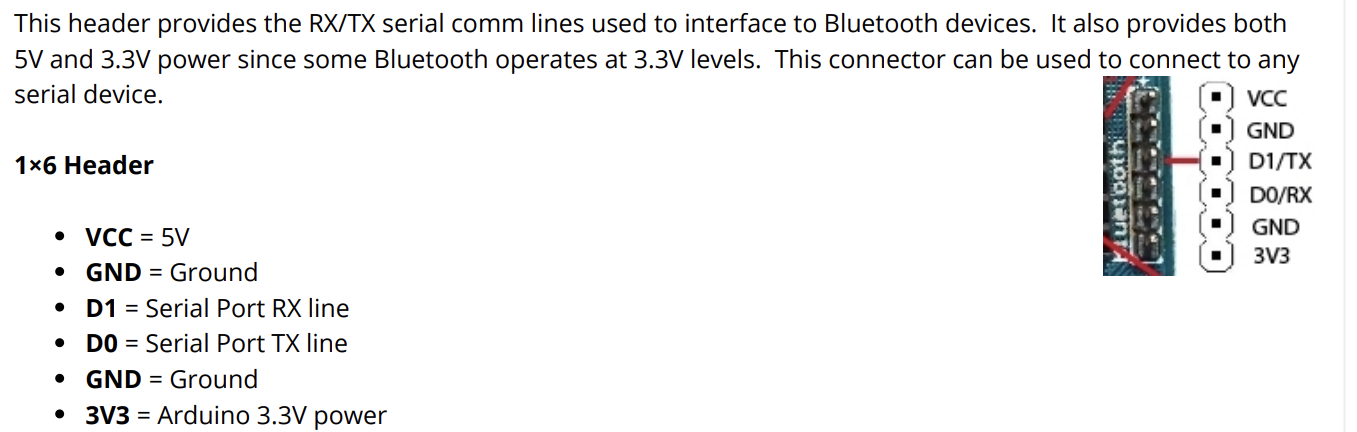
The Rx pin on the HC-05 module is not 5V tolerant. So, if you are using a 5V microcontroller such as Arduino UNO, you need to step down the Tx signal from the Arduino to 3.3V using a resistor divider. A 1K resistor between HC-05’s Rx and Arduino’s D0, and a 2K resistor between HC-05’s Rx and GND, will work just fine.
Also does that mean the vvideo I have sent is wrong?????? because I tried that then it worked (at the beginning ) and they did not use a voltage divider or any other external part
Here are the instructions to get the device into AT mode:
Entering AT Mode
To enter AT mode, follow these steps.
Press and hold the push button on the HC-05 module.
Supply power to the module.
Release the push button now. If the onboard LED starts blinking with a time difference of approximately 2 seconds, the HC-05 has successfully entered AT mode; otherwise, repeat the procedure.
Note that in AT mode, HC-05 communicates at a baud of 38400 by default, and with each command, it is mandatory to send ‘\r’ and ‘\n.’
If you cannot get the HC-05 back into AT mode, then the board is most likely unusable.
Perhaps someone with more experience with these modules than me might weigh in if I am off base.
by the way referring to this post I found another way of trying to set up AT command window.
#include <SoftwareSerial.h>

SoftwareSerial BTSerial(1, 0);   // RX | TX

void setup() {


  Serial.begin(38400);
  Serial.println("Enter AT Commands:");
  BTSerial.begin(38400);  // HC-05 default speed in AT command mode
}

void loop() {

//The code below allows for commands and messages to be sent from COMPUTER (serial monitor) -> HC-05
  if (Serial.available())           // Keep reading from Arduino Serial Monitor
    BTSerial.write(Serial.read());  // and send to HC-05

//The code below allows for commands and messages to be sent from HC-05 -> COMPUTER (serial monitor)
  if (BTSerial.available())         // Keep reading from HC-05 and send to Arduino
    Serial.write(BTSerial.read());  // Serial Monitor
}
for the pins which order should I do?? 0 then 1 or 1 then 0
That is good news. In the serial monitor, make sure that both NL and CR are enabled. At the lower right bottom of the monitor, there is a drop-down (I am using version 2.3.4 of the IDE).
It may be better to start with an empty sketch until you are up and running.
Start the monitor at 38400. If you don't get a response, repower the HC-05 and change the speed. If you see junk, the speed of the HC-05 was modified to something else, so you will need to experiment to determine that speed.