#include <Servo.h>
#include <LiquidCrystal.h>
#include <RTC.h>
#include <WiFiS3.h>
#include <ESP_Mail_Client.h>

#define WIFI_SSID "" // CHANGE IT
#define WIFI_PASSWORD "" // CHANGE IT

// the sender email credentials
#define SENDER_EMAIL "umaakeeru@gmail.com" // CHANGE IT
#define SENDER_PASSWORD "mjxa mbis gvfd jpne"  // CHANGE IT to your Google App password

#define RECIPIENT_EMAIL "umaakeeru@gmail.com" // CHANGE IT

#define SMTP_HOST "smtp.gmail.com"
#define SMTP_PORT 587

SMTPSession smtp;

Servo servo; // create servo object

// constant variables for pins
const int servoPin = 6;
const int buttonPin = 9;
const int ledPin = 7;
const int buzzerPin = 8;

// other variables
int angle = 0;
int angleIncrement = 45;  // default 45 degrees for 4 compartments, change for different number of compartments
int newAngle;
int buttonState;
int movementDelay = 50;
int debounceDelay = 1000;
int num=2;

// time variables
int year;
int month;
int day;
int hour;
int minutes;
int seconds;
bool fred=true;

// initialize the library by associating any needed LCD interface pin
// with the arduino pin number it is connected to
const int rs = 12, en = 11, d4 = 5, d5 = 4, d6 = 3, d7 = 2;
LiquidCrystal lcd(rs, en, d4, d5, d6, d7);

void setup(){ // setup code that only runs once
  pinMode(buttonPin, INPUT); // set button pin as input
  pinMode(ledPin,OUTPUT);    // set LED pin as output
  pinMode(buzzerPin,OUTPUT); // set buzzer pin as output
  digitalWrite(ledPin,LOW);  // make sure LED is off
  digitalWrite(buzzerPin,LOW);  // make sure buzzer is off
  servo.attach(servoPin);    // attach servo object to servoPin
  servo.write(angle);        // set servo to initial angle
  Serial.begin(9600);        // initialize serial for debugging

  // set up the LCD's number of columns and rows:
  lcd.begin(16, 2);

  // initialize the RTC and set the current date and time
  // you will need to manually adjust the time right before you upload the code
  RTC.begin();
  RTCTime startTime(28, Month::OCTOBER, 2024, 21, 05, 50, DayOfWeek::FRIDAY, SaveLight::SAVING_TIME_ACTIVE);
  RTC.setTime(startTime);
}
void updateLCD(){    // function to update LCD screen
  // get current time from the RTC
  RTCTime currentTime;
  RTC.getTime(currentTime);
  // store current time variables
  year = currentTime.getYear();
  month = Month2int(currentTime.getMonth());
  day = currentTime.getDayOfMonth();
  hour = currentTime.getHour();
  minutes = currentTime.getMinutes();
  seconds = currentTime.getSeconds();

  // set the cursor to column 0, line 1
  // (note: line 1 is the second row, since counting begins with 0):
  lcd.setCursor(0, 0);
  // print month/day/year (rearrange for different date formats)
  // add leading spaces if month or day are less than 10 to keep spacing consistent
  // (always use 2 characters for month and day)
  if(month<10){   // print extra space if month is less than 10
    lcd.print(" ");
  }
  lcd.print(month);  // print the month
  lcd.print("/");
  if(day<10){        // print extra space if the day is less than 10
    lcd.print(" ");
  }
  lcd.print(day);    // print the day
  lcd.print("/");
  lcd.print(year);   // print the year

  // print time in hh:mm:ss format
  // add leading zeroes if minutes or seconds are less than ten to keep spacing consistent
  lcd.setCursor(0, 1);  // move cursor to second row
  if(hour<10){          // print leading space if hour is less than 10
    lcd.print(" ");
  }
  lcd.print(hour);      // print the hour
  lcd.print(":");
  if(minutes<10){       // print leading zero if minute is less than 10
    lcd.print("0");
  }
  lcd.print(minutes);   // print the minute
  lcd.print(":");
  if(seconds<10){       // print leading zero if second is less than 10
    lcd.print("0");
  }
  lcd.print(seconds);   // print the second
}
void loop(){  // code that loops forever
  updateLCD();  // display the current date and time on the screen (see function below)

  buttonState = digitalRead(buttonPin); // read button state (you can edit the code to advance the servo when you press the button, useful for debugging)
  Serial.println(angle);                // print the servo angle

  // detect certain times and rotate the servo mechanism ahead by one compartment.
  // the example code rotates the servo once per minute when the seconds variable equals 0.
  // change to detect different times of day, for example (hours == 9 && minutes == 0 && seconds == 0) would detect 9:00:00 AM
  // use additional "else if" conditions to detect more than one time

  if(seconds == 0){               // check for seconds = 0 (one minute intervals)
    newAngle = angle + angleIncrement; // increase angle by increment
    if (newAngle<=180){           // if the new angle is less than or equal to 180, increase angle
    	while(angle < newAngle){    // increase angle until it reaches the new angle
      	angle = angle + 1;        // increase angle by 1
      	servo.write(angle);       // move the servo
        Serial.println(angle);    // print the angle
      	delay(movementDelay);     // delay to slow down movement
    	}
      // flash LED and buzzer
      flashLED(40,150);    // flashLED(number of flashes, delay in milliseconds), see function below
    }
    else{ // if the new angle is greater than 180, reset angle to 0
      while(angle>0){         // decrease angle until it reaches 0
        angle = angle - 1;    // decrease angle by 1
        servo.write(angle);   // move the servo
        Serial.println(angle);// print the angle
        delay(movementDelay); // delay to slow down movement
      }
    }
  }
}

void flashLED(int numFlashes, int flashDelay){  // alarm function to flash LED and sound buzzer
  lcd.clear();              // clear the LCD screen
  lcd.setCursor(0, 0);      // set cursor to top left
  lcd.print("Take medicine!");  // display message
  Serial.begin(9600);
  WiFi.begin(WIFI_SSID, WIFI_PASSWORD);

  for (int i = 0; i < numFlashes; i++) {  // Loop to flash LED/buzzer
  if (digitalRead(buttonPin) == LOW) { // Check if the button is pressed
    digitalWrite(ledPin, LOW);  // Turn LED off
    digitalWrite(buzzerPin, LOW); // Turn buzzer off
    fred = false;
    // Wait until the button is released

    // Resume without incrementing i (continue flashing)
  } else {
    // Flash the LED and buzzer
    digitalWrite(ledPin, HIGH);
    digitalWrite(buzzerPin, HIGH);
    delay(flashDelay);
    digitalWrite(ledPin, LOW);
    digitalWrite(buzzerPin, LOW);
    delay(flashDelay);
    // Increment only when not paused
  }
}


  // wait for button press - the code will get stuck in this loop until you press the button

  while(digitalRead(buttonPin) == LOW){
    digitalWrite(ledPin,HIGH);         // turn LED on
    digitalWrite(buzzerPin,HIGH);      // turn buzzer on
    delay(flashDelay);                 // delay
    digitalWrite(ledPin,LOW);          // turn LED off
    digitalWrite(buzzerPin,LOW);       // turn buzzer off
    delay(flashDelay)
  };

  delay(1000);    // delay before clearing screen
  lcd.clear();    // clear screen
}


  Serial.print("Connecting to Wi-Fi");

  while (WiFi.status() != WL_CONNECTED) {
    Serial.print(".");
    delay(300);
  }
  Serial.println();
  Serial.print("Connected with IP: ");
  Serial.println(WiFi.localIP());
  Serial.println();

  String subject = "Email Notification from Arduino";


  String textMsg = "Hey take your medicine!!!!.\n";
  textMsg += "Also don't forget to press the switch.\n ";
  textMsg += "Have a nice day!"; // OR replace this value read from a sensor


  // wait for button press - the code will get stuck in this loop until you press the button

};


void gmail_send(String subject, String textMsg) {
  // set the network reconnection option
  MailClient.networkReconnect(true);

  smtp.debug(1);

  smtp.callback(smtpCallback);
  Session_Config config;

  // set the session config
  config.server.host_name = SMTP_HOST;
  config.server.port = SMTP_PORT;
  config.login.email = SENDER_EMAIL;
  config.login.password = SENDER_PASSWORD;
  config.login.user_domain = F("127.0.0.1");
  config.time.ntp_server = F("pool.ntp.org,time.nist.gov");
  config.time.gmt_offset = 3;
  config.time.day_light_offset = 0;

  // declare the message class
  SMTP_Message message;

  // set the message headers
  message.sender.name = F("Arduino");
  message.sender.email = SENDER_EMAIL;
  message.subject = subject;
  message.addRecipient(F("To Whom It May Concern"), RECIPIENT_EMAIL);

  message.text.content = textMsg;
  message.text.transfer_encoding = "base64";
  message.text.charSet = F("utf-8");
  message.priority = esp_mail_smtp_priority::esp_mail_smtp_priority_low;

  // set the custom message header
  message.addHeader(F("Message-ID: <abcde.fghij@gmail.com>"));

  // connect to the server
  if (!smtp.connect(&config)) {
    Serial.println("Connection error: ");
    Serial.print("- Status Code: ");
    Serial.println(smtp.statusCode());
    Serial.print("- Error Code: ");
    Serial.println(smtp.errorCode());
    Serial.print("- Reason: ");
    Serial.println(smtp.errorReason().c_str());
    return;
  }

  if (!smtp.isLoggedIn()) {
    Serial.println("Not yet logged in.");
  } else {
    if (smtp.isAuthenticated())
      Serial.println("Successfully logged in.");
    else
      Serial.println("Connected with no Auth.");
  }

  // start sending Email and close the session
  if (!MailClient.sendMail(&smtp, &message)) {
    Serial.println("Connection error: ");
    Serial.print("- Status Code: ");
    Serial.println(smtp.statusCode());
    Serial.print("- Error Code: ");
    Serial.println(smtp.errorCode());
    Serial.print("- Reason: ");
    Serial.println(smtp.errorReason().c_str());
  }
}

// callback function to get the Email sending status
void smtpCallback(SMTP_Status status) {
  // print the current status
  Serial.println(status.info());

  // print the sending result
  if (status.success()) {
    for (size_t i = 0; i < smtp.sendingResult.size(); i++) {
      // get the result item
      SMTP_Result result = smtp.sendingResult.getItem(i);

      Serial.print("Status: ");
      if (result.completed)
        Serial.println("success");
      else
        Serial.println("failed");

      Serial.print("Recipient: ");
      Serial.println(result.recipients.c_str());
      Serial.print("Subject: ");
      Serial.println(result.subject.c_str());
    }
    Serial.println("----------------\n");

    // free the memory
    smtp.sendingResult.clear();
  }
}
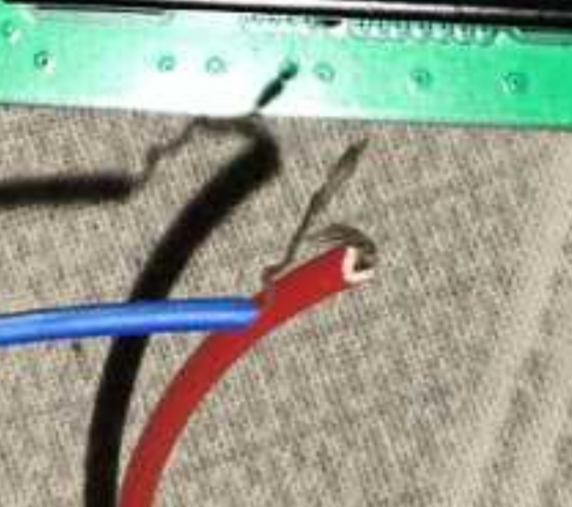
this is my code my lcd is not working for this i adjusted potentiometer and it doesn't work kindly help


this is the wiring i follow