Let us not forget the ribbon cable mount:

Got everything working.
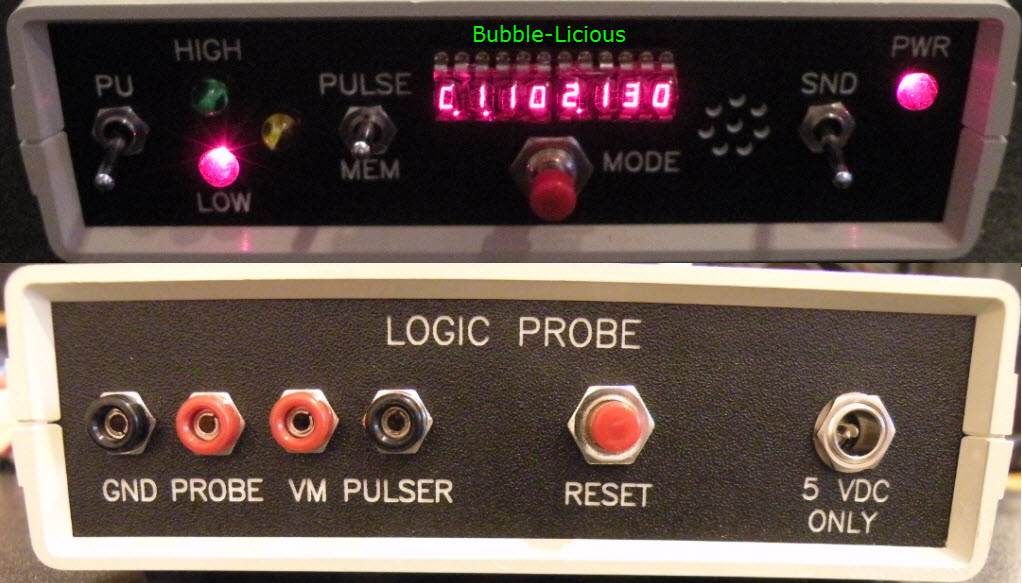
Can't tell you how much the Bubble-Licious contributes with its small size.
Your 1284Weeney is also good for circuit simplification.
Logic probe now includes:
- Logic probe with Hi, Lo, Pulse, Sound and tristate detection
Now displays/has: - Pulse count (using a prescaler)
- Frequency counter
- Pulse width measurement. High and Low
- Pulser output X 1, X 10, X 100, 1 HZ, 10 HZ and 100 HZ
- Auto range voltmeter 0-15 VDC
Thanks Crossroads for your boards and software help.
Going to add 1284Weeney and a Bubble-Licious to the "All in one place I/O PCB"
along with USB to T2L, an 8 bit 74688 with dip switch word detector, 2 bounce suppressed switches, a relay and maybe Max232.
Bubble-Licious still needs to be on your web site ![]()
Will you be proceeding with 256 keypad?
What size are you aiming for?

Looks like a nice test unit there.
Knew there was something I needed to do this weekend! Got the kid sent off to college anyway. Thanks for the reminder.
Will you be proceeding with 256 keypad?
What size are you aiming for?
Not at the moment. PCB will be expensive, not seeing much discussion for one either.
At 20cm x 20cm, PCBs alone will $20 each plus shipping for a 5-lot.
If there are at least 5 takers, I'll order them, not without tho.
I only did 1 row of SMD buttons too, so that would need to be finished up for the pads to support either SMD or thruhole.

Maybe some takers with smaller keyboards.
Perhaps 8X8 (64).
Keep in mind the membrane version discussed (with no switches).
I know I'm late to the party. Any chance of still getting a few Bubble-Licious displays?
Please let me know either way.
Thanks
PM
Crossroads
They work great!
.
Yes, I still have kits and/or assembled boards available.
Bubblelicious: a nice little 8-digit display controlled by a MAX7219. $12.85 each plus shipping & paypal fee.
If there's interest, I can get more until Sparkrun runs out of displays.
The 10uF can be mounted flatter, or on the back. In & Out connectors for daisychaining.
The holes for the display have double rows to accommodate a right angle socket, 2 of mouser 575-2994331211. More application pics & an SPI code example here:
http://forum.arduino.cc/index.php?topic=258723.0
@Crossroads
I think your link is showing something other than your bubble display.
Yes, took me a couple tries to get that right. Got some hypertext thing screwed up on my webpage.
Made some discharge timers, image is a bit saturated:
I got my displays and have played with them. Awesome! Great work to you guys. Is there any other example code? I will need more of these soon. I also plan to take a shot and soldering the display directly to the board on a 30 degree angle.
Thanks
Brandon

Here is some example code you might get some ideas from:
Sample.ino (14.6 KB)
Thanks Larry! Eventually this will be a cell phone. I made a bubble-licious with the chip directly on the board so the display can protrude in the case, and a rear mounted connector.


You can mount the display straight on also.