I'm trying to use an Arduino nano every and a mfrc522 to control what a dfplayer mini outputs. I have had success in making the mfrc522 work, and it reads keys just fine. But with the dfplayer, (i have bought 5), every single one does not want to turn on, even when I connected both grounds, 4.6V, TX and RX connected, SD card inserted. When I short circuit the led to ground on the large metal casing for the card, the LED turns on on all of them. This also happens when i connect one of the grounds to the busy pin. I'm fairly sure I'm doing something wrong, since 5 dfplayer minis later, I am still having no luck with making them work.
I would imagine you are doing something wrong. However, since you have supplied none of the information that would be necessary to be able to say what you are doing wrong (for example, your sketch in a <CODE/> block, an annotated schematic, clear, well lit, in focus pictures of your wiring, error messages if any), help is unlikely to be forthcoming.
1 Like
Here is the code that i used to do it.
#include <SoftwareSerial.h>
#include <DFRobotDFPlayerMini.h>

SoftwareSerial mySerial(2, 3);  // RX, TX
DFRobotDFPlayerMini dfplayer;

void setup() {
  Serial.begin(115200);
  mySerial.begin(9600);

  Serial.println("Testing DFPlayer...");

  if (!dfplayer.begin(mySerial)) {
    Serial.println("DFPlayer not detected.");
  } else {
    Serial.println("DFPlayer detected!");
    dfplayer.volume(20);  // Set volume
    dfplayer.play(1);     // Play the first track
  }
}

void loop() {
  // Nothing here
}


RX is connected to a 1kohm resistor which goes to pin 2, TX is directly connected to pin 3.
In the absence of a schematic, I can only offer overall impressions on what you've done wrong.
You don't say what, if anything, shows up on the serial monitor. So no one knows if your sketch is even recognizing the DFplayer.
The MFRC522 has no level shifting on its signals. The Every is a 5V device, the MFRC522, 3.3V.
You're using SoftwareSerial with a board that has a second HardwareSerial port.
You don't have a speaker hooked up.
You say you shorted the LED to ground. Thereby potentially damaging either the LED or an output pin on the DFplayer.
You grounded the BUSY pin. You've likely damaged the output pin.
Remove the Every and the MFRC522 from the equation. Concentrate on getting the DFplayer to work on its own. The manual shows a simple circuit using just a DFplayer, a speaker, and grounding IO1 or IO2 to play the previous or next track. Getting that to work will tell you whether or not the DFplayer is recognizing your card and/or the files on it. Don't be surprised if the BUSY output and/or LED don't work with the way you've abused them.
1 Like
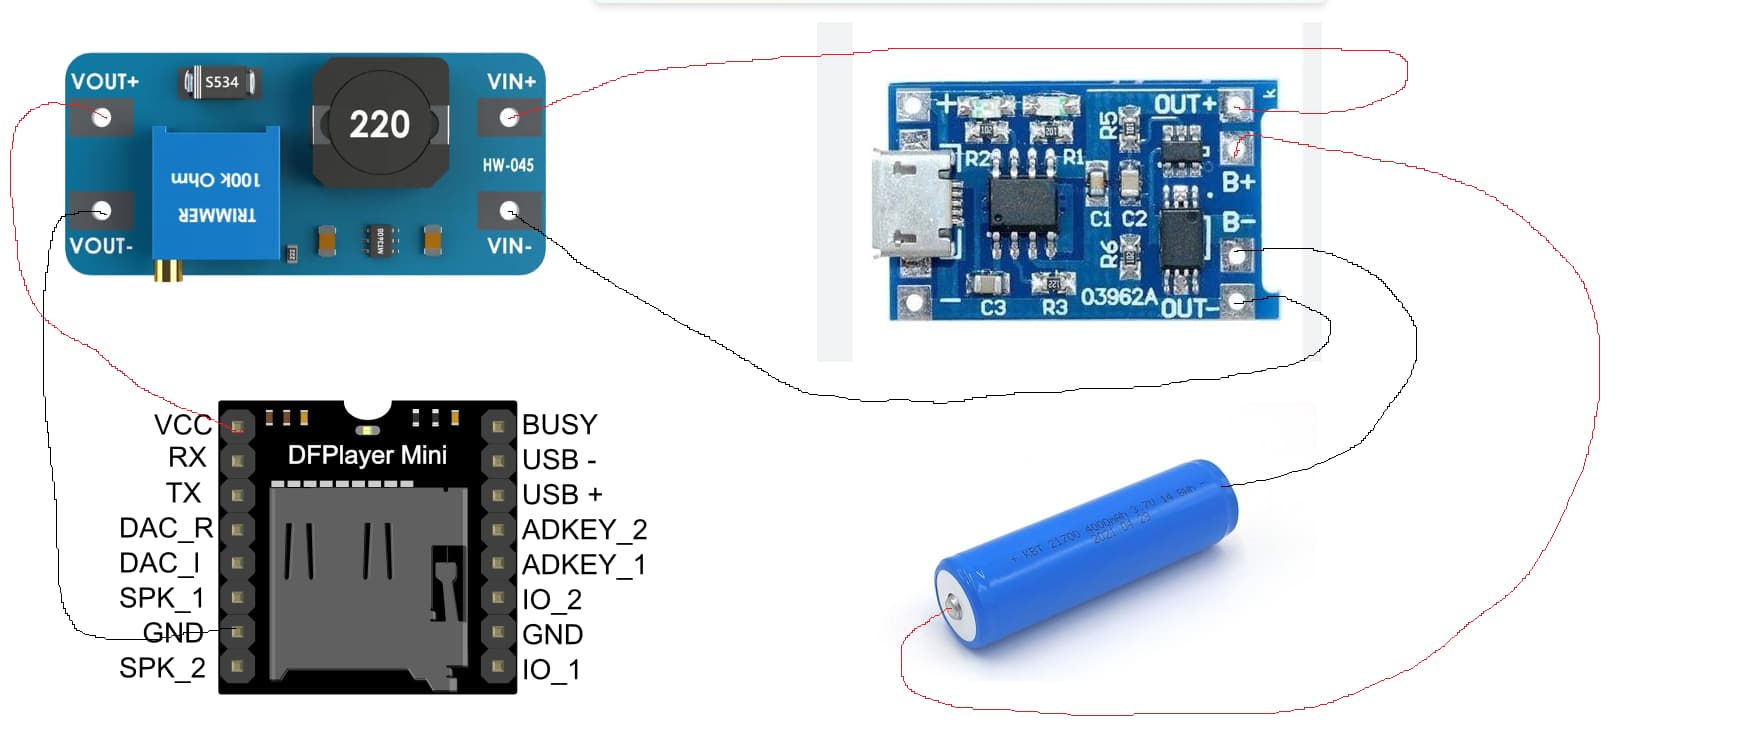
Damn that felt like a telling off. The serial monitor shows that the card is not recognized, with and without the SD. About the simple 5V power supply, I'm also trying to make my own one of those with a 3.7V battery and an mt3608. So far the results haven't been promising, with the input voltage of 3.9V being outputted at 3.7V. Does the output need to be part of a circuit to test it with a voltmeter. From a tiny bit of knowledge I understand that voltmeters should be connected in parallel, but can I do it in series, connecting both the voltage out pins?

Please could you also tell me some reputable brands that I could purchase the DFPlayer from, so that I don't destroy them as they work first try?
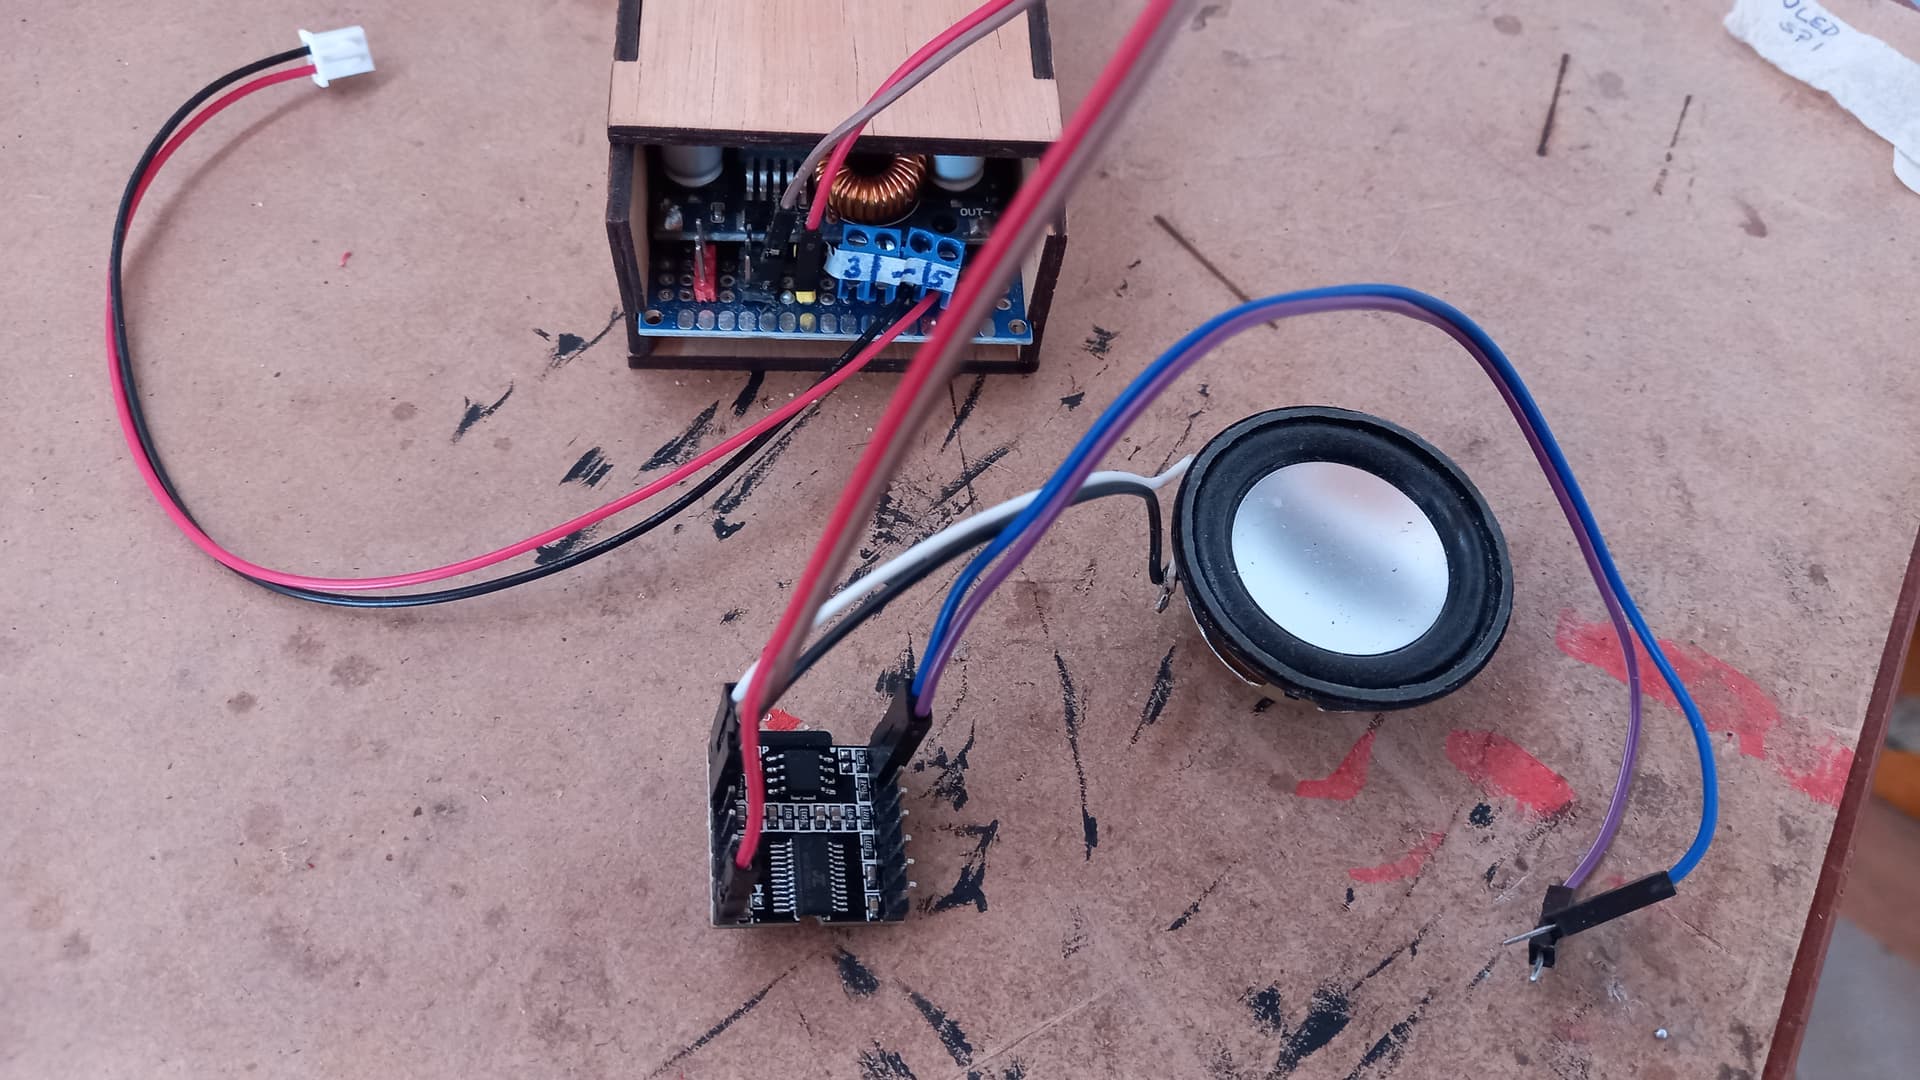
Unfortunately, as expected, all 5 do not turn on with a 3.7v power supply. I don't know what software you guys use for showing circuits, so I made one in paint.
Looks reversed so swap them and test. Then, failing that, try switching to this pair instead: Nano TX pin 11 to DFR RX pin 2 via 1k
Nano RX pin 10 to DFR TX pin 3
Those photos are of little help to us. As requested please post a schematic, possibly hand drawn.
EDIT
Oh, and did you test them without the Arduino, just using the DFR’s IO keys?
I see already suggested by @van_der_decken
Nice try using paint.
Perfectly good schematics can be made with a pencil and paper, also a ruler helps to make them tidy, although not essential.
More about creating a schematic:
If you want to use computer software to create a schematic, then you might like to try either Circuit Diagram or KiCad.
There's a reason I wrote the forum guide, pinned at the top of every forum category, it's to help people new here ask a question in the way that's most likely to attract people able to give good and helpful advice with the minimum of fuss. (Does that also sound like a telling off? ![]() )
)
Good to see you making an effort to learn about this stuff, good luck!
1 Like
Hi @awesomedude2025
yes it´s true these damned DFP-players sometimes are quite tricky to get them work.
I suggest that you try it as simple as possible to make sure that the pure HW is good.
You don´t even need a processor, just 6 wires and a 3.3V powersupply (can be a battery) of course a speaker an a SD-card with proper soundfiles on it. No f...ng breadboard, protoboard or whatever this peace of s..t is called.
connected VCC to +3.3V, GND to -pole, speaker to its corresponding pins and on my example the blue and purple wire go to IO_1 and GND. Now tip the blue and purple wires together and you should hear the first soundfile on the SD card. You can also use IO_2 to start the last soundfile. If you hold the two wires together IO_1 to GND rises the volume and IO_2 to GND lowers the volume. If this all works you can go to next step. Use any type of Arduinoboard and connect RX - TX and TX - RX between the two devices. Load an example sketch from the library and see if it works. If you get stuck on this state then somethin very basic is wrong with it, most probably HW. I often had problems with powering and signal levels. This DFP player works best if everything is powered with 3.3V and signals are on this level too. If you have 5V supply only, try to shift down VCC of the DFP player to 3.3V AND work with the 1k resistor on the RX pin.
Just a few words about these bread- proto-boards: At the beginning I used one of these things to test my sketches and allways but really allways I had problems with bad contacts which caused me severe headaches. Finally I through it on the floor, jumped on it 20 times and put it in the trash. From this point I am using PCB boards and solder the different basic circuits to test different devices. For example, for testing a simple DFP-player it looks like this one...
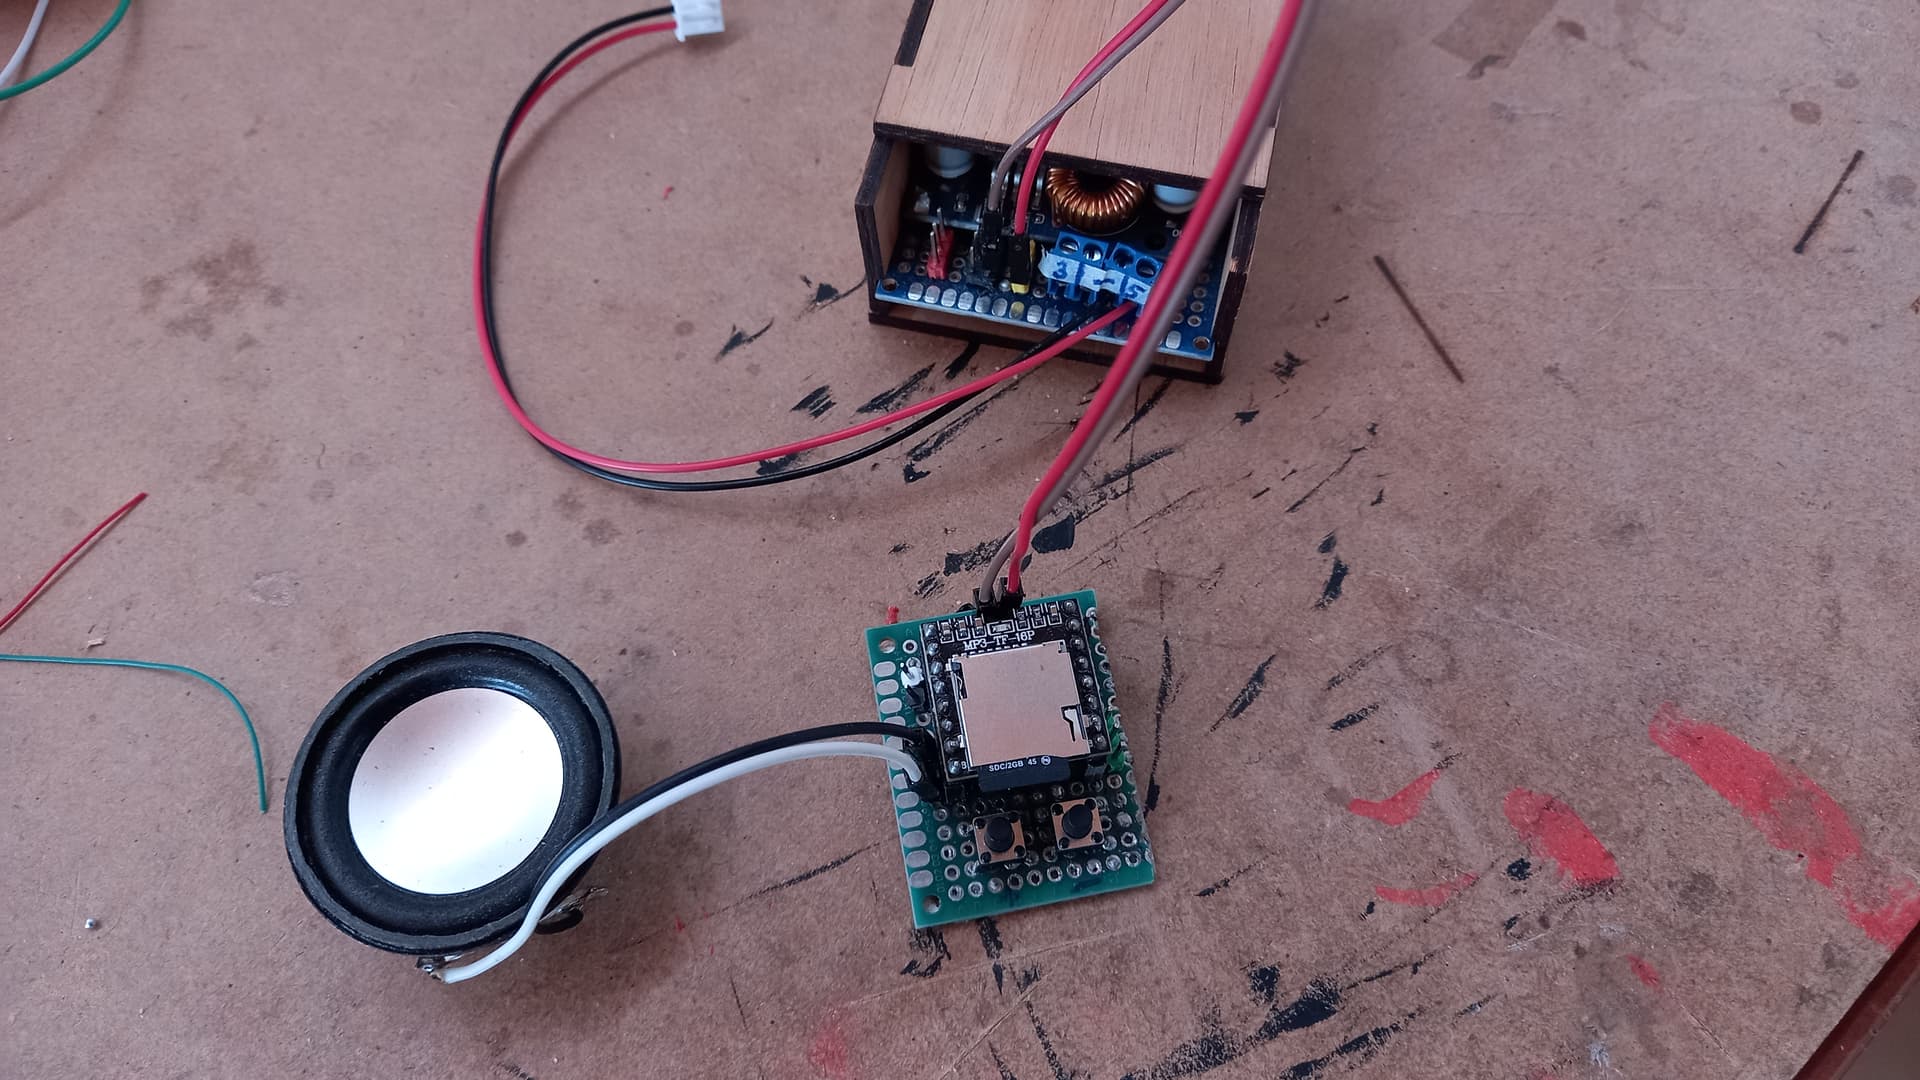
Thank you for this idea. I did try to connect a 3.7V to it in the picture above, but none of the lights turned on. This was done with a few different wires. I also tried directly connecting the arduino to the player with no breadboard, but that also didn't give me anything useful. Do they need SD cards and RX and TX pins connected to something for the LED to turn on? Testing the voltage through the LED reads about .6V iirc. From a search on google it says that I don't need them for the LED to turn on, just the 5V or 3.3V and ground connected. I think I'm going to go with the route that has a few more electronics but has no DFplayers, as apparently they hate me. I'm planning on using an SD card module, an LM386, MCP4725, and a headphone jack instead. I forgot to mention that it was going to be used with headphones, but that is why I have the amplifier. If that all fails I might just give up with the project, and accept a relatively low grade.
...actually the LED on the DFP player does not necessary light up after connecting to power. You do not need to connect TX and RX pin but you do need to have a good SD-card plugged in and what I also read sometimes that the soundfiles must have a special naming format like four numberdigits before any alphanumeric name. For example
0012myFavouriteSong.mp3. Published info about this also says that the playorder of files on the SD is related to the leading numbers of the filenames but this definitly is not true. The playorder is the order of saving the files on the SD. The light on the DFPplayer lights on during a file is playing. It might flash up once when it is connected to the UART and initialized by the program on the Arduino.
Don´t give up, play around .... once after some tries it will work ![]()
2 Likes
copy that. Ill have a another try at some tinkering .
Suddenly I realise that I don't have an SD card reader. Lucky me..
It sounds frustrating to go through five DFPlayer Minis without success! Since the LED turns on when you short it, the modules might not be completely dead. Double-check your power supply to make sure it's stable and at the right voltage. Also, try swapping TX and RX connections, as sometimes they get mixed up. Adding a 1K resistor between the Arduino's TX and the DFPlayer's RX can also help with communication issues. If nothing works, testing the DFPlayer with a minimal setup (just power and a speaker) might help rule out other issues.
Hope you get it working soon!
As I suggested in post 9, but no response.
Sorry, forgot to respond. I tried that but unfortunately it did not work.
You probably have too many unknowns at once.
Suggesting you try a step-by-step process, one thing at a time.
1 Like
I made three suggestions. What were the results of each?