Servo code thingy

Hello,

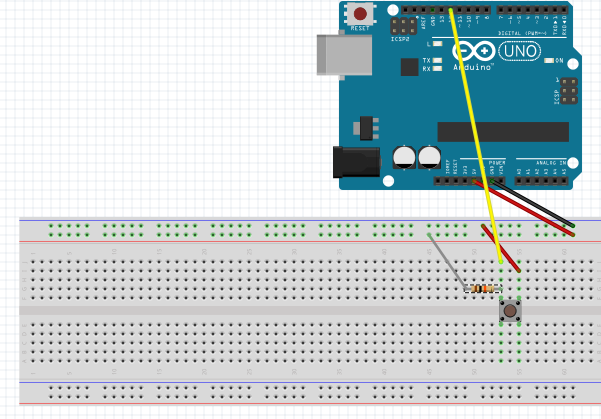
I am trying to create in the starter kit the mood cue and I would like to use one button to turn the servo to one position, another one to turn it to another position and so on. Although it is not working... Below is my code:

#include <Servo.h>

Servo myServo;

int greenLed = 12;
int yellowLed = 10;
int redLed = 9;

int buttonPin1 = 11;
int buttonPin2 = 8;
int buttonPin3 = 7;

int buttonState1;
int buttonState2;
int buttonState3;


int comeIn = 10;
int knock = 70;
int stayOut = 140;


void setup() {
  myServo.attach(6);
  myServo.write(90);
  
  pinMode(greenLed, OUTPUT);
  pinMode(redLed, OUTPUT);
  pinMode(yellowLed, OUTPUT);
  pinMode(buttonPin1, INPUT);
  pinMode(buttonPin2, INPUT);
  pinMode(buttonPin3, INPUT);
  delay(1000);
}

void loop() {
  buttonState1 = digitalRead(buttonPin1);
  buttonState2 = digitalRead(buttonPin2);
  buttonState3 = digitalRead(buttonPin3);
  
  if (buttonPin1 == HIGH) { 
  myServo.write(comeIn);
  digitalWrite(greenLed, HIGH);
  digitalWrite(redLed, LOW);
  digitalWrite(yellowLed, LOW);
  }
  
  if (buttonPin2 == HIGH) {
  myServo.write(knock);
  digitalWrite(yellowLed, HIGH);
  digitalWrite(redLed, LOW);
  digitalWrite(greenLed, LOW);
  
  }
  
  if (buttonPin3 == HIGH) {
  myServo.write(stayOut);
  digitalWrite(yellowLed, LOW);
  digitalWrite(redLed, HIGH);
  digitalWrite(greenLed, LOW);
  } else {
    
  myServo.write(90);
  }
  delay(100);
}

Thanks a lot for your help!

if (buttonPin1 == HIGH) {

State, not pin.

Thanks a lot for your answer. Yes that was probably the problem although now when I press the buttons the corresponding LED lights up but the servo does not change it rotation, only on when I press button 3, which is the red LED. Also, how would I make it possible so when I click the button it stays at that amount of degrees instead of returning back to 90 degrees as the else statement says?

Thanks a lot for your help again.

small changes:
connect push buttons from pin to GND.

altered code

#include <Servo.h>

Servo myServo;

int greenLed = 12;
int yellowLed = 10;
int redLed = 9;

int buttonPin1 = 11;
int buttonPin2 = 8;
int buttonPin3 = 7;

int buttonState1;
int buttonState2;
int buttonState3;


int comeIn = 10;
int knock = 70;
int stayOut = 140;


void setup() {
  myServo.attach(6);
  myServo.write(90);
  
  pinMode(greenLed, OUTPUT);
  pinMode(redLed, OUTPUT);
  pinMode(yellowLed, OUTPUT);
  pinMode(buttonPin1, INPUT_PULLUP);
  pinMode(buttonPin2, INPUT_PULLUP);
  pinMode(buttonPin3, INPUT_PULLUP);
  delay(1000);
}

void loop() {
  buttonState1 = digitalRead(buttonPin1);
  buttonState2 = digitalRead(buttonPin2);
  buttonState3 = digitalRead(buttonPin3);
  
  if (buttonState1 == LOW) { 
  myServo.write(comeIn);
  digitalWrite(greenLed, HIGH);
  digitalWrite(redLed, LOW);
  digitalWrite(yellowLed, LOW);
  } else
  
  if (buttonState2 == LOW) {
  myServo.write(knock);
  digitalWrite(yellowLed, HIGH);
  digitalWrite(redLed, LOW);
  digitalWrite(greenLed, LOW);
  
  } else
  
  if (buttonState3 == LOW) {
  myServo.write(stayOut);
  digitalWrite(yellowLed, LOW);
  digitalWrite(redLed, HIGH);
  digitalWrite(greenLed, LOW);
  } else {
    
  myServo.write(90); //close to knock ??
  }
  delay(100);
}

Try get tid of delays
.. and that last goto pos 90 deg ?? remove it?

Thanks for your answer, now when I press button 1, which should let anyone "come in" the yellow LED turns on and the green one turns off... I basically want it so when you press button 2 the yellow LED to light up and set the servo to 70 degrees and then stay at 70 degrees until I push another of the two buttons... Same with the green led, come in for example. I want it to turn the yellow and red LEDs off and the green ON, while also turning the servo to 10 degrees and staying there. I am going to bed here in Sweden now so I will see your replies tomorrow. but any help is appreciated a lot as this would be a cool project :slight_smile:

Thanks.
Samuel

..again. remove "servo.write(90)".. and the "delay()"
Connect your LEDs to correct pins

Hello,

Here is my code now, edited as you said:

#include <Servo.h>

Servo myServo;

int greenLed = 12;
int yellowLed = 10;
int redLed = 9;

int buttonPin1 = 11;
int buttonPin2 = 8;
int buttonPin3 = 7;

int buttonState1;
int buttonState2;
int buttonState3;


int comeIn = 10;
int knock = 70;
int stayOut = 140;


void setup() {
  myServo.attach(6);
  myServo.write(90);
  
  pinMode(greenLed, OUTPUT);
  pinMode(redLed, OUTPUT);
  pinMode(yellowLed, OUTPUT);
  pinMode(buttonPin1, INPUT_PULLUP);
  pinMode(buttonPin2, INPUT_PULLUP);
  pinMode(buttonPin3, INPUT_PULLUP);
  delay(1000);
}

void loop() {
  buttonState1 = digitalRead(buttonPin1);
  buttonState2 = digitalRead(buttonPin2);
  buttonState3 = digitalRead(buttonPin3);
  
  if (buttonState1 == LOW) { 
  myServo.write(comeIn);
  digitalWrite(greenLed, HIGH);
  digitalWrite(redLed, LOW);
  digitalWrite(yellowLed, LOW);
  } else
  
  if (buttonState2 == LOW) {
  myServo.write(knock);
  digitalWrite(yellowLed, HIGH);
  digitalWrite(redLed, LOW);
  digitalWrite(greenLed, LOW);
  
  } else
  
  if (buttonState3 == LOW) {
  myServo.write(stayOut);
  digitalWrite(yellowLed, LOW);
  digitalWrite(redLed, HIGH);
  digitalWrite(greenLed, LOW);
  }
}

And my connection to one of the button is in the attachment. The problem is that the code still is not working. Please help me...

Skärmavbild 2015-04-23 kl. 19.23.44.png

Hi,

in your code

int buttonPin1 = 11;
int buttonPin2 = 8;
int buttonPin3 = 7;


pinMode(buttonPin1, INPUT_PULLUP);
pinMode(buttonPin2, INPUT_PULLUP);
pinMode(buttonPin3, INPUT_PULLUP);

arduino pin 11, 8, and 9 are your button pins

but in your diagram you used pin 12, which is wrong

also your connection is wrong

INPUT_PULLUP means there is a resistor pulling that pin up already

All you have to do is:

  1. use a multitester to find the two pins (you only use two of the four pins)

when you press the button with your two probes on the two pins there is a reading (ohm reading)

  1. mount those two pins on your breadboard as it is shown in the diagram

3 one of the pin goes to buttonpin1, which is pin 11

  1. the other pin goes to the arduino ground
    5 you do not need any resistors in this case

  2. follow these steps to connect the other two pins which are pin 8 and pin 7
    with two more buttons of course :grin:

good luck

2 am on my side I gotta go get some z's

Oh! I almost forgot

I do not know what kind of servo motor you have got

You are advised to use a separate power supply

ask the people here how you can do it

also as i know some servo motors do not turn from 0 to 180 degrees

so you have to test it out again ask the people about it here

nite

Basic two button servo test code.

//zoomkat servo button test 12-29-2011
// Powering a servo from the arduino usually *DOES NOT WORK*.

#include <Servo.h>
int button1 = 4; //button pin, connect to ground to move servo
int press1 = 0;
int button2 = 5; //button pin, connect to ground to move servo
int press2 = 0;
Servo servo1;

void setup()
{
  pinMode(button1, INPUT);
  pinMode(button2, INPUT);
  servo1.attach(7);
  digitalWrite(4, HIGH); //enable pullups to make pin high
  digitalWrite(5, HIGH); //enable pullups to make pin high
}

void loop()
{
  press1 = digitalRead(button1);
  if (press1 == LOW)
  {
    servo1.write(170);
  }    
  
  press2 = digitalRead(button2);
  if (press2 == LOW)
  {
    servo1.write(10);
  }
}

Thanks for all your help. It works now!