The Arduino Starter Kit Project 2- Non LED-light

Hi Arduino-froum,

I have just dug into my
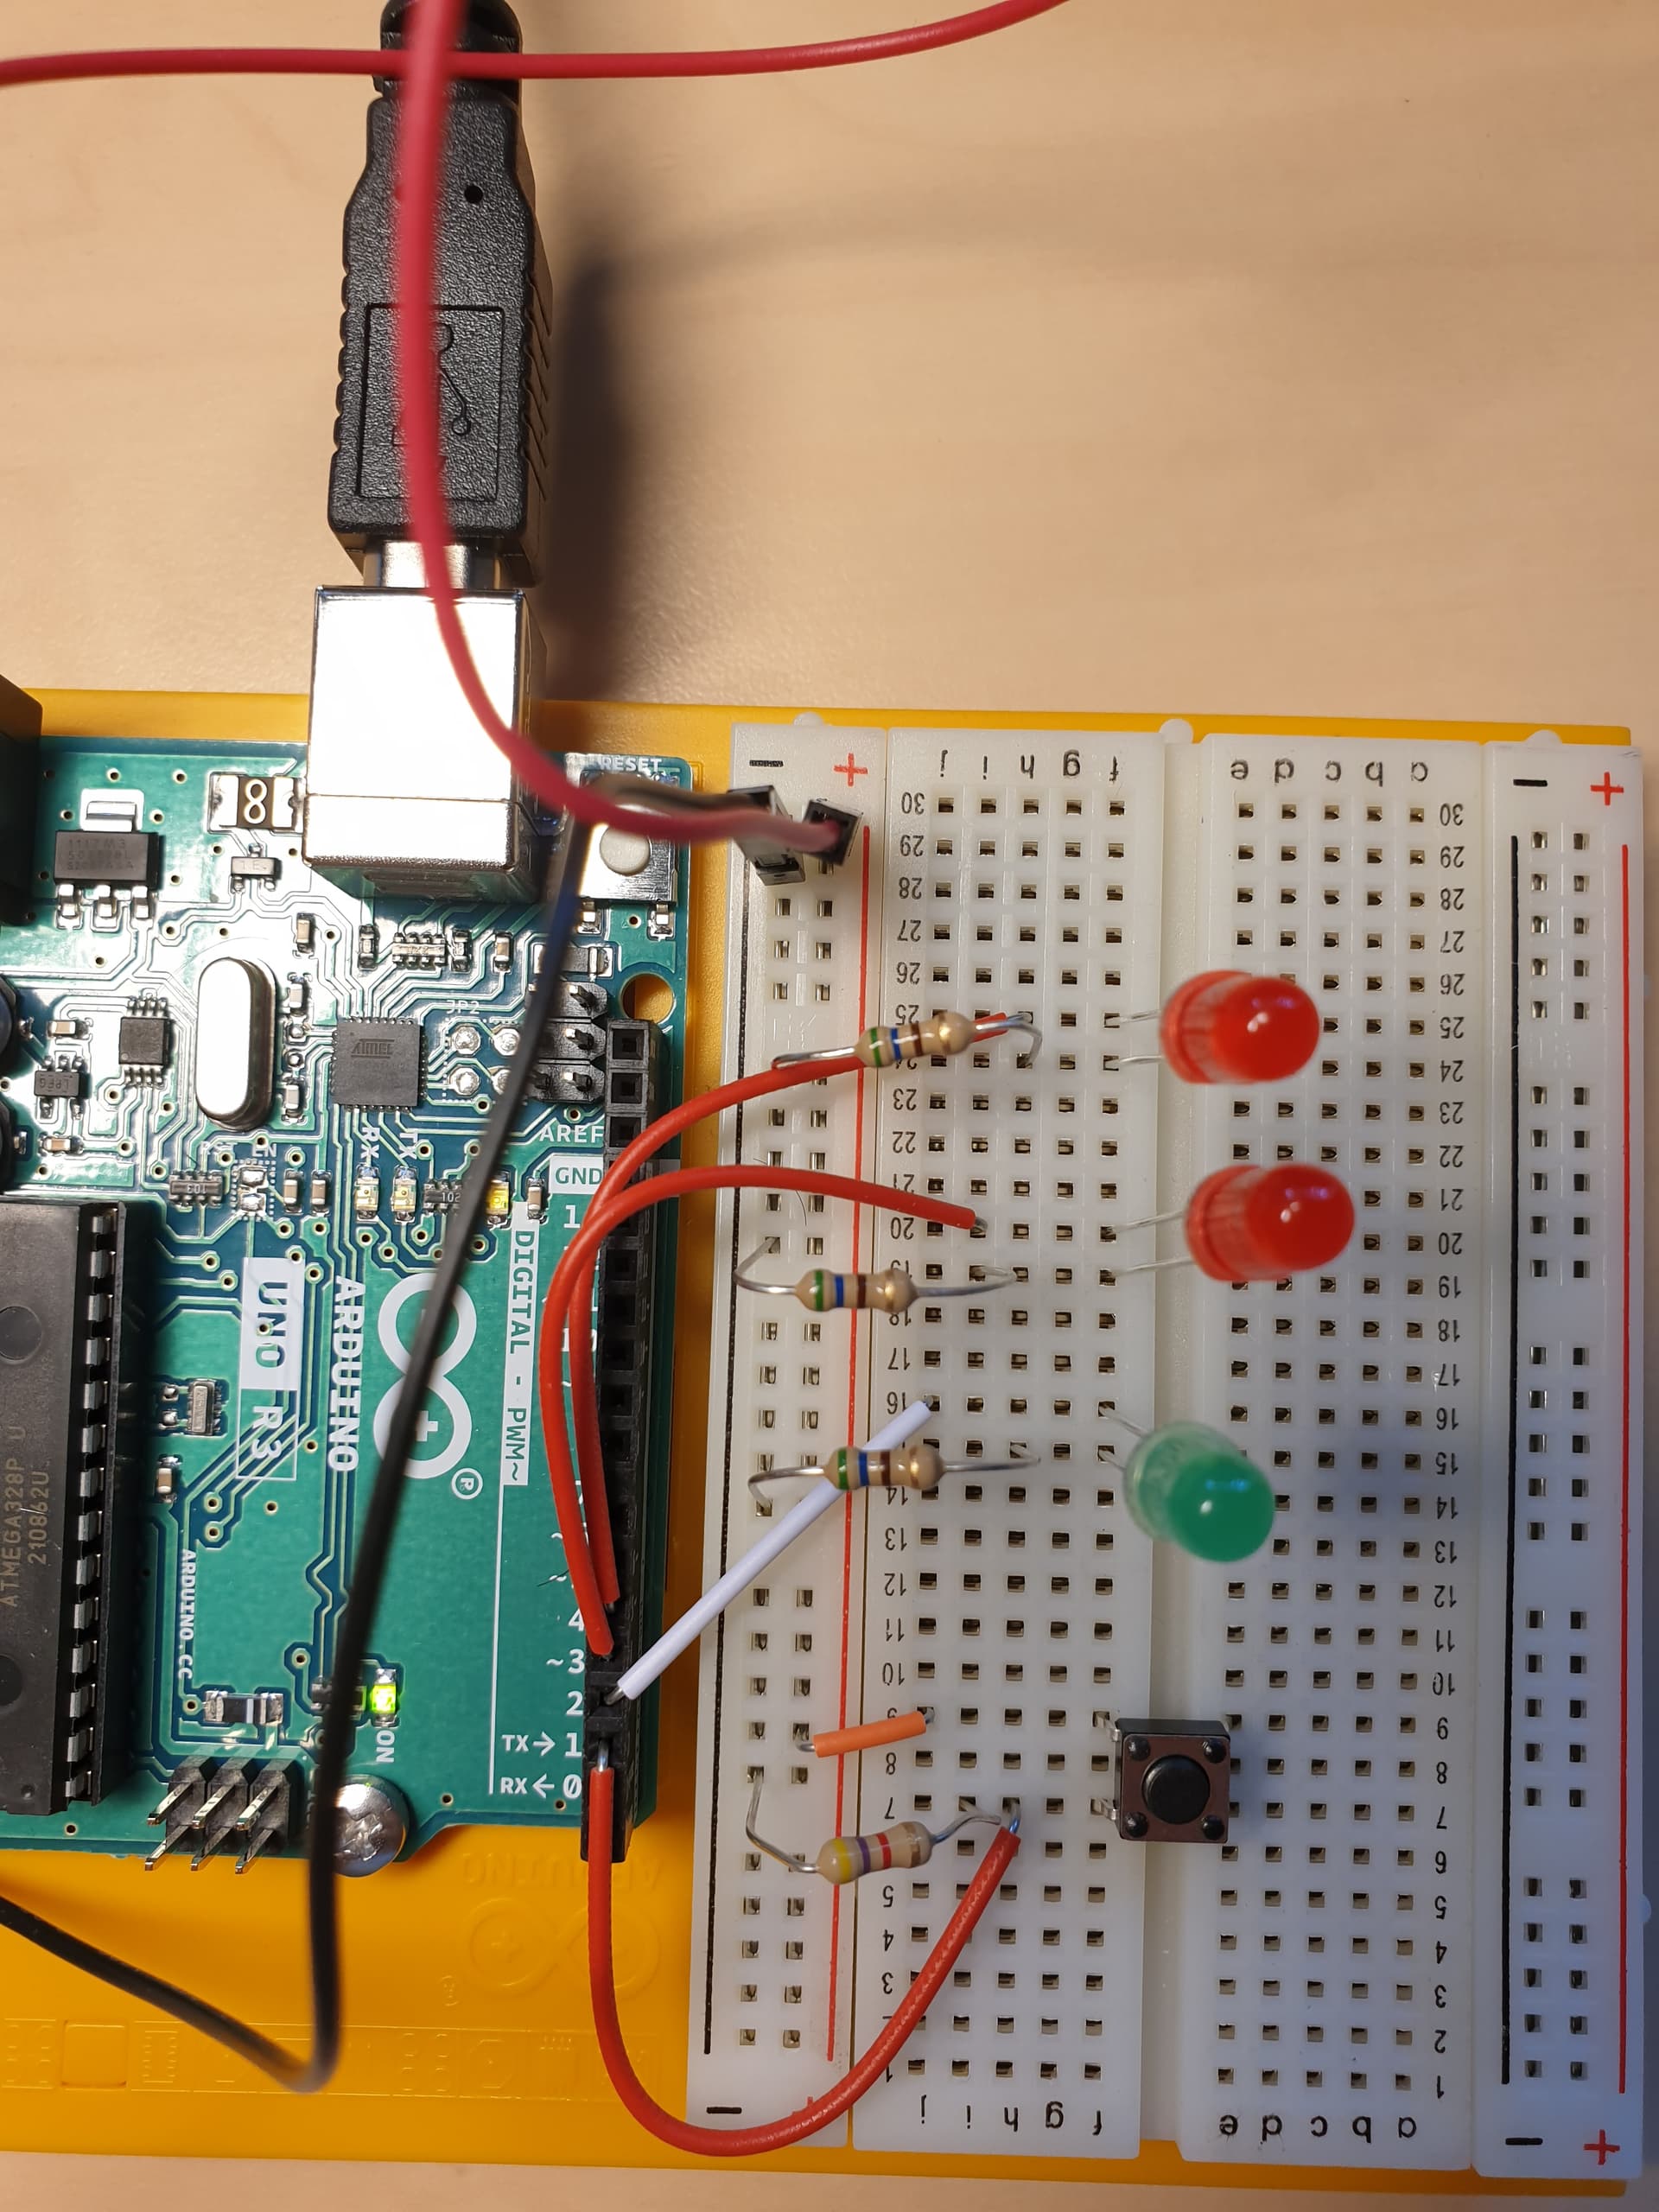
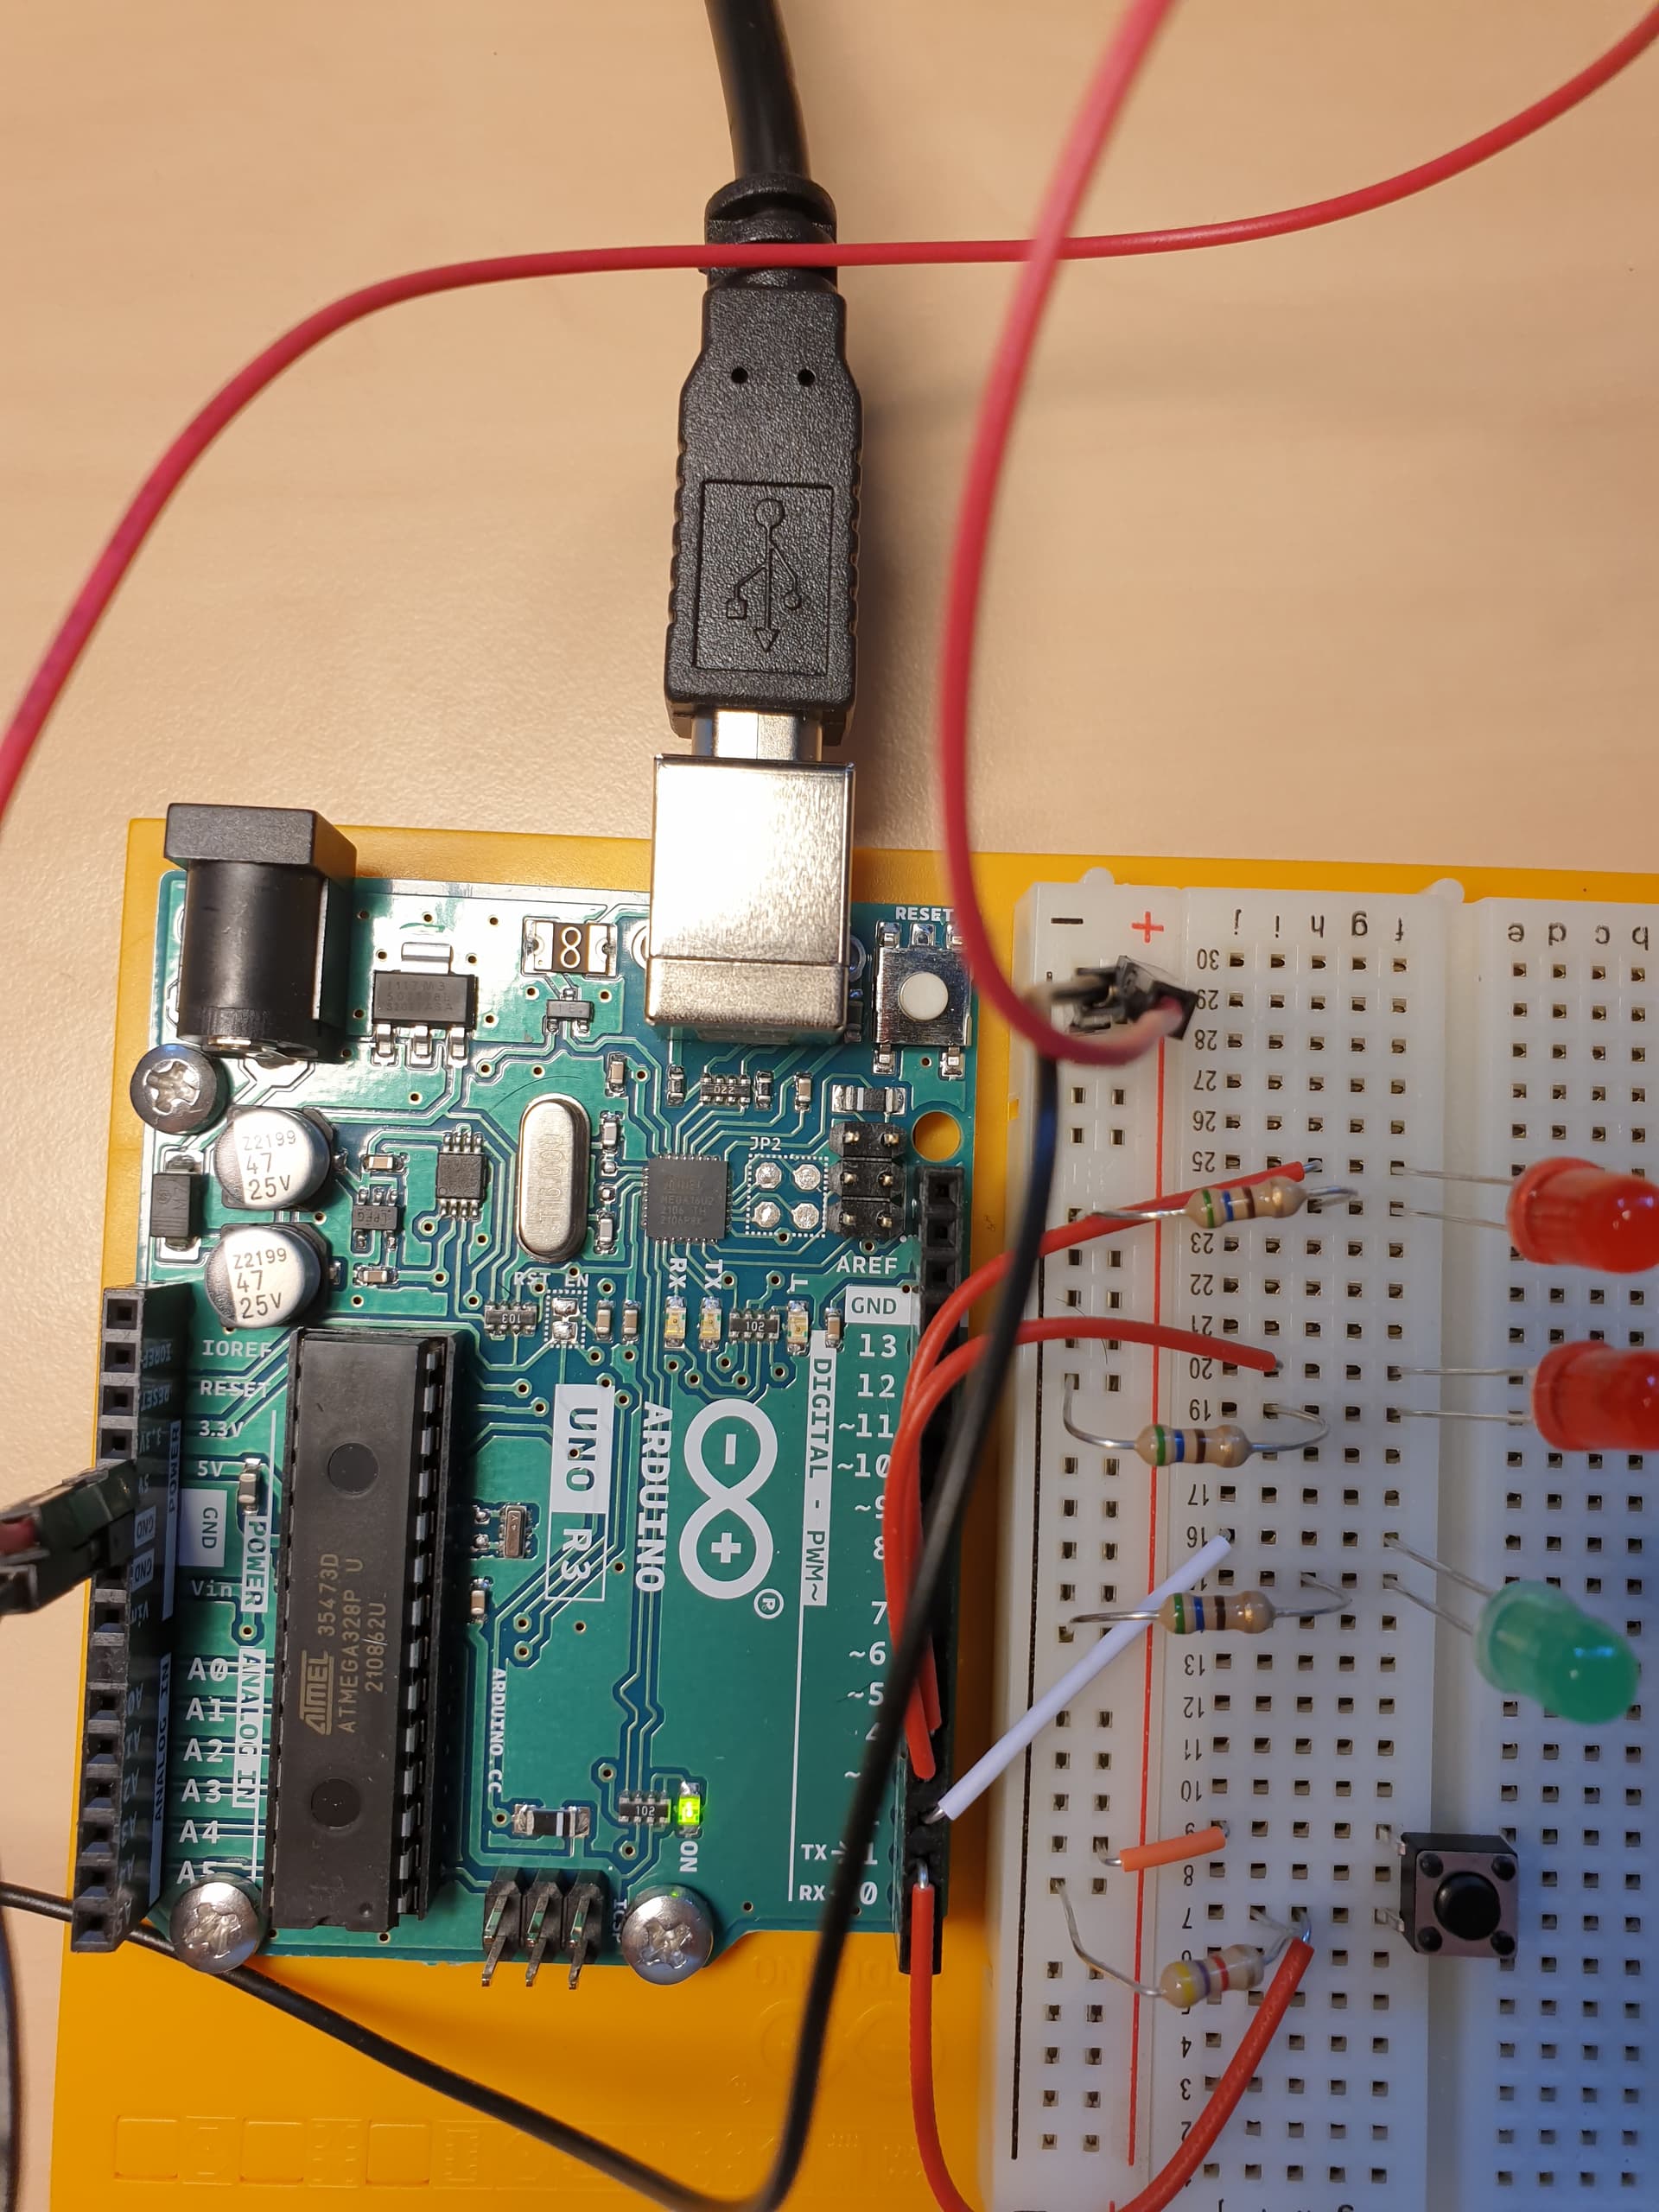
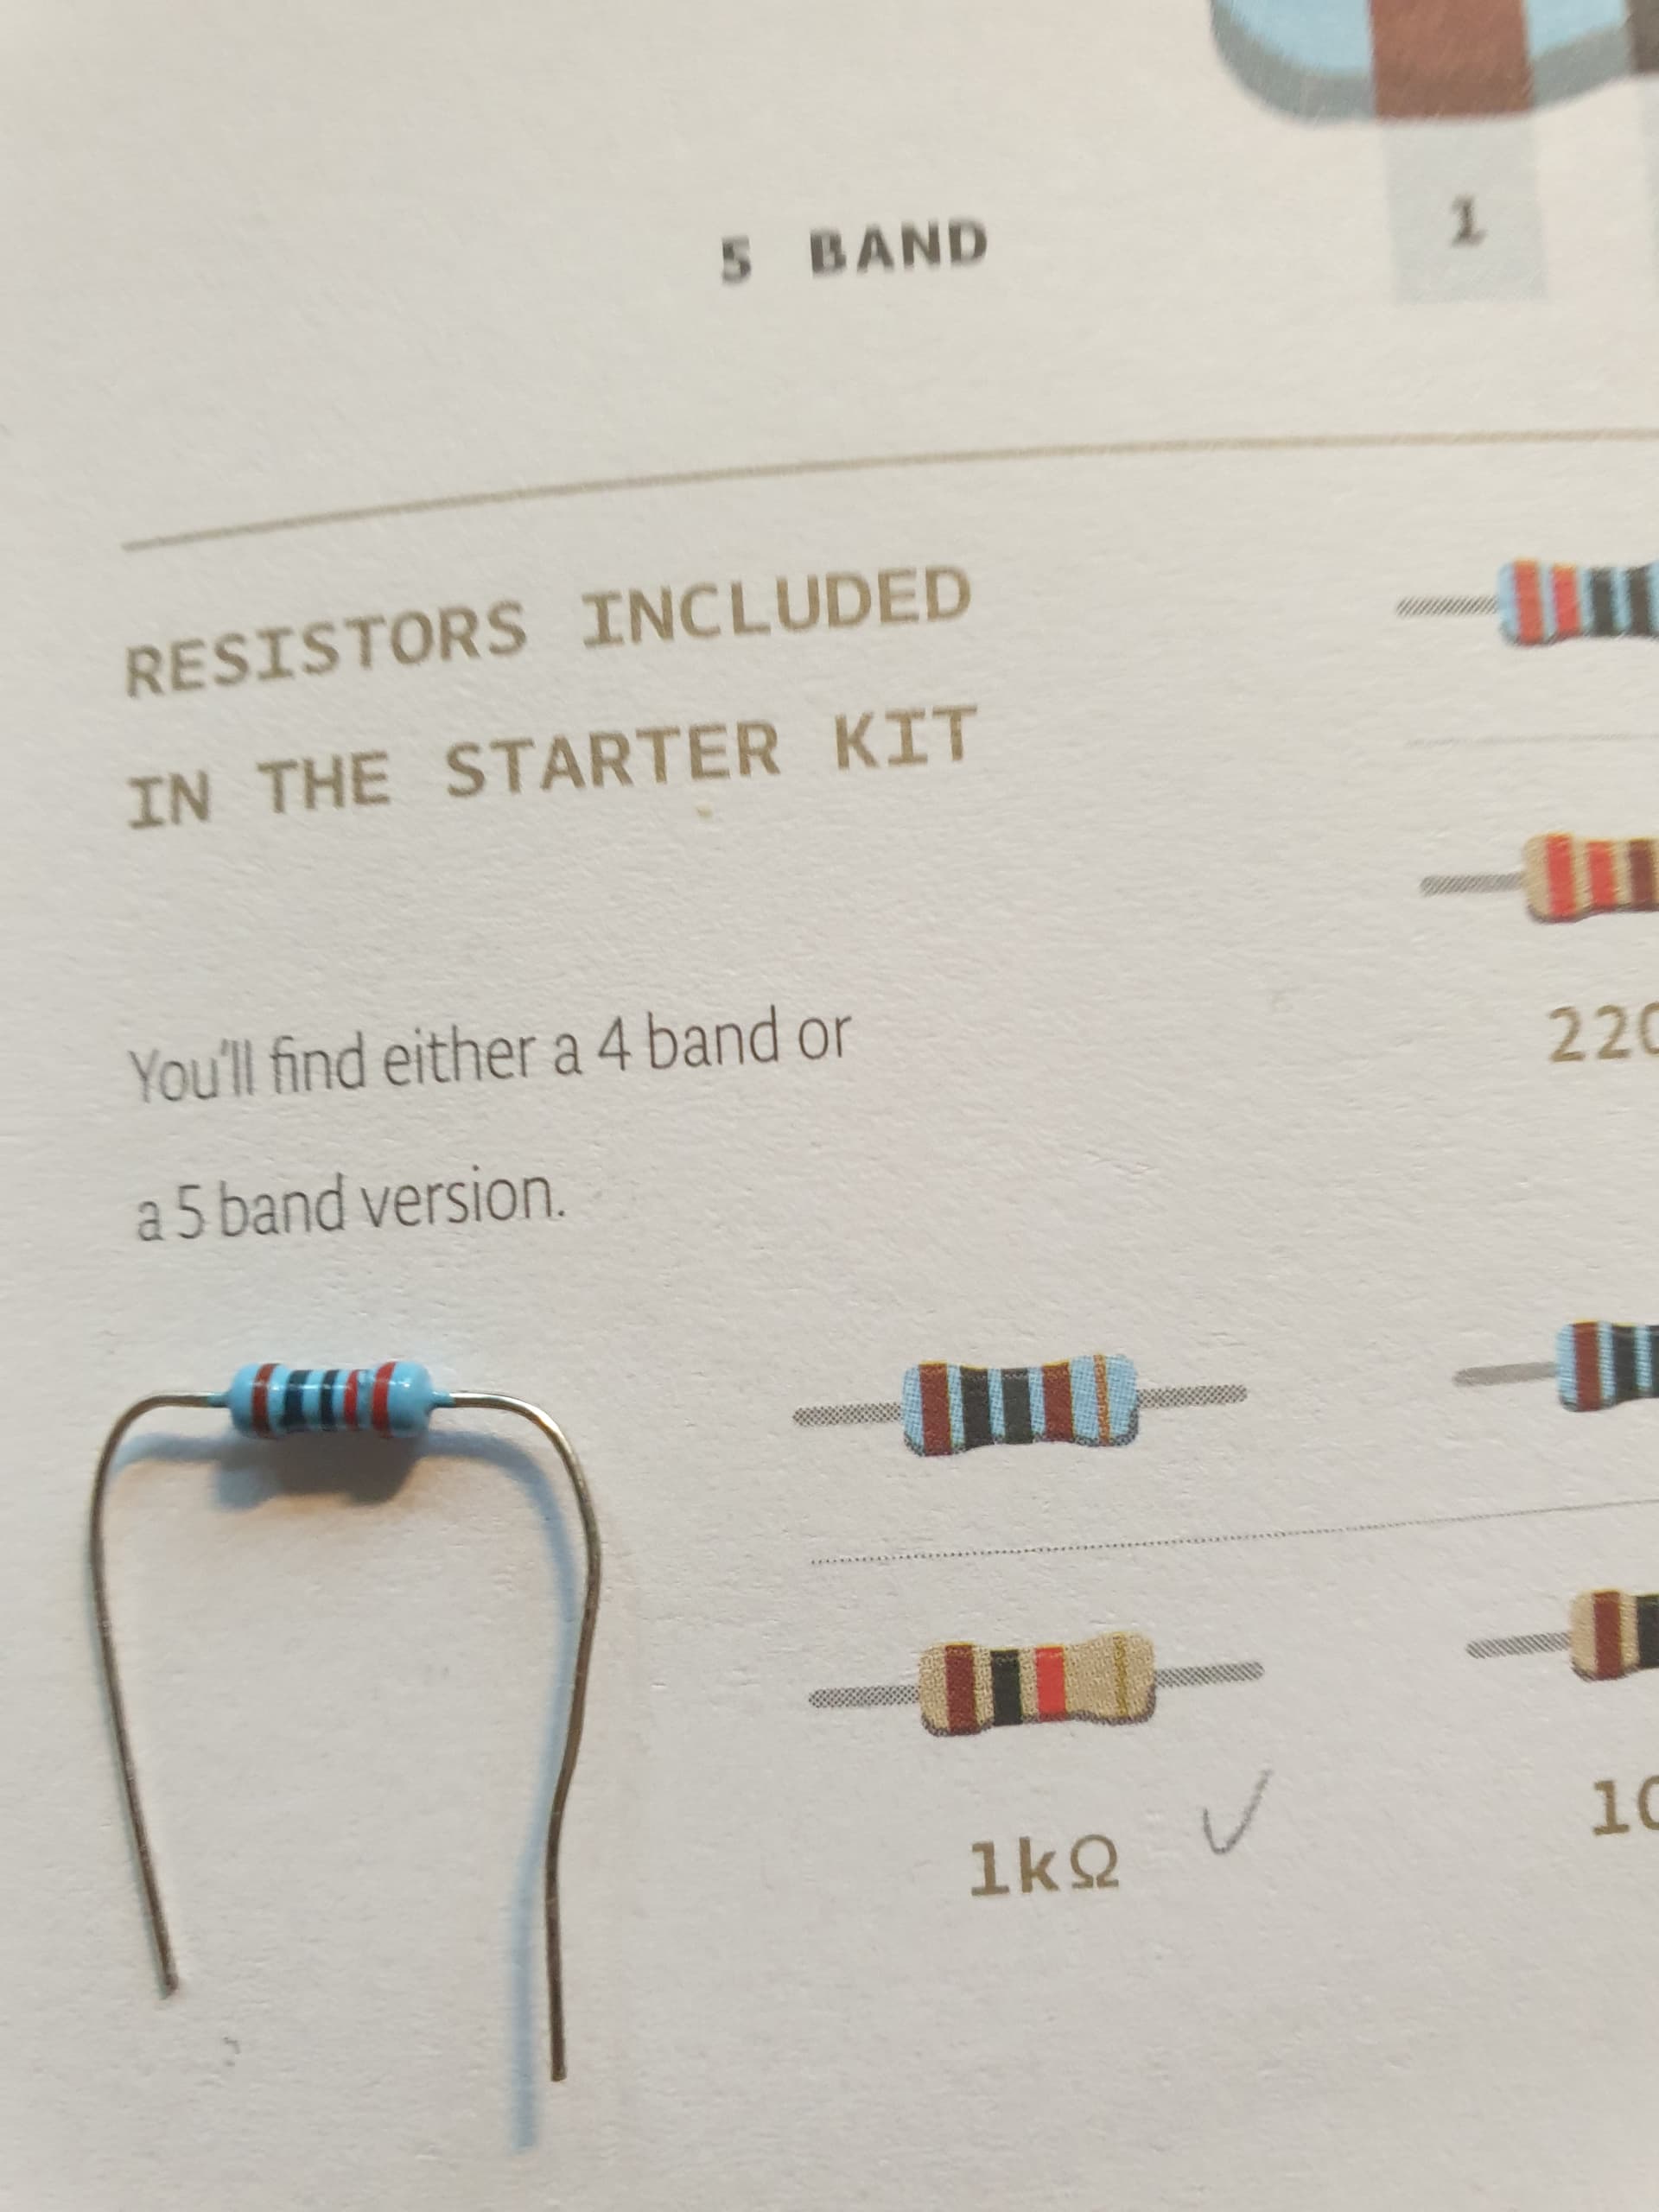
Arduino Starter Kit, where I have reached project 2 “Spaceship interface”. I have noticed that my kit don't contain 10 k ohm resistor. Is that alright?

So, the coding is set up and it looks alright.
But happen with the circuit. No LED light at all.
Could you help me out?
Best,
Janosch


Which color code do you expect for a 10k resistor?

Your switch might not be making good contact in the solderless breadboard.


Remove the white wire going to Arduino pin 2 pin 3.

Connect the Anode of the Green LED to 5V, does the Green LED turn ON ?

If it doesn't, reverse the Green LED.

Do similar with the other two LEDs.

After you get the LEDs tested as above, re-wire them as in your post #1.


BTW

  • Use diagonal switch leads on switches like this.

So I see you used the 4.7K instead. So it should work

@Delta_G

  1. No worries! Next time. Learning by doing! No master comes from scratch.
  2. Nop!

If you want to give it go again. Still not working.

@DrDiettrich expecting this:

After going through my boxes once again, I came across a resistor. Could be the 10 k ohm resistor?

Check it with your multimeter!

(Don't reply "I don't have a multimeter". You can guess what the response will be. You need one. It does not need to be expensive.)

@LarryD @jim-p
Hi everybody, because some of you asked if the LED-setup could be in the wrong directions. I have the proof that's not the case.

What you see below is that I wire the green LDE with the 5V Anode instead of the PIN 3 and like you see, the LED lights green.

So, what does that lead to?

With 4-pin pushbuttons, the safest way to wire them is to connect one pin to ground and the diagonally opposite pin to the Arduino input. Use pinMode(pin, INPUT_PULLUP). The input pin will read LOW when pressed and HIGH when not pressed. No resistor required.

Hi, @janosch1
Connect the green led wire back to pin 3 and try this code;

int switchPin = 2;
int greenledPin = 3;
bool switchstate;

void setup()
{
  pinMode(switchPin, INPUT);
  pinMode(greenledPin, OUTPUT);
}

void loop()
{
  if (switchstate == LOW)
  {
    digitalWrite(greenledPin, LOW);
  }
  else
  {
    digitalWrite(greenledPin, HIGH);
  }
}

Tell us what happens when you press the button.

The above instructions will show you how to post your code in a scrolling window to make it easy to read.

Thanks.. Tom.. :grinning: :+1: :coffee: :australia:

Under Files->Examples->Basic, there is a program called Blink.
Try running it and see if the LED on the UNO blinks.
That will at least tell you the UNO is OK

Hard to tell, use your DMM.

I don't understand why newbies are confronted with 4 and 5 band resistors :frowning:

These are the results of overproduction, which are now being thrown on the market for cheap money.

@PaulRB

Thank you mate. Its written on my list. :slight_smile:

@PaulRB Thank you for your support.
Sorry mate but I am newbie, project 2. Thats how far I got. Back to you instructions, where do to insert the code and where to wire?
I will insert the entire code the next post

@TomGeorge Thank you for support. Maybe, you saw it straight away, I am a newbie. Hehe. I have the post from Perry and know more the "T & C" of the form. I Just straight execute the learning from there, here you get the code from Arduino project and I how code it in Auto Format by Arduino IDE

int switchState = 0;
void setup() {
  pinMode(3, OUTPUT);
  pinMode(4, OUTPUT);
  pinMode(5, OUTPUT);
  pinMode(2, INPUT);
}
void loop() {
  switchState = digitalRead(2);
  if (switchState == LOW) {
    //the button is not pressed

    digitalWrite(3, HIGH);  //green LED
    digitalWrite(4, LOW);   //red LED
    digitalWrite(5, LOW);   //red LED
  } else {                  //thr button is pressed
    digitalWrite(3, LOW);
    digitalWrite(4, HIGH);
    digitalWrite(5, HIGH);
    delay(250);  //wait for a quarter second
    //toggle the LEDs
    digitalWrite(4, HIGH);
    digitalWrite(5, LOW);
    delay(250);  //wait for a quarter second
  }
}  // go back to the beginning of the loop

@TomGeorge Now I install you code. But before I do so, please keep in my mind that I am a newbie. Actually, I shall work with the code in the book because that's my learning curve and the book keeps building on from project to project.

@TomGeorge

int switchPin = 2;
int greenledPin = 3;
bool switchstate;

void setup()
{
  pinMode(switchPin, INPUT);
  pinMode(greenledPin, OUTPUT);
}

void loop()
{
  if (switchstate == LOW)
  {
    digitalWrite(greenledPin, LOW);
  }
  else
  {
    digitalWrite(greenledPin, HIGH);
  }
}

I am afraid to say mate, it happened nothing.

@jim-p
I found the program the Blink. Unfortunately, no, blink @jim-p . Maybe I do something fundamentally wrong. I dont know. I have to be honest, it's challenging when there is nobody on your side, I mean in the real world to show me how it works.