I am interested in finding the best termination practice that ensures long term
connection integrity when wiring up these microcontrollers. I am using Uno WiFi Rev2s and ESP32s in my building projects.
I have noticed the pre-assembled jumper cables you can get off eBay are not very snug
when pressed home on the UNO terminal blocks. Is there a source for male to male cables
that have a slightly larger pin diameter and would seat more firmly? Or slightly enlarged pin assemblies you could fashion your own cables with?
the dupont jumper cables are fine for prototyping but for more long term projects breakout boards solderable or with screw terminals will give better connections
also good quality power suplies are essential
for production runs of commercial or industrial systems custom PCBs would be produced
That is a understatement. The pin is often too thin, and after a few month they seem to oxide on the outside surface. Sometimes jumper wires are broken.
For long term integrity, you should not use breadboards or jumper wires. Soldered wires to a pcb board is good. A sturdy connector with gold plated pins is good. A screw type connector with a fork plug is good.
There are many connectors with yellow-ish pins that have the same look as gold plated, but they are not.
I use single core copper wires and breadboards for a test. There is no pin, the core has the right width.
For long term usage, I use a good quality board with a good quality prototype shield on top of it, and I solder the wires to the prototype shield.
If I only could buy wires with crocodile clips that would last
I guess potential unreliability is the reason they have never developed
a screw terminal or pcb type shield for the UNO WiFi Rev2 that would mate directly to the pin
headers. I have the blank Prototype PCB for Arduino UNO R3 Shield Board.
It matches the UNO exactly and I thought if pins could be located that fit tightly into the
UNO headers I could solder them on the blank shield board and mate it to the UNO.
My projects are for my property's building monitoring & control so the controllers are stationary after being installed.
You are waaaay ahead of me. I like your approach very much.
Regarding the perf board that plugs into your mega, does it come with those pins already
in place? If not, where do you source the pins? And also the screw terminal blocks?
That Walmart link was a great link for me! I now have a better
plan for approaching my builds for these building controllers I want to assemble.
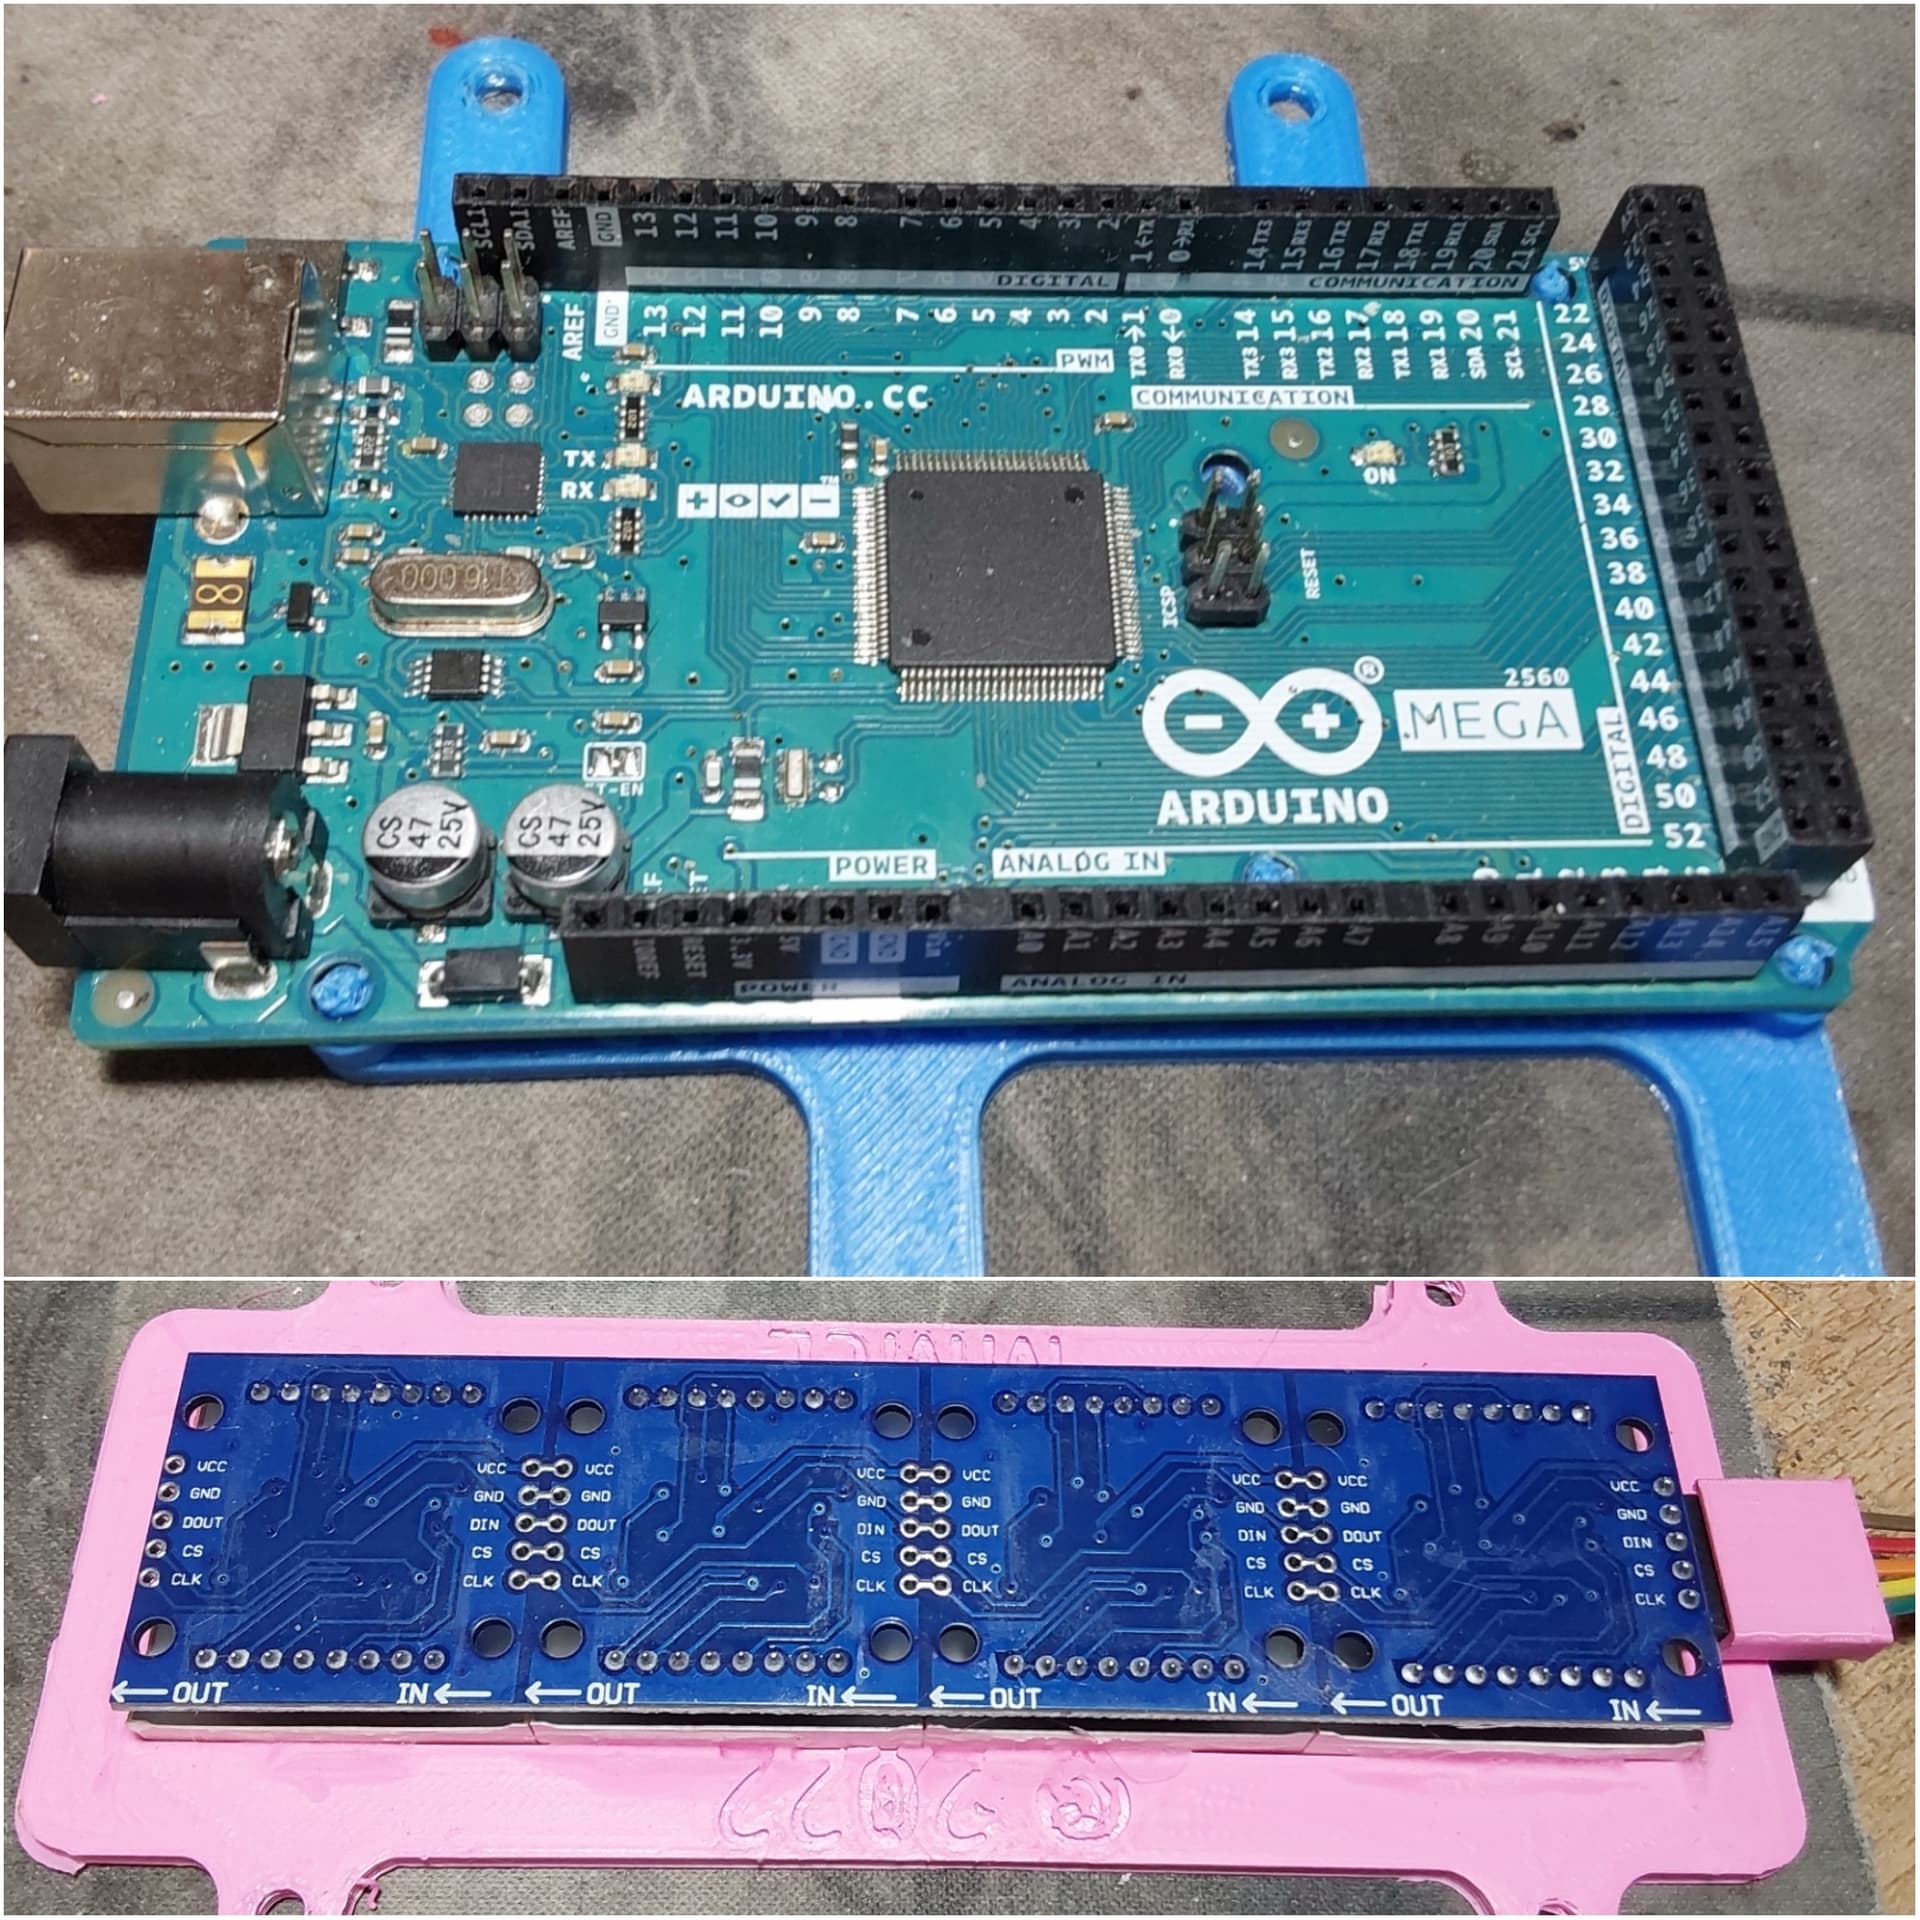
In your pic of the 3 boards sandwiched together are you using the pin headers
on the top perf board to pass all the way thru to the outputs/inputs on the bottom mega board?
No. There is no electrical connection between the PDB (Power Distribution Board) and the terminal shield. The two are only mechanically connected with some (blue in the pic) 3D printed 1/2" spacers and some #4 mounting hardware. The terminal shield and PDB are screwed together as a unit and the pins from the terminal shield engage the sockets on the mega 2560 and are, collectively, sufficient to hold everything together without any additional mounting hardware.
The mega is screwed to the 3D printed wide mount (available HERE) with more #4 hardware. The assembled "engine" is ready to mount and wire with just a screwdriver. Fully tightened the entire project can be wired ahead of time and the plugged in as a ready-to-go module.
I use heat shrink to band the leads. The first band is over all wires about 6" from the end on the leads to prevent the ribbon cable from splitting more. Then I split the Vcc and gnd wires out and band the pair. Finally a single piece of hs is placed on the gnd lead only. This way you can tell the power leads from signals and then be able to connect -- correctly -- to the PDB without using a cheat sheet. This allows you to ship a replacement part &/or cable and it can be field replaced with just a screwdriver, no soldering.
I also 3D printed slipon cable shrouds to group and label the opposite end. This increases retention of the duponts on the devices and makes it MUCH easier to connect/remove. The mounts are also 3D printed and available on CULTS3D.COM
I wish you were my neighbor. Lol
I would trade vino outta my vineyard for your "creations."
You gotta website or place where you show off your so-called hobby?
Ive made 3d pieces for others & shipped the parts. And given part is usually under $1 for material and the machine time is basically free at this point. Whatcha need made and what color do you want it in (even glow-in-the-dark)?
I will keep you in mind as I have several projects to complete. I have my home, woodworking
shop, wife's She Shed, Vino building, boiler house, and metal shop to all put monitors/controls in. I am a retired building automation tech and controls/monitoring is in my blood. Lol
I saw someone's tyranosaurus rex they 3D printed and it was awesome. I can see how you could get hooked on that printer very easily.