At the upper left of each message is a number "#xx" tell me which reply has the link that does not work.
I also have a couple of outstanding items for the Chinese new year...At least the most important stuff is already en-route.
Chances are they will just send out a new controller after you badger them but get them to put new driver boards with it as you cannot be sure they are not the cause.
Often I bypass Bangood, Ebay, Amazon and get my parts from Aliexpress.
Not had a bad experience yet and they are pretty prompt about mistakes etc.
More so than Ebay.
Changed all my controllers over to UNO's with regular CNC shields as I find they are more robust.
Also allows me to have very cheap spares laying around too.
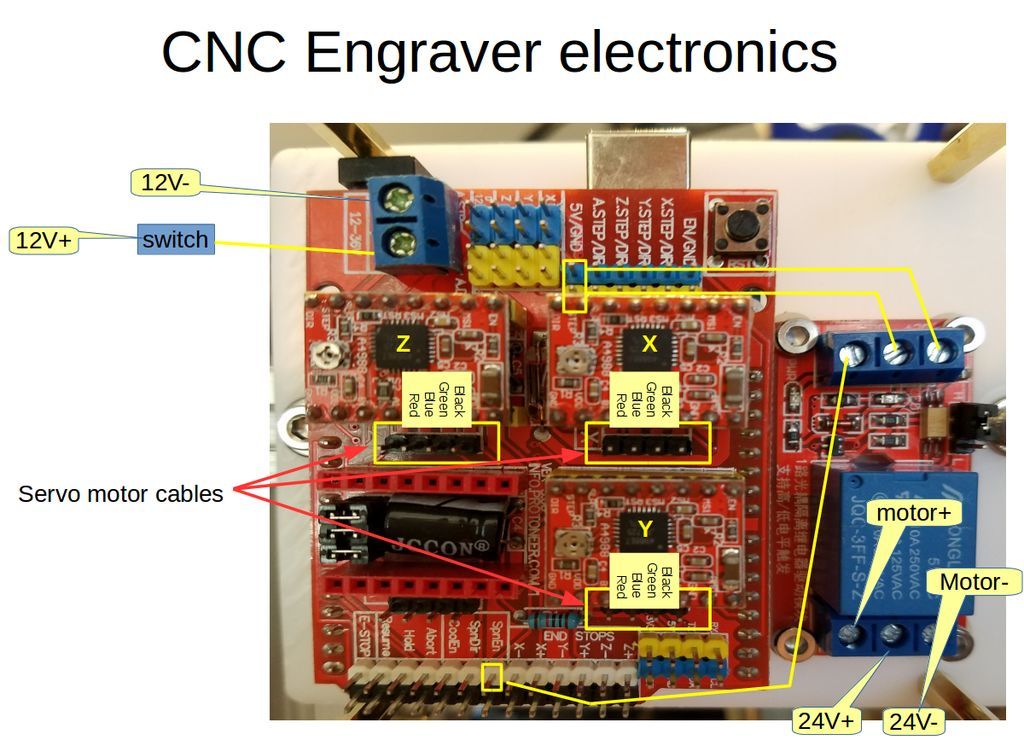
#13's "I would also refer you to a thread Danger and myself have in which there are also some decent tips." This link opens an image of my board.
I've tinkered a little bit more, and applying a cold pencil eraser (chilled with freeze spray) to the CH340C chip cures the failure. Putting my finger on the chip brings it right back. I've inspected it pretty closely with my dissecting microscope and don't see any cold solder joints, solder splashes, or detritus. It fails with all the cables disconnected except the USB and power. In fact, it fails with just the USB connected, as enough power seems to get there thru USB to operate the processor at idle. None of my usual fast sources (Mouser, Digikey, etc) carry the chip, so I don't think I can make progress any faster than waiting for a replacement even if I was willing to risk the warranty.
If I knew it was going to take three months to get a working machine, I would have happily spent more money.
jjgurley:
If I knew it was going to take three months to get a working machine, I would have happily spent more money.
I've had mine about that long. Mine went pretty smooth for a time. But the spindle is crap and the run out gets bad pretty quick. So, I've spent what little time I've had over the last month designing and milling a new mount for the new spindle. One more piece to go. So, hoping the original spindle holds up just a little longer.
These machines are a perfect example of "You get what you pay for". However, the frame is not bad and the steppers seem ok. Apart from that, you would probably be replacing that board, the spindle and the printed parts sooner rather than later.
I followed Bob's advice of having multiples of everything and switched to an Uno based system as I have several of them. And got myself 2 control boards (one as backup). Extra stepper modules, etc. Basically if any part of the control system goes bad, it's a simple swap once the issue is found. I think I only used the original controll board for 3 or 4 little jobs and stuck it in box somewhere.
And I'll add, I got mine to learn with. And it has been more of a learning experience than I thought it would be!
Link fixed...my bad.
I used my original controller until I hit a snag with what turned out to be just a bad driver.
Then went to the UBO/shield approach as it handles more voltage than most of the ones supplied with these machines.
The simple swap method has been handy here too as I once corrupted GRBL !
Who knew uploading a blink sketch would do that when you have over 20 live boards and forget to change the COM port.
Suspected a board issue so a 2 minute swap to put another UNO in and off to the races while I figured out the real issue.
In almost all cases even the wires themselves will just swap from a custom board to a CNC shield.
Only caveat I have there is for spindle cables which I would suggest to re-route through another form of control as you may find you need more current than the shield / custom board can handle.
I know these are sort of anecdotal stories but they do carry valid points.
Can you save me a lot of time and point at a "UNO/Shield" version of a board? I'm starting from scratch here and the jargon is unfamiliar. I'll go read the article you linked to - maybe it will become crystal clear.
These are what we were referring to
Although depending on exactly where you are you may have access to a store that is nearer (maybe not cheaper) If you need it in a rush then there is always the overpriced Amazon
The search term to use is " arduino cnc v3 " which should bring up a lot of hits.
I prefer the 8825 drivers as I have had fewer failures since moving to them.
So far I have not lost a UNO or a SHIELD at all.
If you are a penny pincher like me you can also often source the individual parts a little cheaper eg shield, UNO, drivers. And as for drivers maybe the A4988 could be a little cheaper and just as reliable with a small fan blowing over them.
@Danger....
I re-read our thread (the whole thing) and the wife asked what I was laughing at.
Still as funny and just as informative the second time around.
I've been through parts of that thread numerous times trying to find that tid bit of information you dropped about this and that. There's more than one place in it I start chuckling. And, seeing as I know myself pretty well, I can guarantee that thread isn't dead!
Nothing wrong with cutting up from time to time. 
I bought the Aliexpress controller linked above, and it finally arrived with zero documentation. Could someone point me at something that describes all the jumpers, which three of the four driver sockets to use, adjustments, where the spindle plugs in, etc? I'm not excited about learning too much about the Arduino - I just want to carve some signs for the wife.
Banggood hasn't decided if they can get a new board, so I'm going to drag my feet on the changeover until they declare, since all the cables will need replacement (it appears). I also ordered a CH340C part, which I will swap out on my bad unit, perhaps fixing it.
There is no documentation for any of those chinese shields.
Luckily a lot of it is marked anyway and others have made lots of documentation on the internet.
Simple search for "cnc shield v3 setup" will give you lots of results that will help you.
"CH340C part" would I assume be the UNO that drives the whole thing.
That can be tested separately from the cnc shield anyway just by treating it as an Arduino UNO and sending sketches to it to check parts of the board.
The cables can be easily checked both visually and with a simple multimeter and usually dont need replacing
I would recommend mounting the UNO on a thin piece of plywood or some other thin but sturdy material the same size as the mounting for your original board to make sure the UNO remains insulated from frame of the machine. It will also make it easier for you to mount and test the machine when the time comes.
As it uses less space than the original you may also be able to add a couple of smaller add on boards at a later stage. I have a relay board on one of mine and a small voltage regulator board for ancillary items.
That is, if not exact, very similar to my board. (mine has "proteneer.com" on it)
If you use the link below this post, you can see a bit larger image.
And by no means is plugging the steppers in like I have the best way of doing things. It works for me though.
But those are all the connections you NEED to get running.
You do need a way to power your spindle. I have mine powered through the board that came with my machine. That part of my board is working fine for that.
Don't forget to put a piece of insulation tape across the top of the USB connector on the UNO before you start to play.
Somebody recently had an issue with shorting out and whilst not really mentioned in most places it is a little trick that may save you some headache.
By CH340 part, I mean the SOIC16 integrated circuit next to the USB port that converts from serial to USB. I'll try replacing that, since my existing board won't drive the spindle any better than it does anything else. I was wondering how the UNO board would handle the spindle, and I guess the answer is it doesn't.
That is where an additional device such as a MOSFET or RELAY would be required.
Using an external device give you more freedom in that you can match the external device to a larger load if needed and should it fail at any point you only need to replace a smaller cheaper item and not the whole board.
One such method here but there are simpler methods.
This method is the one I use but with an SSR now.
Bear in mind that if you ever move to a larger more durable spindle then the external device will be a requirement as the chances of your all in one board supporting a better spindle is quite slim.
Most of us prefer heavy duty SSR's or high power mosfets for the spindle task.
Simply replacing the CH340 chip does not guarantee any sort of fix.
They have been proven to be a lot more durable than the standard arduino approach so chances are that if you destroyed that you also did some other major damage. Board rework at that level requires specialist equipment.
It was also the same reason we suggested the UNO and SHIELD approach as it makes swap outs a simple process and the UNO becomes more isolated from the shield in some regards.
The rework is easy, since I have the right tools and some experience. The fact that the failure comes/goes with the temperature of the CH340C gives me a high degree of confidence it is the problem. Cooling in the vicinity doesn't help. It's possible its a signal with a bad level coming into the chip, but I'm too lazy to pull out the scope.
If the easy path doesn't work, Plan B will be to figure out the spindle control.
Finally got my CH340C parts, reworked it (took three minutes), and it is up and running, except now I don't know what to do with it.
My Z axis is backwards (I think) - I think there's a one-time command to flip it, but I'll have to dig it up somewhere. Also, what GRBL control program is more robust than the one that comes with the unit?
I haven't actually tried an engraving since I've been too busy lately, but at least the communications errors are gone. I probably have to watch some Youtube to figure out the basics.
Two ways to swap the Z.
- Turn the connector for the Z around where it mounts to the board. Easy if it is the UNO and SHIELD approach.
- Invert in the parameters.
As for software there are lots of choices. Depends on if you want windows or linux based ?
Think we already mentioned UGS.
Also depends on if you want to use laser or CNC.
Windows, CNC
My connectors are keyed, so I'd either have to unsolder the PC mounted part or pluck pins out of the shell. I could shave off the keys, I suppose. I thought I read somewhere about a GRBL command that permanently swaps an axis. Then maybe I'm mis-understanding the motion - when I push the "up arrow" on the GRBL or UGS console, the axis moves down.
UGS is my preference for software but it does have some small limitations in that it does not always handle large files too well and may occasionally lock up.
Part of that would depend on the job size you expect to be able to handle.
And as its only a small machine you may be OK with UGS.
Occasionally those Chinese cable looms are supplied with the wires not in the correct order.
Compare it to one of the others that work OK.
Removing pins from the shell is a trick I have used here to rectify that simple mistake.
I just used a needle to push the pin tab down and then pull the wires free.
Then popped the tab back up and inserted them back in the correct order.
But inverting the axis in firmware will also do the job.
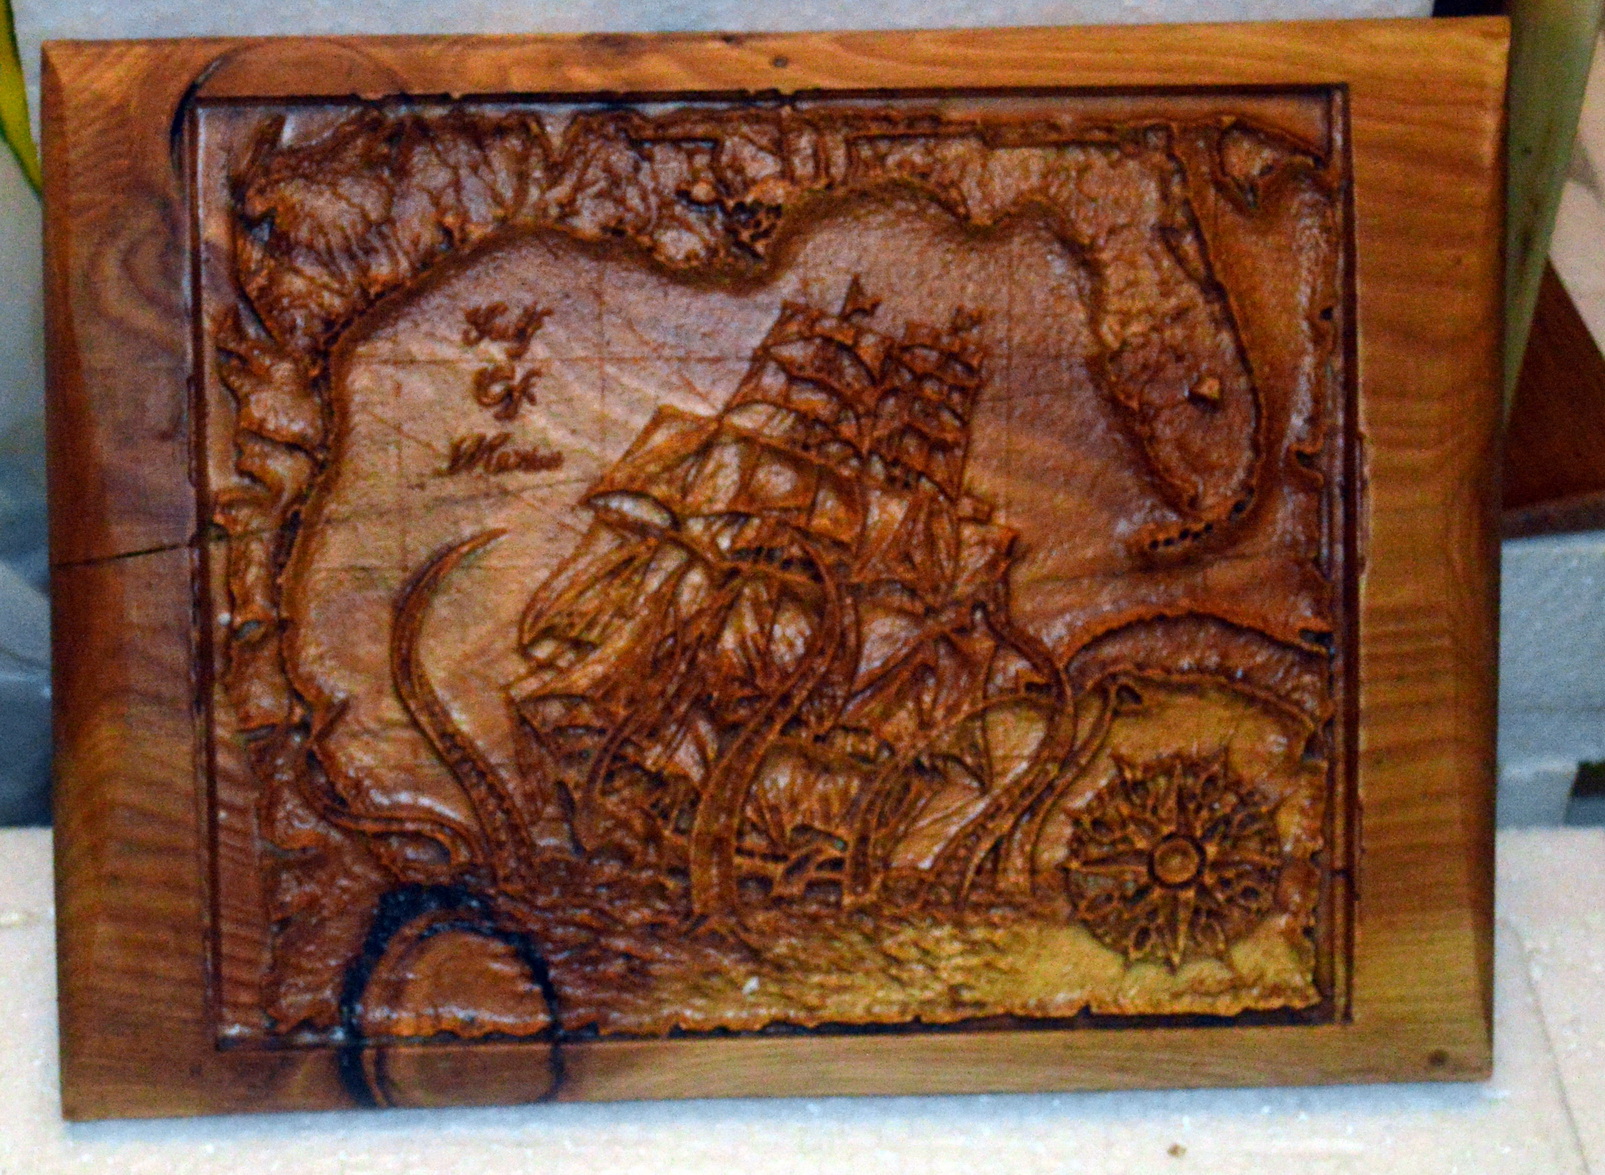
made with UGS.
@Danger
Sometimes peeps get inspiration from others...
And yea I was quite proud of em seeing nobody taught me how to do it.
BTW a truck load of cherry, maple, walnut, and oak rounds just landed in my yard courtesy of the missus.
Gotta find me somewhere to stack em to dry.
Already took a thinner slice and popped it in the microwave. Smell of cherry was fantastic.