I want to connect the ILI9341 display and the SD card that comes with it to the esp32. I tried to connect one device to VSPI, the other to HSPI, but because of this, the blue LED on the esp32 stopped lighting, and the board refused to do anything at all. Attempts to install both devices on one bus (VSPI) were also unsuccessful. I have very little experience, and I do not understand how to implement this idea. On the Internet, I saw how this problem was solved using classes, but then alternative pins were used, because of which the esp32 stopped working again. How to solve this problem?
Divide and conqurer.
First get the display to work. Make notes and pics of the wiring.
Now remove the display and just get the SD card to work but use different pins.
Also make a note and pic of the wiring.
Now combine the two.
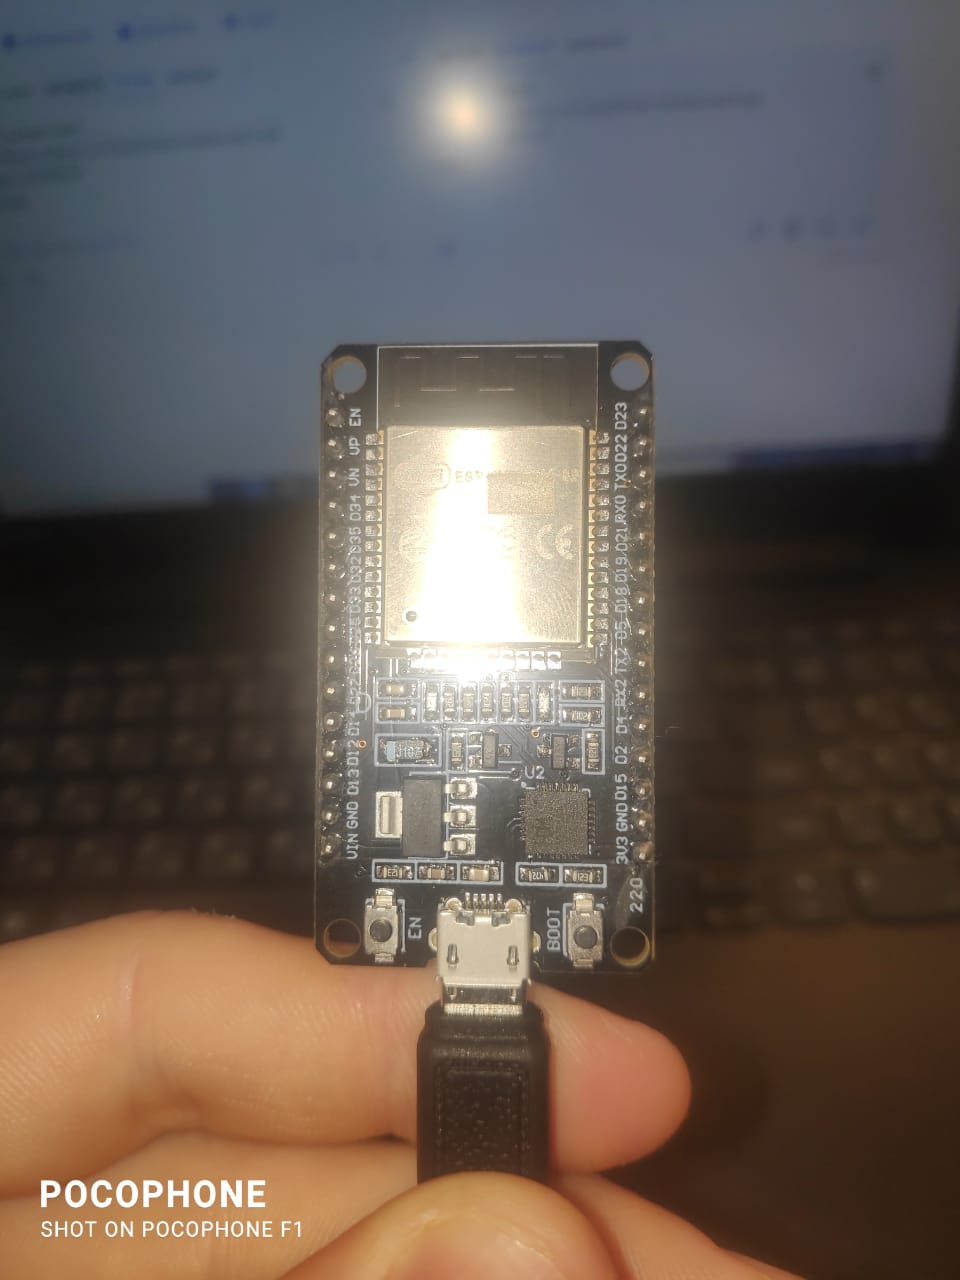
Do you have a NanoESP32 (i suspect not but you posted in the NanoESP section) or a different board. Please show us the exact board you have.
The SD library provides the option of passing a reference to the SPI object to at initialization, This will give you the option of connecting it to HSPI without to much issue, leaving VSPI (the default) for connecting the IL9341
Sorry, this is my first day on this site. I have ESP 32 DEV MODULE. I tried to connect devices separately. The display works, but to check the operation of the SD card, logs are required, and in the logs, instead of letters and numbers, there are hieroglyphs (I watch through a serial monitor). Here is a sample code:
// ESP32 Bluetooth GIF Receiver
#include "BluetoothSerial.h"
#include <SPI.h>
#include <FS.h>
#include <SD.h>
#include <TFT_eSPI.h>     // Include TFT library
#include <AnimatedGIF.h>  // Include GIF library
                          // TFT pins
#define TFT_MISO 19       // (leave TFT SDO disconnected if other SPI devices share MISO)
#define TFT_MOSI 23
#define TFT_SCLK 18
#define TFT_CS 15  // Chip select control pin
#define TFT_DC 2   // Data Command control pin
#define TFT_RST 4  // Reset pin (could connect to RST pin)
// VCC to 5V if J1 open else 3.3V

TFT_eSPI tft = TFT_eSPI();  // Invoke custom library

#define HSPI_MISO 27
#define HSPI_MOSI 13
#define HSPI_SCLK 14
#define HSPI_SS 26
SPIClass* vspi = NULL;
SPIClass* hspi = NULL;
void setup() {
  Serial.begin(115200);
  vspi = new SPIClass(VSPI);
  hspi = new SPIClass(HSPI);
  vspi->begin(TFT_SCLK, TFT_MISO, TFT_MOSI, TFT_CS);
  hspi->begin(HSPI_SCLK, HSPI_MISO, HSPI_MOSI, HSPI_SS);
  tft.begin();
  tft.init();
  pinMode(25, OUTPUT);
  digitalWrite(25, HIGH);
  tft.setRotation(3);
  tft.fillScreen(TFT_BLACK);
  tft.setTextColor(TFT_WHITE);
  tft.println("Display OK!");
  if (!SD.begin(HSPI_SS, *hspi)) {
    Serial.println("Card Mount Failed");
    tft.println("Card Mount Failed");
    return;
  } else {
    Serial.println("Card Mount Success");

    tft.println("Card Mount Success");
    return;
  }
}
void loop() {
}
You have to Install these libraries:
Adafruit_GFX
Adafruit_ILI9341
SD
Use shared SCK, MISO, MOSI (GPIO 18, 19, 23).
Use unique CS pins (e.g. GPIO 15 for display, GPIO 5 for SD).
How to physically use the same pins for the display and the SD card? Only one wire can be installed on the leg of one pin
I moved your topic to a more appropriate forum category @sarkel_77.
The Nano Family > Nano ESP32 category you chose is only used for discussions directly related to the Arduino Nano ESP32 board.
In the future, when creating a topic please take the time to pick the forum category that best suits the subject of your question. There is an "About the _____ category" topic at the top of each category that explains its purpose.
Thanks in advance for your cooperation.
You can use a breadboard. Connect SCK, MOSI,MISO pins of the Arduino to 3 different points of a breadboard with 3 jumper wires. Then you can connect those 3 pins with the SCK,MOSI and MISO pins of your SD card and display using jumper wires.
what specific display are you using? give a link?
also a link to the SD card reader?
I have connected a HiLegGo 240X320 Resolution 2.8" SPI TFT LCD Display Touch Panel ILI9341 plus a SD card reader to a ESP32
used VSPI for display and HSPI for SD card
display pins
// #define TFT_MISO 19  // (leave TFT SDO disconnected if other SPI devices share MISO)
// #define TFT_MOSI 23
// #define TFT_SCLK 18
// #define TFT_CS   15  // Chip select control pin
// #define TFT_DC   2  // Data Command control pin
// #define TFT_RST  4  // Reset pin (could connect to RST pin)
// VCC to 5V if J1 open else 3.3V
sd card pins
// define HSPI pins (default HSPI pins crash processor)
#define HSPI_MISO 27  // note 12 causes problems when RST pressed
#define HSPI_MOSI 13
#define HSPI_SCLK 14
#define HSPI_SS 26
I used the TFT_eSPI library including using the touch screen

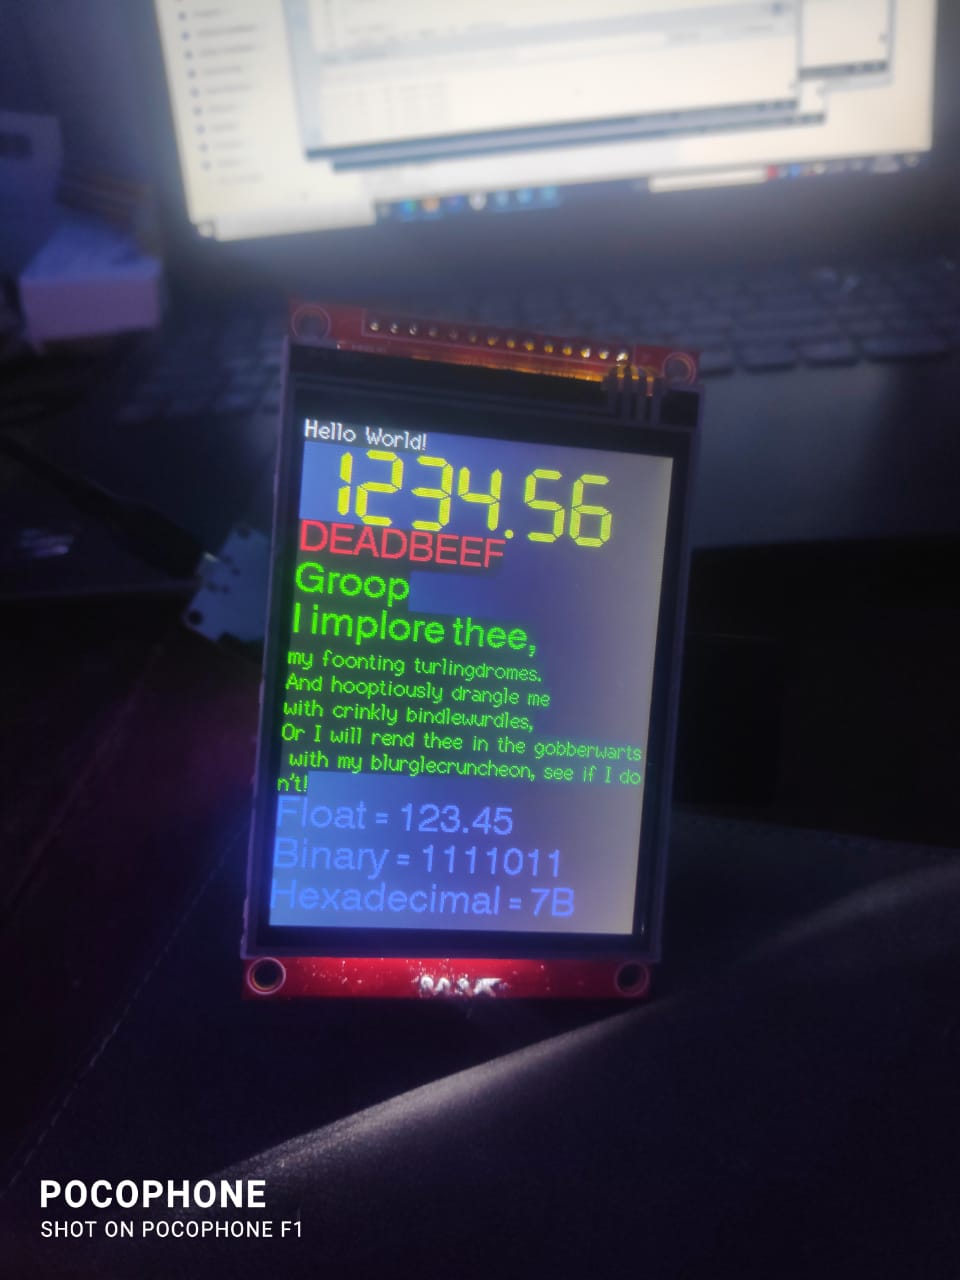
Here is a picture of my display. It has a slot for installing an SD card. I tried to install a 64 GB and a 16 GB SD card, but even with a primitive check the SD card does not initialize. I saw a sample of your sketch on the forum, where both the screen and the SD card were used at the same time, but when I tried to use it myself, the display stopped working for me too.
can you give a link to the sketch?
which ESP32 board are you using?
which version of the ESP32 core libraries?
link to your sketch:
ESP32 DEV module and 2 SPI devices - #4 by horace?
I use the latest versions of libraries provided by the Arduino development environment.
Good idea! Thanks, I'll try.
tested again - TFT on VSPI and SD reader on HSPI work OK together
Arduino IDE V2.3.5 ESP32 core 3.2.0
TFT.ino file
/// ESP32 TFT_eSPI library  example TFT_Print_Test on VSPI with  with SD card reader on HSPI
//  240X320 Resolution 2.8_ SPI TFT LCD Display Touch Panel ILI9341

// in file TFT_eSPI/User_Setup_Select.h uncomment the following definition
// #include <User_Setups/Setup42_ILI9341_ESP32.h>           // Setup file for ESP32 and SPI ILI9341 240x320

// in file TFT_eSPI/User_Setups/Setup42_ILI9341_ESP32.h uncomment the definitions setting pin numbers
// #define ILI9341_DRIVER
//
// #define TFT_MISO 19  // (leave TFT SDO disconnected if other SPI devices share MISO)
// #define TFT_MOSI 23
// #define TFT_SCLK 18
// #define TFT_CS   15  // Chip select control pin
// #define TFT_DC   2  // Data Command control pin
// #define TFT_RST  4  // Reset pin (could connect to RST pin)  Reset input active LOW.  Pull to 3.3V if not using.
// 5Volt power to display VCC if J1 is open
// LED to 3.3V

/*
 Test the tft.print() viz. the libraries embedded write() function

 This sketch used font 2, 4, 7

 Make sure all the required fonts are loaded by editing the
 User_Setup.h file in the TFT_eSPI library folder.

  #########################################################################
  ###### DON'T FORGET TO UPDATE THE User_Setup.h FILE IN THE LIBRARY ######
  #########################################################################
 */

#include <SPI.h>

#include <TFT_eSPI.h>  // Hardware-specific library

TFT_eSPI tft = TFT_eSPI();  // Invoke custom library

#define TFT_GREY 0x5AEB  // New colour


void setup(void) {
  //uint16_t ID = tft.readID();
  Serial.begin(115200);
  delay(2000);
  Serial.println("\n\nESP32 TFT_eSPI library  example TFT_Print_Test");
  Serial.println("\n\nESP32 TFT_eSPI library  example TFT_Print_Test with SD card reader");
  Serial.println("TFT setup - display every 5 seconds");
  tft.init();
  tft.setRotation(2);
  Serial.println("SD setup - hit key to print SD contents");
  setupSD();
}

void loop() {
  static long int timer1 = 0;  //millis();
  if (millis() - timer1 > 5000) {
    timer1 = millis();

    // Fill screen with random colour so we can see the effect of printing with and without
    // a background colour defined
    tft.fillScreen(random(0xFFFF));

    // Set "cursor" at top left corner of display (0,0) and select font 2
    // (cursor will move to next line automatically during printing with 'tft.println'
    //  or stay on the line is there is room for the text with tft.print)
    tft.setCursor(0, 0, 2);
    // Set the font colour to be white with a black background, set text size multiplier to 1
    tft.setTextColor(TFT_WHITE, TFT_BLACK);
    tft.setTextSize(1);
    // We can now plot text on screen using the "print" class
    tft.println("Hello World!");

    // Set the font colour to be yellow with no background, set to font 7
    tft.setTextColor(TFT_YELLOW);
    tft.setTextFont(7);
    tft.println(1234.56);

    // Set the font colour to be red with black background, set to font 4
    tft.setTextColor(TFT_RED, TFT_BLACK);
    tft.setTextFont(4);
    tft.println((long)3735928559, HEX);  // Should print DEADBEEF

    // Set the font colour to be green with black background, set to font 4
    tft.setTextColor(TFT_GREEN, TFT_BLACK);
    tft.setTextFont(4);
    tft.println("Groop");
    tft.println("I implore thee,");

    // Change to font 2
    tft.setTextFont(2);
    tft.println(F("my foonting turlingdromes."));  // Can store strings in FLASH to save RAM
    tft.println("And hooptiously drangle me");
    tft.println("with crinkly bindlewurdles,");
    // This next line is deliberately made too long for the display width to test
    // automatic text wrapping onto the next line
    tft.println("Or I will rend thee in the gobberwarts with my blurglecruncheon, see if I don't!");

    // Test some print formatting functions
    float fnumber = 123.45;
    // Set the font colour to be blue with no background, set to font 4
    tft.setTextColor(TFT_BLUE);
    tft.setTextFont(4);
    tft.print("Float = ");
    tft.println(fnumber);  // Print floating point number
    tft.print("Binary = ");
    tft.println((int)fnumber, BIN);  // Print as integer value in binary
    tft.print("Hexadecimal = ");
    tft.println((int)fnumber, HEX);  // Print as integer number in Hexadecimal
  }
  if (Serial.available()) {
    while (Serial.available()) Serial.read();
    loopSD();
  }
}
file User_Setup.h (in same directory as above TFT.ino file)
// TFT_eSPI User_Setup.h file 240X320 Resolution 2.8_ SPI TFT LCD Display Touch Panel ILI9341

#define USER_SETUP_INFO "User_Setup"

#define ILI9341_DRIVER

// For ST7735, ST7789 and ILI9341 ONLY, define the colour order IF the blue and red are swapped on your display
// Try ONE option at a time to find the correct colour order for your display
//  #define TFT_RGB_ORDER TFT_RGB  // Colour order Red-Green-Blue
//  #define TFT_RGB_ORDER TFT_BGR  // Colour order Blue-Green-Red

// For ST7789, ST7735, ILI9163 and GC9A01 ONLY, define the pixel width and height in portrait orientation
#define TFT_WIDTH  240 // ST7789 240 x 240 and 240 x 320
#define TFT_HEIGHT 320 // ST7789 240 x 320

// If colours are inverted (white shows as black) then uncomment one of the next
// 2 lines try both options, one of the options should correct the inversion.

// #define TFT_INVERSION_ON
// #define TFT_INVERSION_OFF

#define TFT_CS   15
#define TFT_MOSI MOSI
#define TFT_SCLK SCK
#define TFT_MISO MISO

#define TFT_DC   2
#define TFT_RST  4

#define LOAD_GLCD
#define LOAD_FONT2
#define LOAD_FONT4
#define LOAD_FONT6
#define LOAD_FONT7
#define LOAD_FONT8
#define LOAD_GFXFF

#define SMOOTH_FONT

#define SPI_FREQUENCY   10000000

#define SPI_TOUCH_FREQUENCY  2500000
file SD_test.ino (in same directory as above TFT.ino file)
// SD card test ILI9341 color TFT toutch display using VSPI and SD card using HSPI
// see https://forum.arduino.cc/t/esp32-initialize-hspi-as-default-spi/1155093/12

/*
  Rui Santos
  Complete project details at https://RandomNerdTutorials.com/esp32-microsd-card-arduino/

  This sketch can be found at: Examples > SD(esp32) > SD_Test
*/

// define HSPI pins (default HSPI pins crash processor)
#define HSPI_MISO 27  // note 12 causes problems when RST pressed
#define HSPI_MOSI 13
#define HSPI_SCLK 14
#define HSPI_SS 26


#include "FS.h"
#include "SD.h"
#include "SPI.h"

SPIClass *hspi = NULL;  // SPI object

void listDir(fs::FS &fs, const char *dirname, uint8_t levels) {
  Serial.printf("Listing directory: %s\n", dirname);

  File root = fs.open(dirname);
  if (!root) {
    Serial.println("Failed to open directory");
    return;
  }
  if (!root.isDirectory()) {
    Serial.println("Not a directory");
    return;
  }

  File file = root.openNextFile();
  while (file) {
    if (file.isDirectory()) {
      Serial.print("  DIR : ");
      Serial.println(file.name());
      if (levels) {
        listDir(fs, file.name(), levels - 1);
      }
    } else {
      Serial.print("  FILE: ");
      Serial.print(file.name());
      Serial.print("  SIZE: ");
      Serial.println(file.size());
    }
    file = root.openNextFile();
  }
}

void createDir(fs::FS &fs, const char *path) {
  Serial.printf("Creating Dir: %s\n", path);
  if (fs.mkdir(path)) {
    Serial.println("Dir created");
  } else {
    Serial.println("mkdir failed");
  }
}

void removeDir(fs::FS &fs, const char *path) {
  Serial.printf("Removing Dir: %s\n", path);
  if (fs.rmdir(path)) {
    Serial.println("Dir removed");
  } else {
    Serial.println("rmdir failed");
  }
}

void readFile(fs::FS &fs, const char *path) {
  Serial.printf("Reading file: %s\n", path);

  File file = fs.open(path);
  if (!file) {
    Serial.println("Failed to open file for reading");
    return;
  }

  Serial.print("Read from file: ");
  while (file.available()) {
    Serial.write(file.read());
  }
  file.close();
}

void writeFile(fs::FS &fs, const char *path, const char *message) {
  Serial.printf("Writing file: %s\n", path);

  File file = fs.open(path, FILE_WRITE);
  if (!file) {
    Serial.println("Failed to open file for writing");
    return;
  }
  if (file.print(message)) {
    Serial.println("File written");
  } else {
    Serial.println("Write failed");
  }
  file.close();
}

void appendFile(fs::FS &fs, const char *path, const char *message) {
  Serial.printf("Appending to file: %s\n", path);

  File file = fs.open(path, FILE_APPEND);
  if (!file) {
    Serial.println("Failed to open file for appending");
    return;
  }
  if (file.print(message)) {
    Serial.println("Message appended");
  } else {
    Serial.println("Append failed");
  }
  file.close();
}

void renameFile(fs::FS &fs, const char *path1, const char *path2) {
  Serial.printf("Renaming file %s to %s\n", path1, path2);
  if (fs.rename(path1, path2)) {
    Serial.println("File renamed");
  } else {
    Serial.println("Rename failed");
  }
}

void deleteFile(fs::FS &fs, const char *path) {
  Serial.printf("Deleting file: %s\n", path);
  if (fs.remove(path)) {
    Serial.println("File deleted");
  } else {
    Serial.println("Delete failed");
  }
}

void testFileIO(fs::FS &fs, const char *path) {
  File file = fs.open(path);
  static uint8_t buf[512];
  size_t len = 0;
  uint32_t start = millis();
  uint32_t end = start;
  if (file) {
    len = file.size();
    size_t flen = len;
    start = millis();
    while (len) {
      size_t toRead = len;
      if (toRead > 512) {
        toRead = 512;
      }
      file.read(buf, toRead);
      len -= toRead;
    }
    end = millis() - start;
    Serial.printf("%u bytes read for %u ms\n", flen, end);
    file.close();
  } else {
    Serial.println("Failed to open file for reading");
  }


  file = fs.open(path, FILE_WRITE);
  if (!file) {
    Serial.println("Failed to open file for writing");
    return;
  }

  size_t i;
  start = millis();
  for (i = 0; i < 2048; i++) {
    file.write(buf, 512);
  }
  end = millis() - start;
  Serial.printf("%u bytes written for %u ms\n", 2048 * 512, end);
  file.close();
}

void setupSD(void) {
  //Serial.begin(115200);
  Serial.println("\n\nSetting up SD card");
  loopSD();
}

// initialised SD card and test
void loopSD() {
  // moved to setupSD()
  hspi = new SPIClass(HSPI);  // create SPI class
  hspi->begin(HSPI_SCLK, HSPI_MISO, HSPI_MOSI, HSPI_SS);  //SCLK, MISO, MOSI, SS
  if (!SD.begin(HSPI_SS, *hspi)) {                        // mount card
    Serial.println("Card Mount Failed");
    return;
  }
  //pinMode(hspi->pinSS(), OUTPUT); //HSPI SS
  uint8_t cardType = SD.cardType();

  if (cardType == CARD_NONE) {
    Serial.println("No SD card attached");
    return;
  }
  Serial.print("SD Card Type: ");
  if (cardType == CARD_MMC) {
    Serial.println("MMC");
  } else if (cardType == CARD_SD) {
    Serial.println("SDSC");
  } else if (cardType == CARD_SDHC) {
    Serial.println("SDHC");
  } else {
    Serial.println("UNKNOWN");
  }

  uint64_t cardSize = SD.cardSize() / (1024 * 1024);
  Serial.printf("SD Card Size: %lluMB\n", cardSize);

  listDir(SD, "/", 0);
  createDir(SD, "/mydir");
  listDir(SD, "/", 0);
  removeDir(SD, "/mydir");
  listDir(SD, "/", 2);
  writeFile(SD, "/hello.txt", "Hello ");
  appendFile(SD, "/hello.txt", "World!\n");
  readFile(SD, "/hello.txt");
  deleteFile(SD, "/foo.txt");
  renameFile(SD, "/hello.txt", "/foo.txt");
  readFile(SD, "/foo.txt");
  //testFileIO(SD, "/test.txt");  // does Not work
  Serial.printf("Total space: %lluMB\n", SD.totalBytes() / (1024 * 1024));
  Serial.printf("Used space: %lluMB\n", SD.usedBytes() / (1024 * 1024));
  SD.end();
  hspi->end();
}
serial monitor output (SD card is a Kingston 32GB Micro SD)
ESP32 TFT_eSPI library  example TFT_Print_Test with SD card reader
TFT setup - display every 5 seconds
SD setup - hit key to print SD contents


Setting up SD card
SD Card Type: SDHC
SD Card Size: 29664MB
Listing directory: /
  DIR : System Volume Information
  FILE: UsefulLinks.doc  SIZE: 110592
  FILE: DELETE.BAT  SIZE: 179
  FILE: del.bat  SIZE: 72
  DIR : test
  FILE: test.txt  SIZE: 1048576
  FILE: foo.txt  SIZE: 13
Creating Dir: /mydir
Dir created
Listing directory: /
  DIR : System Volume Information
  FILE: UsefulLinks.doc  SIZE: 110592
  FILE: DELETE.BAT  SIZE: 179
  FILE: del.bat  SIZE: 72
  DIR : test
  FILE: test.txt  SIZE: 1048576
  FILE: foo.txt  SIZE: 13
  DIR : mydir
Removing Dir: /mydir
Dir removed
Listing directory: /
  DIR : System Volume Information
Listing directory: System Volume Information
Failed to open directory
  FILE: UsefulLinks.doc  SIZE: 110592
  FILE: DELETE.BAT  SIZE: 179
  FILE: del.bat  SIZE: 72
  DIR : test
Listing directory: test
Failed to open directory
  FILE: test.txt  SIZE: 1048576
  FILE: foo.txt  SIZE: 13
Writing file: /hello.txt
File written
Appending to file: /hello.txt
Message appended
Reading file: /hello.txt
Read from file: Hello World!
Deleting file: /foo.txt
File deleted
Renaming file /hello.txt to /foo.txt
File renamed
Reading file: /foo.txt
Read from file: Hello World!
Total space: 29646M
Used space: 2MB

Now I'm sitting here and I understand that I don't understand anything. Out of desperation, I started moving the card reader lock back and forth. I initially checked: everything was fine, but after these actions everything started working! The problem was in the card reader. Thank you for your time!
