I'm trying to find a socket that will fit the Arduino Nano33BLE with headers.
I have found nothing with 30 pins and all the ones I found with 32 pins seam to work with smaller pins than the Arduino. The Nanos pins measure 0.025" (0.64mm) square
They are available cheap from any place you would by electronics supplies and are a very useful thing to have on hand. Rather than stocking a collection of different lengths, I usually buy the 40 pin version and then cut them down to the length I need with side cutters (you lose one pin at the cut, but it doesn't matter).
I noticed the Note on #1 says soldering is required. The second one doesn't mention soldering. These look like the little connectors I plug into my bread board and have a tendency to fall out.
I was told a machined pin socket was the only way to go for non soldered sockets in automotive applications I guess they don't make that for a Nano. I was hoping not to solder but I guess I will.
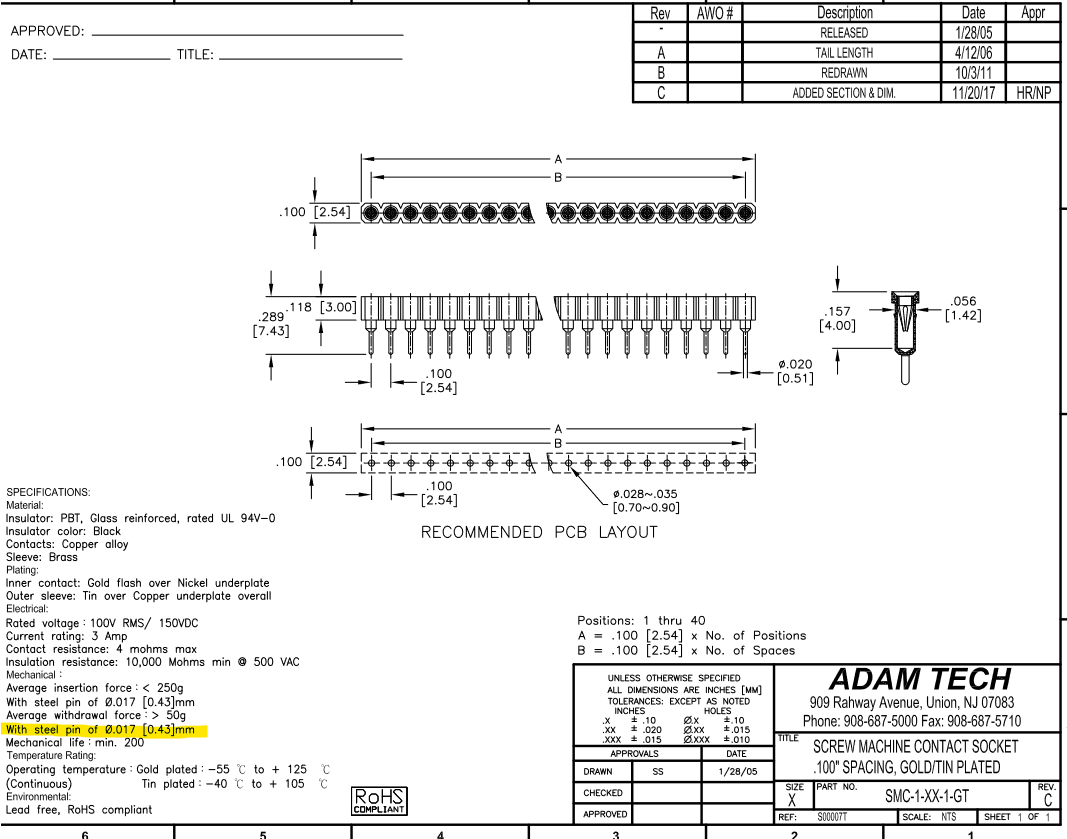
Sockets provide a solderless electrical connection. You will never solder the Nano to the socket itself. However, other than perhaps some very rare "press-fit" exceptions, you will always solder the socket itself to the circuit board.
The fact that you are asking this makes me suspect that we don't fully understand what you are trying to accomplish. Please provide more information.
They are not for use with a breadboard. They are for use soldering to a circuit board with through holes.
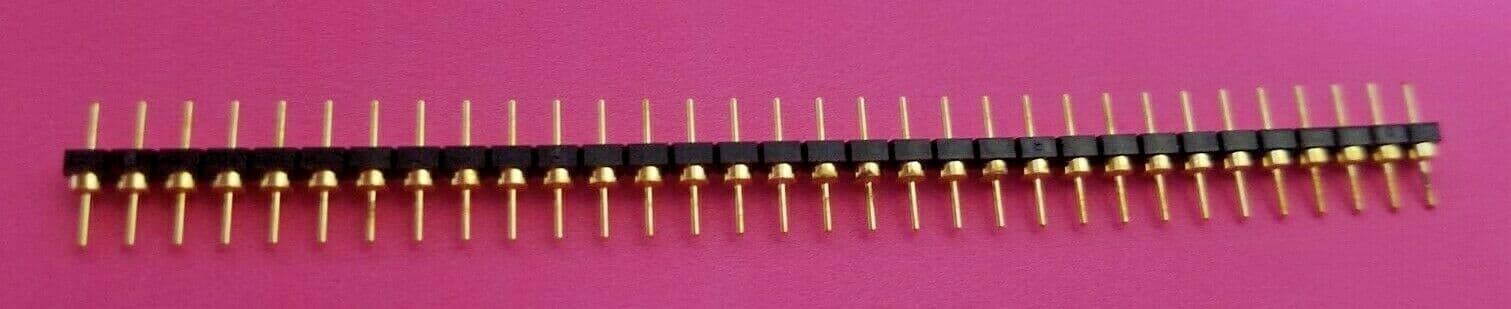
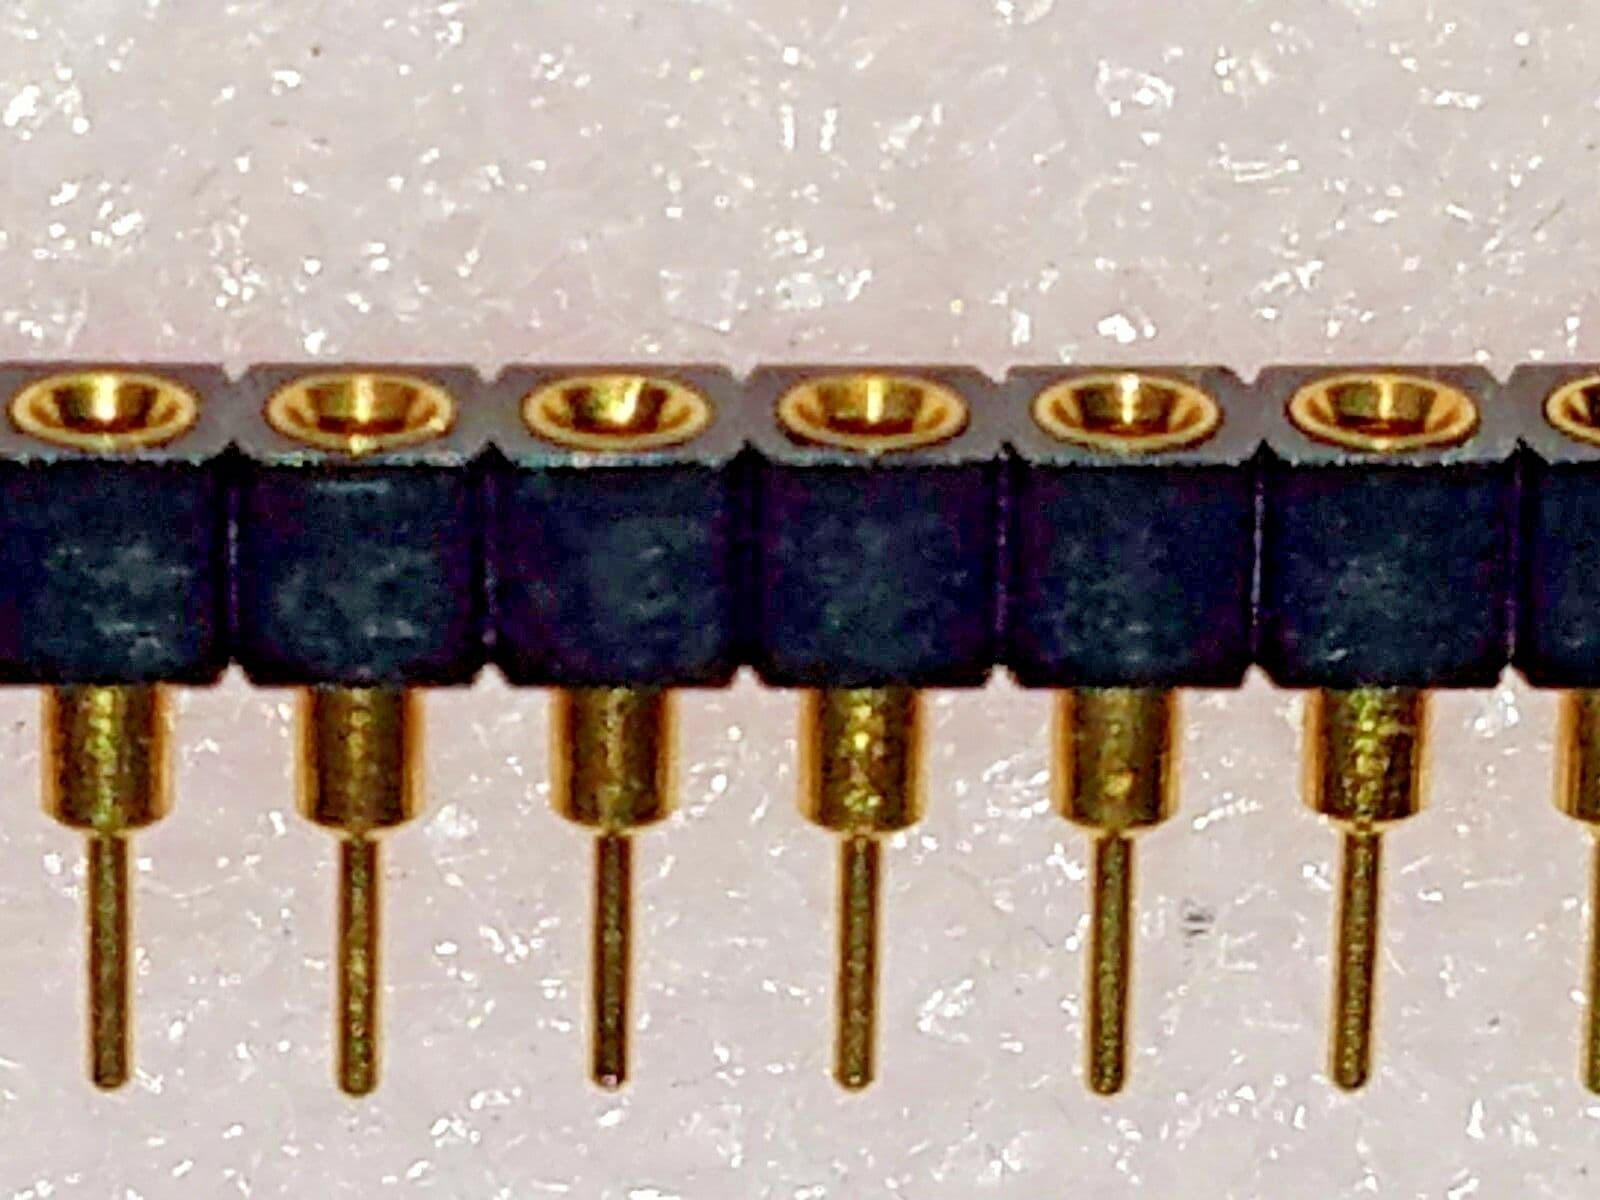
You can used machined pin sockets. However, you will need to get the version of the Nano 33 BLE without headers:
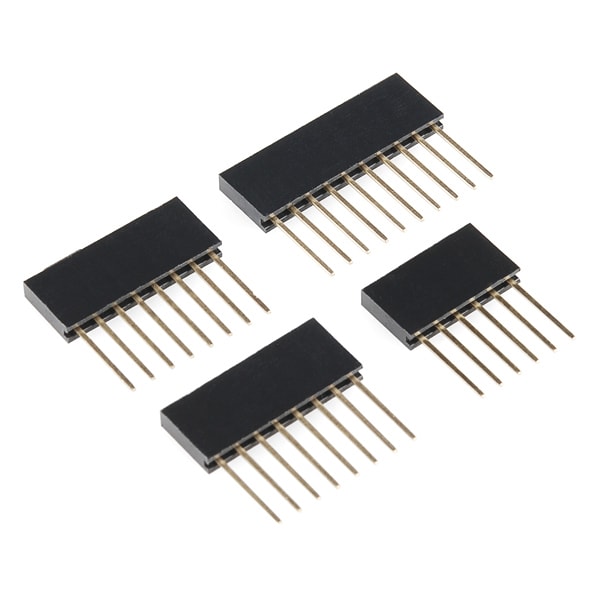
Then you will need to solder the male machined pin headers on the Nano 33 BLE. Like these:
This is another case where you can use two strips of female machined pin headers cut to size instead of a socket. Solder those to the circuit board you want to attach the Nano 33 BLE to:
Where are you noticing Note #1 ?
Can you please post a link.
Some vendors offer their product with pins fitted and soldered, or not fitted but supplied.
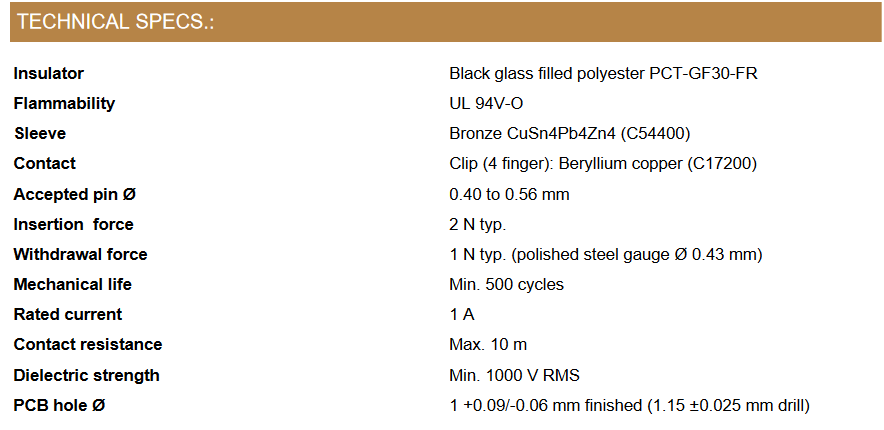
The header sockets in post #3 that @in0 cited will do the trick, they will take the full length of the header pins, providing a good and secure connection.
You missed the part where I said that you need to buy a Nano 33 BLE without the soldered headers and then solder the correctly dimensioned pin headers to the Nano.
I like the second option you posted with the female pins except the they wont fit the board. I'm trying to avoid soldering the nano to anything therefor the non header version is out. Eventually the nano will be soldered to a PCB board and then this is no longer an issue.
OK, it makes more sense now. Well, unless you find one of those "press-fit" solutions (example here, but with male headers), you are going to need to do soldering for the female part regardless.
I still don't understand your application. Your desire to use a socket indicates a circuit board, since a breadboard is essentially just a giant socket already. But usually with a circuit board you would need to be doing soldering anyway, unless you are getting a pre-assembled board from PCBA service.
It sounds to me that you are deep enough into the Arduino world that it would be worth the effort to improve your soldering skills. Soldering headers is really easy and fast once you have a reasonably usable soldering iron (you can get one for around $20) and some decent flux core lead solder.
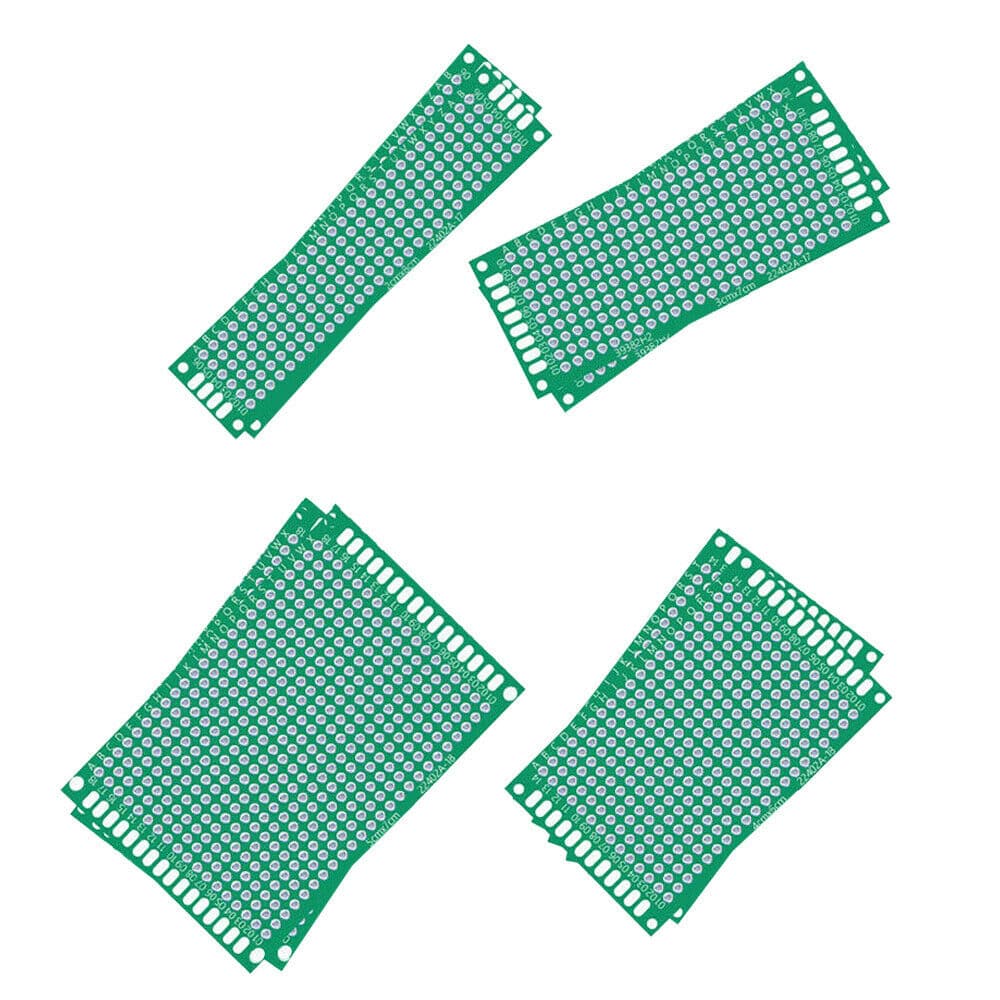
My recommendation is to buy some "protoboard", the plated through hole style like this (doesn't matter what dimensions you get):
Watch a few YouTube videos about soldering and then just start soldering bits of wire into the protoboard, evaluating the quality of your solder fillet each time.
This will allow you to practice as much as you like without being worried about the expense. And any protoboard and wire left over will surely be useful later. If you can get a good fillet on the protoboard within a reasonable amount of time, you will have no problem soldering headers to the Nano 33 BLE.
This will be the first PCB board I will be making. For the first few, I would prefer to screw up sockets rather than nano's. In the end it will be soldered. If not by me, by someone that does soldering all the time. I recently purchased a Hakko soldering station and built a much smaller circuit requiring about 5 or 6 soldered joints to one of those green boards. It came out successful. But it was only about 3 or 4 resisters and caps soldered in place. No surface mounted stuff on the other side to fall off because I over heated it.
Application will be a fan controller for an automotive radiator fan.
Way cool! Definitely pick up some supplies and put in a little bit of time on soldering practice. With that sweet iron and the experience you already have, you'll have it down perfect within an hour or less.
You can see a lot about the project here with some videos of the fan running on the bench. This is a thread about getting an opticoupler to work. Now I'm getting to the nitty gritty of constructing it.