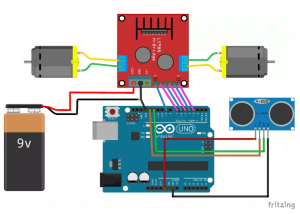
Hello there. I'm having some problems with a project we're currently doing at school, the project being an obstacle avoiding car. I'll be providing a link at the end of this post for the instructions I've used to create the car.
Now, we've been working on this for days: trying to figure out what the problem is because we've tested everything (The motors, the sensors, the cables and etc.) and everything should work. The light on the motor driver card (I apologize if the name is not correct) is turning on as well, and yet nothing seems to be working.
For now, I don't have an idea about the model of the driver I'm using as I'm far away from school, but I'll be sure to update tomorrow if needed.
Thank you.
You list several things the seem to be working, but write that nothing is working. How can that be? Did you ever test just the motors and the controller board to try to track down the problem? Try that and report back.
Of course, in order for all this structure to work, the friends will get electricity, in this system, we will use 2 film bodies, in fact, 4 batteries, which are called our pen batteries, and then we will use nine vold batteries, friends, thanks to this 9 volt battery, we will still reflect an extra power to the system, otherwise it is not a very efficient work, even the wheels are better when they do not rotate, so it is friendly to get the necessary energy here. In fact, we need to use it additionally in that province, of course, until all this, let me also point out that it would be better if you use a lithium polymer battery because there are many here
elbette tum bu yapin calisabilmesi icin haliyle elektrige ihtiyac arkadaslar electrik alacak bizim bu sistemimizde 2 adet filmi vucut aslinda 4 adet bizim bu kalem pil diye gecen pilleri kullandikatan sonra bir de yaninda dokuz vold pil kullanacagiz arkadaslar bu 9 volt pil sayesinde de yine sistemi ekstra bir guc yansitmis olacagiz aksi halde cok verimli bir calisma olmuyor hatta tekerlerin Yeri geliyor donmedigi daha iyi oluyor o yuzden burada gerekli enerjisi albilmek icin dost aslinda bizim bu o ilde ek olarak kullanmamiz gerekiyor tabi tum bunlara kadar sunu da belirteyim lityum polimer bir batarya kullanirsaniz da daha iyi olur cunku burada chok fazla
When "nothing works", usually only one thing doesn't work.
When you have everything setup and it should be running and it doesn't, use a multimeter to check the voltage at each point. Add a blinking led on the Arduino, which tells you at which point of the sketch the program is running. Or even better, keep the Arduino connected with the USB and have it print information to you on the serial monitor.
Measure the voltage at the power source, at the motor driver at each motor terminal, at the motor terminals, at the Arduino 5V pin, at the digital pins connected to the motor driver. Do that at the exact moments you expect the motors to be turning. And at the exact moments you expect them to be still. Repeat the measurements with the motors disconnected.
Draw your conclusions from the measurements. The simplest thing is that if at any point the power source drops from 6 V to almost 0 V, you have bad batteries.
Something like this is what should be used, if one needs 9 V in a small robot set:
It's for six AA batteries. With good quality alkaline batteries the voltage won't drop like it will with that 9V battery meant for clocks and smoke detectors.
Thanks a lot for replying! We did use a 9V battery to power the motor driver, though my teacher also tried using an adapter to power the Arduino and the motor as well. When we connected the adapter to the motor and to the arduino as well, both of the LEDs on the arduino and the motor were working, though the car didn't run.
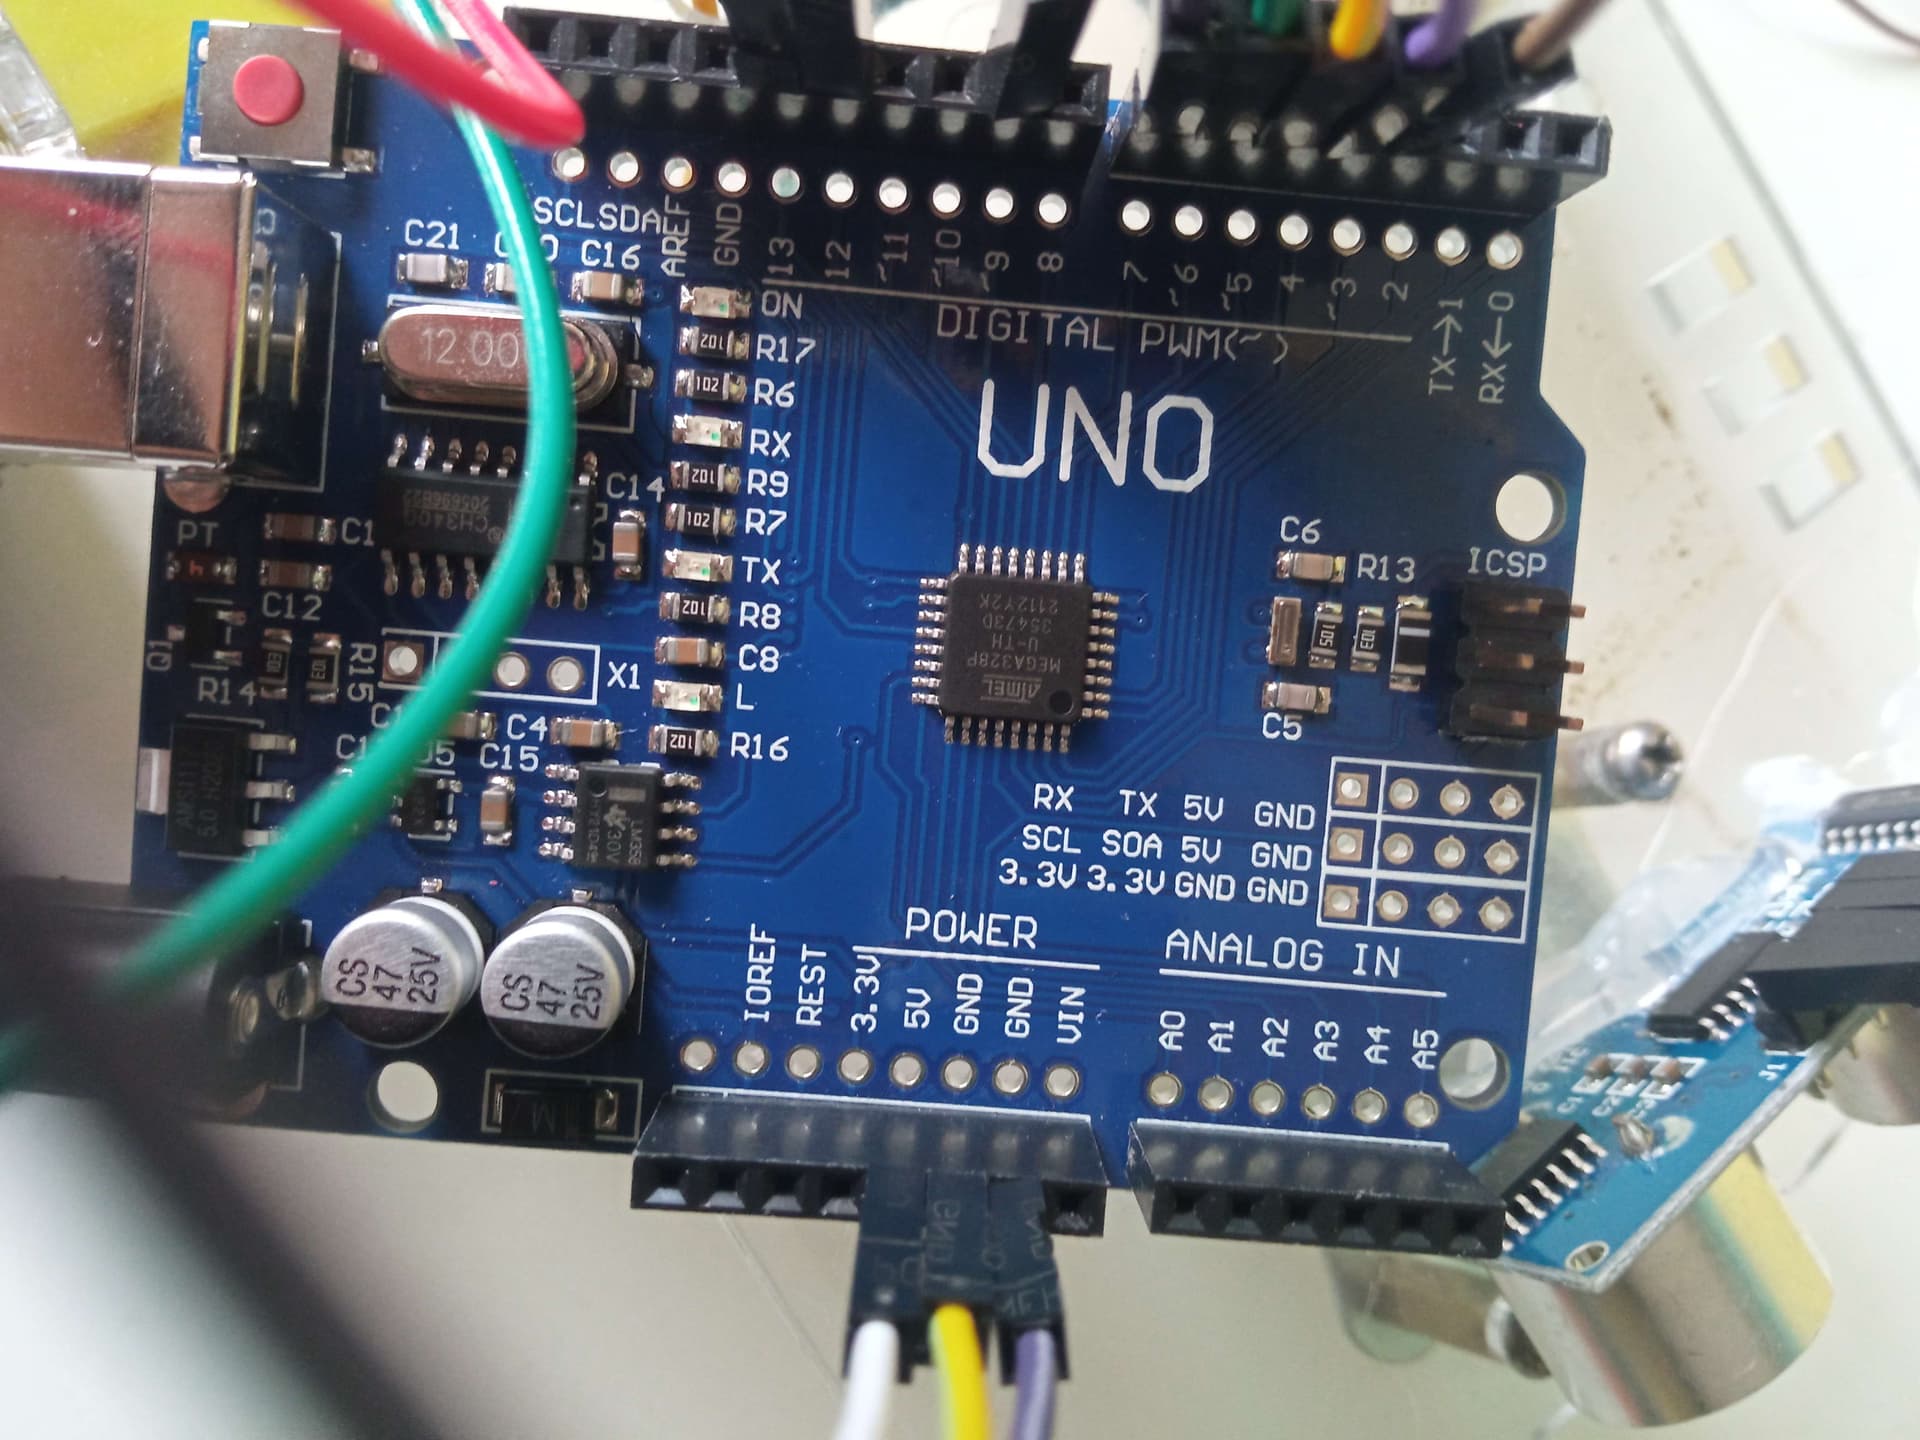
Some pictures will be attached to this image. By the way, I don't think I mentioned this in the OG post, but the version of the app is 1.8.5. I asked the teacher at the course if that could be an issue, but they said no.
I see, thank you a lot for replying. The 9V battery wasn't working well after all, but we tried to connect an adapter to the circuit to see if it'd help. Both the LEDs to the arduino and the motor were on, but unfortunately the car did not run.
Excuse my wording! By "nothing" I meant that nothing we've tried helped make the robot actually run, but we tested the motors (Through the driver) and they worked, we tested the sensor and it worked, I already tried with 3 different arduinos and they all seemed to work in different projects anyway. I also used a LED connected to the cables coming from the battery to the Arduino and the motor driver, the LED turned on just fine.
We didn't use a program to test the motors, just connected two cables to an adapter and connected the other tips to the motors and both of them worked.
At the course, we already had a template of the robot with the motors, driver and the sensor attached to the base of the robot, and that robot has been used in previous courses already, so we know they work.