Replacing a 10k potentiometer with a programmable timer

Hi, I have a wobble varnishing machine with the following code.
The code works so that when the varnishing carriage is up, pressing a button causes the carriage to go down. When reaching the intermediate sensor, the speed of movement can be adjusted with a potentiometer. When reaching the lower sensor, the carriage stops. The program has a programmable (delay2000) lower limit timer. I need a 10k potentiometer-operated timer 1-10s to replace this. I can implement this electrically, but I can't make Arduino code. Could someone help me with this? :slight_smile:

google translate code
< CODE/ >

// define the stepper motor driver pins 9 stepping, 8 direction
AccelStepper stepper1(AccelStepper::DRIVER, 9, 8);

// define the button pins for the arduino
#define ON_BUTTON_PIN 4
#define UPPER_LIMIT_PIN 3
#define LOWER_LIMIT_PIN 2
#define DECELERATION_PIN 5

// define the speed control potentiometer analog pin
#define SPEED_PIN 0

// define the maximum and minimum step speed per second (scale the potentiometer to this range)
#define MAX_SPEED 20000
#define MIN_SPEED 100

bool deceleration;

void setup() {
// adjust the maximum speed of the stepper motor
stepper1.setMaxSpeed(40000.0);
deceleration = false;

// Set the button type of the sensors and the push button. input_pullupit means that the operation implemented with pull-up resistors is used
pinMode(PAALLENAPPI_PIN, INPUT_PULLUP);
pinMode(YLARAJA_PIN, INPUT_PULLUP);
pinMode(ALARAJA_PIN, INPUT_PULLUP);
pinMode(PAALLENAPPI_PIN, INPUT_PULLUP);
}

void loop() {
static float current_speed = 0.0; // Holds current motor speed in steps/second
static int analog_read_counter = 1000; // Counts down to 0 to fire analog read
static char sign = 0; // Holds -1, 1 or 0 to turn the motor on/off and control direction
static int analog_value = 0; // Holds raw analog value.

// 1 carriage moves up

// -1 carriage moves down
// 0 carriage stops

// if the sensor or pushbutton is active, the next character is written to the program(sign)
if ((digitalRead(ON_BUTTON_PIN) == 1) && (digitalRead(UPPER_LIMIT_PIN) == 1)) {
sign = -1;
}

if ((digitalRead(ON_BUTTON_PIN) == 1) && (digitalRead(UPPER_LIMIT_PIN) == 0)) {
sign = 1;
}

if ((sign == 1) && (digitalRead(UPPER_LIMIT_PIN) == 1)) {
sign = 0;
}

if (((digitalRead(LOWER_LIMIT_PIN) == 1)) && (sign != 1)) {
sign = 1;
delay(4000);
}

if ((digitalRead(DELAY_PIN) == 1) && (sign == -1)) {
delay = true;
}

if ((digitalRead(DELAY_PIN) == 1) && (sign == 1)) {
delay = false;
}
if (slowdown) {
// the speed is read occasionally (because it takes a long time in the program
// and we don't want to do it all the time in the main loop)
if (analog_read_counter > 0) {
analog_read_counter--;
}
else {
analog_read_counter = 3000;
// Now read the pot (from 0 to 1023)
analog_value = analogRead(SPEED_PIN);
// Give the stepper a chance to step if it needs to
stepper1.runSpeed();
}

    // scale the potentiometer value from minimum to maximum

current_speed = sign * (((analog_value / 1023.0) * (MAX_SPEED - MIN_SPEED)) + MIN_SPEED);
}
else {
current_speed = sign * (((1) * (MAX_SPEED - MIN_SPEED)) + MIN_SPEED);
}

// update the stepper motor speed to the new value
stepper1.setSpeed(current_speed);
// this will run the stepper motor at a constant speed
stepper1.runSpeed();
}

< CODE/ >

original code
< CODE/ >

#include <AccelStepper.h>

// määritetään askelmoottorin ohjaimen pinnit 9 askellus, 8 suunta
AccelStepper stepper1(AccelStepper::DRIVER, 9, 8);

// määritetään painikkeiden pinnit arduinolle
#define PAALLENAPPI_PIN 4
#define YLARAJA_PIN 3
#define ALARAJA_PIN 2
#define HIDASTUS_PIN 5

// määritetään nopeus säädön potikka analogia pinni
#define SPEED_PIN 0

// määritetään maksimi ja minimi askelnopeus sekuntia kohden (skaalaa potikan tähän väliin)
#define MAX_SPEED 20000
#define MIN_SPEED 100

bool hidastus;

void setup() {
// säädetään askelmoottorin maximi pyörimisnopeus
stepper1.setMaxSpeed(40000.0);
hidastus = false;

// Asetetaan antureiden ja painonapin nappityyppi. input_pullupit tarkoittaa, että käytössä ylösvetovastuksilla toteutettu toiminta
pinMode(PAALLENAPPI_PIN, INPUT_PULLUP);
pinMode(YLARAJA_PIN, INPUT_PULLUP);
pinMode(ALARAJA_PIN, INPUT_PULLUP);
pinMode(PAALLENAPPI_PIN, INPUT_PULLUP);

}

void loop() {
static float current_speed = 0.0; // Holds current motor speed in steps/second
static int analog_read_counter = 1000; // Counts down to 0 to fire analog read
static char sign = 0; // Holds -1, 1 or 0 to turn the motor on/off and control direction
static int analog_value = 0; // Holds raw analog value.

// 1 kelkka liikkuu ylöspäin
// -1 kelkka liikkuu alaspäin
// 0 kelkka pysähtyy

// jos anturi tai painonappi on aktiivinen, seuraava merkki kirjoitetaan ohjelmaan(sign)
if ((digitalRead(PAALLENAPPI_PIN) == 1) && (digitalRead(YLARAJA_PIN) == 1)) {
    sign = -1;
}

if ((digitalRead(PAALLENAPPI_PIN) == 1) && (digitalRead(YLARAJA_PIN) == 0)) {
    sign = 1;
}

if ((sign == 1) && (digitalRead(YLARAJA_PIN) == 1)) {
    sign = 0;
}

if (((digitalRead(ALARAJA_PIN) == 1)) && (sign != 1)) {
    sign = 1;
    delay(4000);
}

if ((digitalRead(HIDASTUS_PIN) == 1) && (sign == -1)) {
    hidastus = true;
}

if ((digitalRead(HIDASTUS_PIN) == 1) && (sign == 1)) {
    hidastus = false;
}


if (hidastus) {
    // potikkaa(nopeutta luetaan silloin tällöin (koska se ottaa ohjelmassa pitkän ajan
    // eikä sitä haluta tehdä koko ajan pääsilmukassa)  
    if (analog_read_counter > 0) {
        analog_read_counter--;
    }
    else {
        analog_read_counter = 3000;
        // Now read the pot (from 0 to 1023)
        analog_value = analogRead(SPEED_PIN);
        // Give the stepper a chance to step if it needs to
        stepper1.runSpeed();
    }

    //  skaalataan potikan arvo minimistä maksiminopeuteen
    current_speed = sign * (((analog_value / 1023.0) * (MAX_SPEED - MIN_SPEED)) + MIN_SPEED);
}
else {
    current_speed = sign * (((1) * (MAX_SPEED - MIN_SPEED)) + MIN_SPEED);
}

// päivitetään askelmoottorin nopeus uuteen arvoon
stepper1.setSpeed(current_speed);
// tämä ajaa askelmoottoria vakionopeudella
stepper1.runSpeed();

}
< CODE/ >
Welcome to the forum

Please follow the advice given in the link below when posting code, in particular the section entitled 'Posting code and common code problems'

Use code tags (the < CODE/ > icon above the compose window) to make it easier to read and copy for examination

Please post your full sketch, using code tags when you do

Posting your code using code tags prevents parts of it being interpreted as HTML coding and makes it easier to copy for examination

In my experience the easiest way to tidy up the code and add the code tags is as follows

Start by tidying up your code by using Tools/Auto Format in the IDE to make it easier to read. Then use Edit/Copy for Forum and paste what was copied in a new reply. Code tags will have been added to the code to make it easy to read in the forum thus making it easier to provide help.

1 Like

Read an analog pin that has a 10K potentiometer wired as a voltage divider for input.

Take that value and transform it into the range you need.

delay() for that number of milliseconds.

    int thePot = analogRead(somePotPin);
    int theDelay = map(thePot, 0, 1023, 1000, 10000);

    delay(theDelay);

HTH

a7

I don't really understand anything about coding :slight_smile: The potentiometer is supposed to be added to pin 1. Could you modify the code I sent so that I can get the potentiometer's timer control to work?

I have no idea what you mean. I think you just have something that isn't exactly a potentiometer, please say what you have in front of you and share any information about it that you can.

a7

I have a 10k potentiometer and I know how to connect it to the Arduino. The code I posted was made by an acquaintance of mine. This current code works but now I would like to add this new potentiometer so that I can adjust the time the slide is down without having to change the Arduino code (delay4000). I just don't know how to make this code myself. I'm asking for help to make it. So could someone please modify the code I sent earlier so that this potentiometer code would be included.

As soon as you complete the request from post #2, it’s possible that someone will help you out.

A pot can only be connected to an analog pin, A1 for example

As @alto777 suggested, simply replace delay(4000); with:

    int thePot = analogRead(A1); // if the wiper of the pot is connected to pin A1
    int theDelay = map(thePot, 0, 1023, 1000, 10000);

    delay(theDelay);

Your complete code should become:

#include <AccelStepper.h>

// määritetään askelmoottorin ohjaimen pinnit 9 askellus, 8 suunta
AccelStepper stepper1(AccelStepper::DRIVER, 9, 8);

// määritetään painikkeiden pinnit arduinolle
#define PAALLENAPPI_PIN 4
#define YLARAJA_PIN 3
#define ALARAJA_PIN 2
#define HIDASTUS_PIN 5

// määritetään nopeus säädön potikka analogia pinni
#define SPEED_PIN 0

// määritetään maksimi ja minimi askelnopeus sekuntia kohden (skaalaa potikan tähän väliin)
#define MAX_SPEED 20000
#define MIN_SPEED 100

bool hidastus;

void setup() {
  // säädetään askelmoottorin maximi pyörimisnopeus
  stepper1.setMaxSpeed(40000.0);
  hidastus = false;

  // Asetetaan antureiden ja painonapin nappityyppi. input_pullupit tarkoittaa, että käytössä ylösvetovastuksilla toteutettu toiminta
  pinMode(PAALLENAPPI_PIN, INPUT_PULLUP);
  pinMode(YLARAJA_PIN, INPUT_PULLUP);
  pinMode(ALARAJA_PIN, INPUT_PULLUP);
  pinMode(PAALLENAPPI_PIN, INPUT_PULLUP);
}

void loop() {
  static float current_speed = 0.0; // Holds current motor speed in steps/second
  static int analog_read_counter = 1000; // Counts down to 0 to fire analog read
  static char sign = 0; // Holds -1, 1 or 0 to turn the motor on/off and control direction
  static int analog_value = 0; // Holds raw analog value.

  // 1 kelkka liikkuu ylöspäin
  // -1 kelkka liikkuu alaspäin
  // 0 kelkka pysähtyy

  // jos anturi tai painonappi on aktiivinen, seuraava merkki kirjoitetaan ohjelmaan(sign)
  if ((digitalRead(PAALLENAPPI_PIN) == 1) && (digitalRead(YLARAJA_PIN) == 1)) {
    sign = -1;
  }

  if ((digitalRead(PAALLENAPPI_PIN) == 1) && (digitalRead(YLARAJA_PIN) == 0)) {
    sign = 1;
  }

  if ((sign == 1) && (digitalRead(YLARAJA_PIN) == 1)) {
    sign = 0;
  }

  if (((digitalRead(ALARAJA_PIN) == 1)) && (sign != 1)) {
    sign = 1;
    int thePot = analogRead(A1);
    int theDelay = map(thePot, 0, 1023, 1000, 10000); // delay values between 1s and 10s
    delay(theDelay);
  }

  if ((digitalRead(HIDASTUS_PIN) == 1) && (sign == -1)) {
    hidastus = true;
  }

  if ((digitalRead(HIDASTUS_PIN) == 1) && (sign == 1)) {
    hidastus = false;
  }


  if (hidastus) {
    // potikkaa(nopeutta luetaan silloin tällöin (koska se ottaa ohjelmassa pitkän ajan
    // eikä sitä haluta tehdä koko ajan pääsilmukassa)
    if (analog_read_counter > 0) {
      analog_read_counter--;
    }
    else {
      analog_read_counter = 3000;
      // Now read the pot (from 0 to 1023)
      analog_value = analogRead(SPEED_PIN);
      // Give the stepper a chance to step if it needs to
      stepper1.runSpeed();
    }

    //  skaalataan potikan arvo minimistä maksiminopeuteen
    current_speed = sign * (((analog_value / 1023.0) * (MAX_SPEED - MIN_SPEED)) + MIN_SPEED);
  }
  else {
    current_speed = sign * (((1) * (MAX_SPEED - MIN_SPEED)) + MIN_SPEED);
  }

  // päivitetään askelmoottorin nopeus uuteen arvoon
  stepper1.setSpeed(current_speed);
  // tämä ajaa askelmoottoria vakionopeudella
  stepper1.runSpeed();
}

EDIT: or with slight improvements:

#include <AccelStepper.h>

// määritetään askelmoottorin ohjaimen pinnit 9 askellus, 8 suunta
AccelStepper stepper1(AccelStepper::DRIVER, 9, 8);

// määritetään painikkeiden pinnit arduinolle
#define PAALLENAPPI_PIN 4
#define YLARAJA_PIN 3
#define ALARAJA_PIN 2
#define HIDASTUS_PIN 5
#define DELAY_POT_PIN A1  // Pot Wiper on Pin A1
#define MIN_DELAY  1000   // 1 second min delay
#define MAX_DELAY 10000   // 10 seconds max delay

// määritetään nopeus säädön potikka analogia pinni
#define SPEED_PIN 0

// määritetään maksimi ja minimi askelnopeus sekuntia kohden (skaalaa potikan tähän väliin)
#define MAX_SPEED 20000
#define MIN_SPEED 100

bool hidastus;

void setup() {
  // säädetään askelmoottorin maximi pyörimisnopeus
  stepper1.setMaxSpeed(40000.0);
  hidastus = false;

  // Asetetaan antureiden ja painonapin nappityyppi. input_pullupit tarkoittaa, että käytössä ylösvetovastuksilla toteutettu toiminta
  pinMode(PAALLENAPPI_PIN, INPUT_PULLUP);
  pinMode(YLARAJA_PIN, INPUT_PULLUP);
  pinMode(ALARAJA_PIN, INPUT_PULLUP);
  pinMode(PAALLENAPPI_PIN, INPUT_PULLUP);
}

void loop() {
  static float current_speed = 0.0; // Holds current motor speed in steps/second
  static int analog_read_counter = 1000; // Counts down to 0 to fire analog read
  static char sign = 0; // Holds -1, 1 or 0 to turn the motor on/off and control direction
  static int analog_value = 0; // Holds raw analog value.

  // 1 kelkka liikkuu ylöspäin
  // -1 kelkka liikkuu alaspäin
  // 0 kelkka pysähtyy

  // jos anturi tai painonappi on aktiivinen, seuraava merkki kirjoitetaan ohjelmaan(sign)
  if ((digitalRead(PAALLENAPPI_PIN) == 1) && (digitalRead(YLARAJA_PIN) == 1)) {
    sign = -1;
  }

  if ((digitalRead(PAALLENAPPI_PIN) == 1) && (digitalRead(YLARAJA_PIN) == 0)) {
    sign = 1;
  }

  if ((sign == 1) && (digitalRead(YLARAJA_PIN) == 1)) {
    sign = 0;
  }

  if (((digitalRead(ALARAJA_PIN) == 1)) && (sign != 1)) {
    sign = 1;
    int thePot = analogRead(DELAY_POT_PIN);
    int theDelay = map(thePot, 0, 1023, MIN_DELAY, MAX_DELAY);
    delay(theDelay);
  }

  if ((digitalRead(HIDASTUS_PIN) == 1) && (sign == -1)) {
    hidastus = true;
  }

  if ((digitalRead(HIDASTUS_PIN) == 1) && (sign == 1)) {
    hidastus = false;
  }


  if (hidastus) {
    // potikkaa(nopeutta luetaan silloin tällöin (koska se ottaa ohjelmassa pitkän ajan
    // eikä sitä haluta tehdä koko ajan pääsilmukassa)
    if (analog_read_counter > 0) {
      analog_read_counter--;
    }
    else {
      analog_read_counter = 3000;
      // Now read the pot (from 0 to 1023)
      analog_value = analogRead(SPEED_PIN);
      // Give the stepper a chance to step if it needs to
      stepper1.runSpeed();
    }

    //  skaalataan potikan arvo minimistä maksiminopeuteen
    current_speed = sign * (((analog_value / 1023.0) * (MAX_SPEED - MIN_SPEED)) + MIN_SPEED);
  }
  else {
    current_speed = sign * (((1) * (MAX_SPEED - MIN_SPEED)) + MIN_SPEED);
  }

  // päivitetään askelmoottorin nopeus uuteen arvoon
  stepper1.setSpeed(current_speed);
  // tämä ajaa askelmoottoria vakionopeudella
  stepper1.runSpeed();
}
1 Like

The code works fine. Many thanks for this :grinning_face: :ok_hand: :+1:

Would there be any possibility of getting a program that would have a display connected to it? Next to the display would be + and - buttons to set the time. There was also a reset and set button

Another thing I'm wondering about is the use of limit sensors? could they be replaced with code? because it's a stepper motor and its rotation is defined by steps.... could those sensors be used as safety limits at the top and bottom?

Why don't you give a bit more information?
I'm intrigued to know what a wobble varnishing machine is.
Is this a homemade machine?

I'm trying to understand how you have ended up having to solve this.

The solution seems to be straightforward.
You have a fixed delay and you want to replace it with a variable delay.
I can see that @Etienne_74 has helped. You read the voltage from the wiper of the potentiometer, scale it and map it.
Good luck with the limit sensors and the display.

I am a hobbyist in making wobblers and other fishing tackle. This machine is used to prime wooden blanks for wobblers. The wooden blanks are attached to a stand and this homemade machine performs the 'dip' into a varnishing container. I have been using this machine for years and now I would like to modernize the device.

They can but i'm not sure there's a real advantage, you'll need them to make sure the motor didn't miss a step. If it's a reliability problem, you can replace them with hall effect sensors, they are not effected by dust and oxidation.

As for the display, you can tie one to SPI or I2C bus depending on need and available pins. Which Arduino are you using?

I have reed switches (magnetic switches) in use and they work reliably. I would like to at least try to control the stepper motor programmatically because I am interested in stepper motor control. The only thing is that I don't know how to make this code :slight_smile: As a display, I have this Arduino's own liquid crystal display. I also have displays familiar from the logic world, e.g. beijer, siemens and abb, but I don't know how to connect these to the Arduino, so I'll leave it at that for now... I currently have an Arduino Uno but you can also change it to a Mega etc.

You are treating this forum like it is a code-writing service.

Most of us would rather you work on your programming skills. There are thousands of examples for almost anything you can think up all over the internets, google is you friend.

The IDE has examples starting from zero. Read them. Work them. Read the articles they refer to.

Come here with your honest attempts to add these simple features to "your" code, say what difficulties you still have and we can help you learn.

a7

It's a shame that you experience this this way. I'm learning programming all the time and I already know how to do it to some extent, but I'm not yet good enough to be able to create code like this. I'm a beginner. Have a good autumn and a happy Christmas. And above all, successful coding.

We all started somewhere. No one was born knowing how to program microprocessors. There is no instant gratification in this hobby.

If ppl keep writing code for you, you won't make progress.

a7

1 Like

Your Uno is OK.

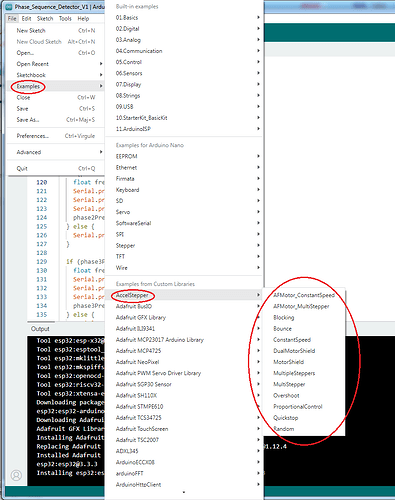
Then, you'll have to learn. As @alto777 suggested, read the examples provided by the stepper motor library you use (AccelStepper).

The other interesting readings you'll need to do (on top of basic "button read" and "pot read") are "Blink without delay" to know how to write non blocking code and some basics about State Machines (Finite-state machine is the real term, Äärellinen automaatti) to manage events in sequence.
If anyone here knows of a simple tutorial on finite state machines, please let us know...

One might start with the Tutorials section of this forum, scrolling down not far:

“simple” of course is in the eye of the beholder.

1 Like

And I forgot to mention Wokwi that allows you to simulate sketches and hardware easily!