HI I am using Apple computer with Ventura 13.6.1 and Safari 17.1. This is my latest update.
I cannot add my NANO 33 IOT board because Arduino Cloud Agent cannot be updated to the latest required version.
A month ago I've added Uno R4 WiFI without any problems. Can somebody help me ?
Stan
Hi @stan_52
Please provide a detailed description of how you attempted to update it and what happened when you attempted the update.
Make sure to include the full and exact text of any error or warning messages you encountered while doing that.
Hi @ ptillish
I am responding via email as here I can attach the screenshots.
So, I was trying at the Arduino Cloud ( of course after login in ) to add device which is board - NANO 33 IOT.
- At the Setup Device tab I chose Arduino board
2 At the screen appeared information “ Connect your IOT device to the computer” and a little bit later “ waiting for your device to become available “
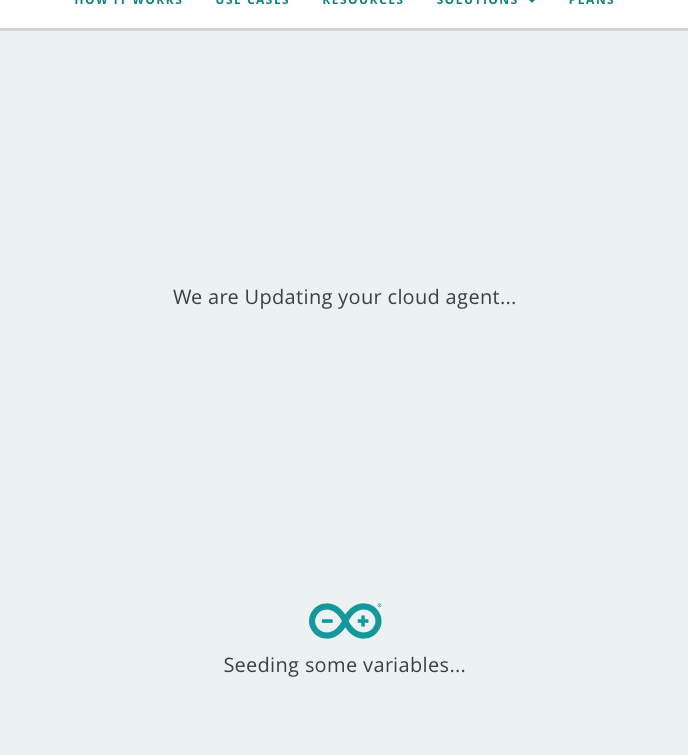
3 As the result appeared page as at screenshot:
I have already Agent installed and it is present at the system bar.
Icon s not gray
I do not know if this is atest Agent version - my version is : 1.2.7-ventura-df758
- As problem persist was trying update the one clicking at the green button “Install”
5 The new tab appeared :
And finally
- After that I closed the tab but as I was trying to add my board to the cloud situation repeated.
I do not have any other information beside this shown above.
Recently ( month ago ) I ‘ve added successfully the UNO R4 Wifi board without any problems.
And my first NANO 33 IOT board ( added at a few months ago ) is currently connected to the Arduino Cloud.
If you need any additional information- let me know.
Stan
Hi @stan_52. Unfortunately none of your images are visible and I'm having trouble understanding from the text alone without the context they provide.
Please try making your post again. You can attach screenshots by whichever one of the following methods is most convenient for you:
- Save the screenshot as an image and then drag and drop it into the reply field on the forum page.
- Save the screenshot as an image, click the upload button (
 ) in the post composer toolbar, and then select the image file.

- Press Command+V to paste the screenshot from the clipboard.
Screen _1.pdf (67.5 KB)
Screen _2.pdf (21.8 KB)
Screen _3.pdf (29.4 KB)
Hi Ptillish.
The screen shots - attached . Descriptions- acc. to my previous info.
Thanks. That makes things more clear to me. For the benefit of others who might read this topic, I'll post the images directly here on the forum so they aren't forced to download the PDFs just to look at them:
The image from Screen _1.pdf:

The image from Screen _2.pdf:
The image from Screen _3.pdf:

I'll provide instructions you can follow to update from Arduino Create Agent 1.2.7 to 1.3.5:
A. Uninstall Arduino Create Agent 1.2.7
- If you see the Arduino Create Agent icon on the macOS "menu bar", control click on it and select Quit Agent from the menu.
- Open macOS Finder.
- Select Go > Go to Folder from the Arduino IDE menus.
The "Go to Folder" dialog will open. - Type
~/Applicationsinto the "Go to Folder" field in the dialog. - You will see an item "Users > <username> > Applications" (where <username> is your macOS username) in the search results. Double click on it.
TheApplicationsfolder will open in Finder. - You will see a folder named
ArduinoCreateAgentin the folder listing. Control click on theArduinoCreateAgentfolder.
A context menu will open. - Select "Move to Trash" from the context menu.
TheArduinoCreateAgentfolder will disappear.
B. Install Arduino Create Agent 1.3.5
- Start the "SET UP NEW DEVICE" process again in Arduino Cloud, just as you did before.
- When you get to the "Download started Once the download has finished, install the Agent following these steps: ..." page, a download of
ArduinoCreateAgent-1.3.5-osx-amd64-installer.dmgshould start. If it doesn't, check the address bar in Safari. You will see an icon that looks like two overlapping dialogs:
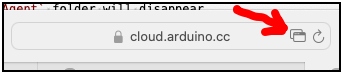
Click on that icon and then confirm that the download should be allowed. - Wait for the download to finish.
- Control click the downloaded
ArduinoCreateAgent-1.3.5-osx-amd64-installer.dmgfile.
An "ArduinoCreateAgent" window will open. - Click and drag the "ArduinoCreateAgent" icon to the "Applications" folder icon in the "ArduinoCreateAgent" window.
- Open the macOS Launchpad.
- You should see an "ArduinoCreateAgent" app in the Launchpad window. Click on it.
- A ""ArduinoCreateAgent" is an app downloaded from the Internet. Are you sure you want to open it?" dialog might now appear. If so, click the "Open" button in the dialog.
The Arduino Create Agent icon should now appear on the macOS menu bar. - Switch back to the Safari window and select the Arduino Cloud tab in the Safari window.
You should find that the Nano 33 IoT board has now been detected by Arduino Cloud. You can now complete the Arduino Cloud Device setup process.
Please let me know if you have any questions or problems while following those instructions.
Hi Ptillish.
Removing ald Agent and installation of the new one went smooth and without problems. Thank you for such detailed procedure.
Currently version 1.3.5 - 3ba51ce is installed.
And finally - my new NANO 33 IOT board is configured and added to he cloud.
Thank you.
So we can close the case now
You are welcome. I'm glad it is working now.
Regards,
Per
This topic was automatically closed 180 days after the last reply. New replies are no longer allowed.