Tips for these type of mounting holes

thx

My post was just sharing really what I found convenient to use and is somewhat a no brainer. I never investigated more complicated way of getting things tied together. Nylon is relatively easy to cut so the washers can be adjusted if components get in the way

I'm not sure I get what you are saying. probably lost in translation

this is a M3 Mounting hole

Thank you the last three comments are very helpful, most of my questions are very awkward to ask making it ever more Awkward to answer in a way that actually helps me as I have a learning disability and all of my frustrations tend to form in the realm of the physical concept self plugging all this stuff into one another and storing it safely / reliably.

As I'm nearing 50 years old and have quite a bit of schooling and CGI and Visual Studio / C sharp so I'm able to sufficiently get by finding tidbits here and there on my own to Google on YouTube in terms of the software needs in terms of what you put in the curly brackets of a sketch.

But taking the first year of an engineering design course where it's all theoretical not much Hands-On I've been basically exposed to a boatload of scenarios on the way that you should not do things without asking first as it will most likely lead to injury or destruction of equipment.
And as someone who has had several near misses working in factories I am extremely paranoid to go off script when I absolutely have to because of lack of funds or University level text explaining things in a format that just makes you think you jump right to rocket science off the bat going way over your head.

I'm on disability supplementary income and I've invested 4 months of my spending money to getting a basic small toolbox full of starter gear and I'm very hesitant to be even feel confident I've separated and I'll be said components in a way that and confident they will work when I next take them out let alone the concept of actually handling these things with electricity applied.

thanks for the context.

There is ton of fun to have without even going to build something "finished" (even if it's nice to have a finished product) - just using a breadboard and Dupont Wires.

Make sure power is applied where it's due and look twice for shorts. Unfortunately getting a bit of magic smoke from time to time is part of the learning... (or has been for me)

side note:

many of us are waaaayy past that and still having fun :slight_smile: . Keep at it !

1 Like

These things come in various sizes and flavors.

These links might stir some ideas in you brain:


Holy crap those look cool, and $$$ tho lol.

I think i found something that will getcme by till i can find an affordable source of 3d printing.

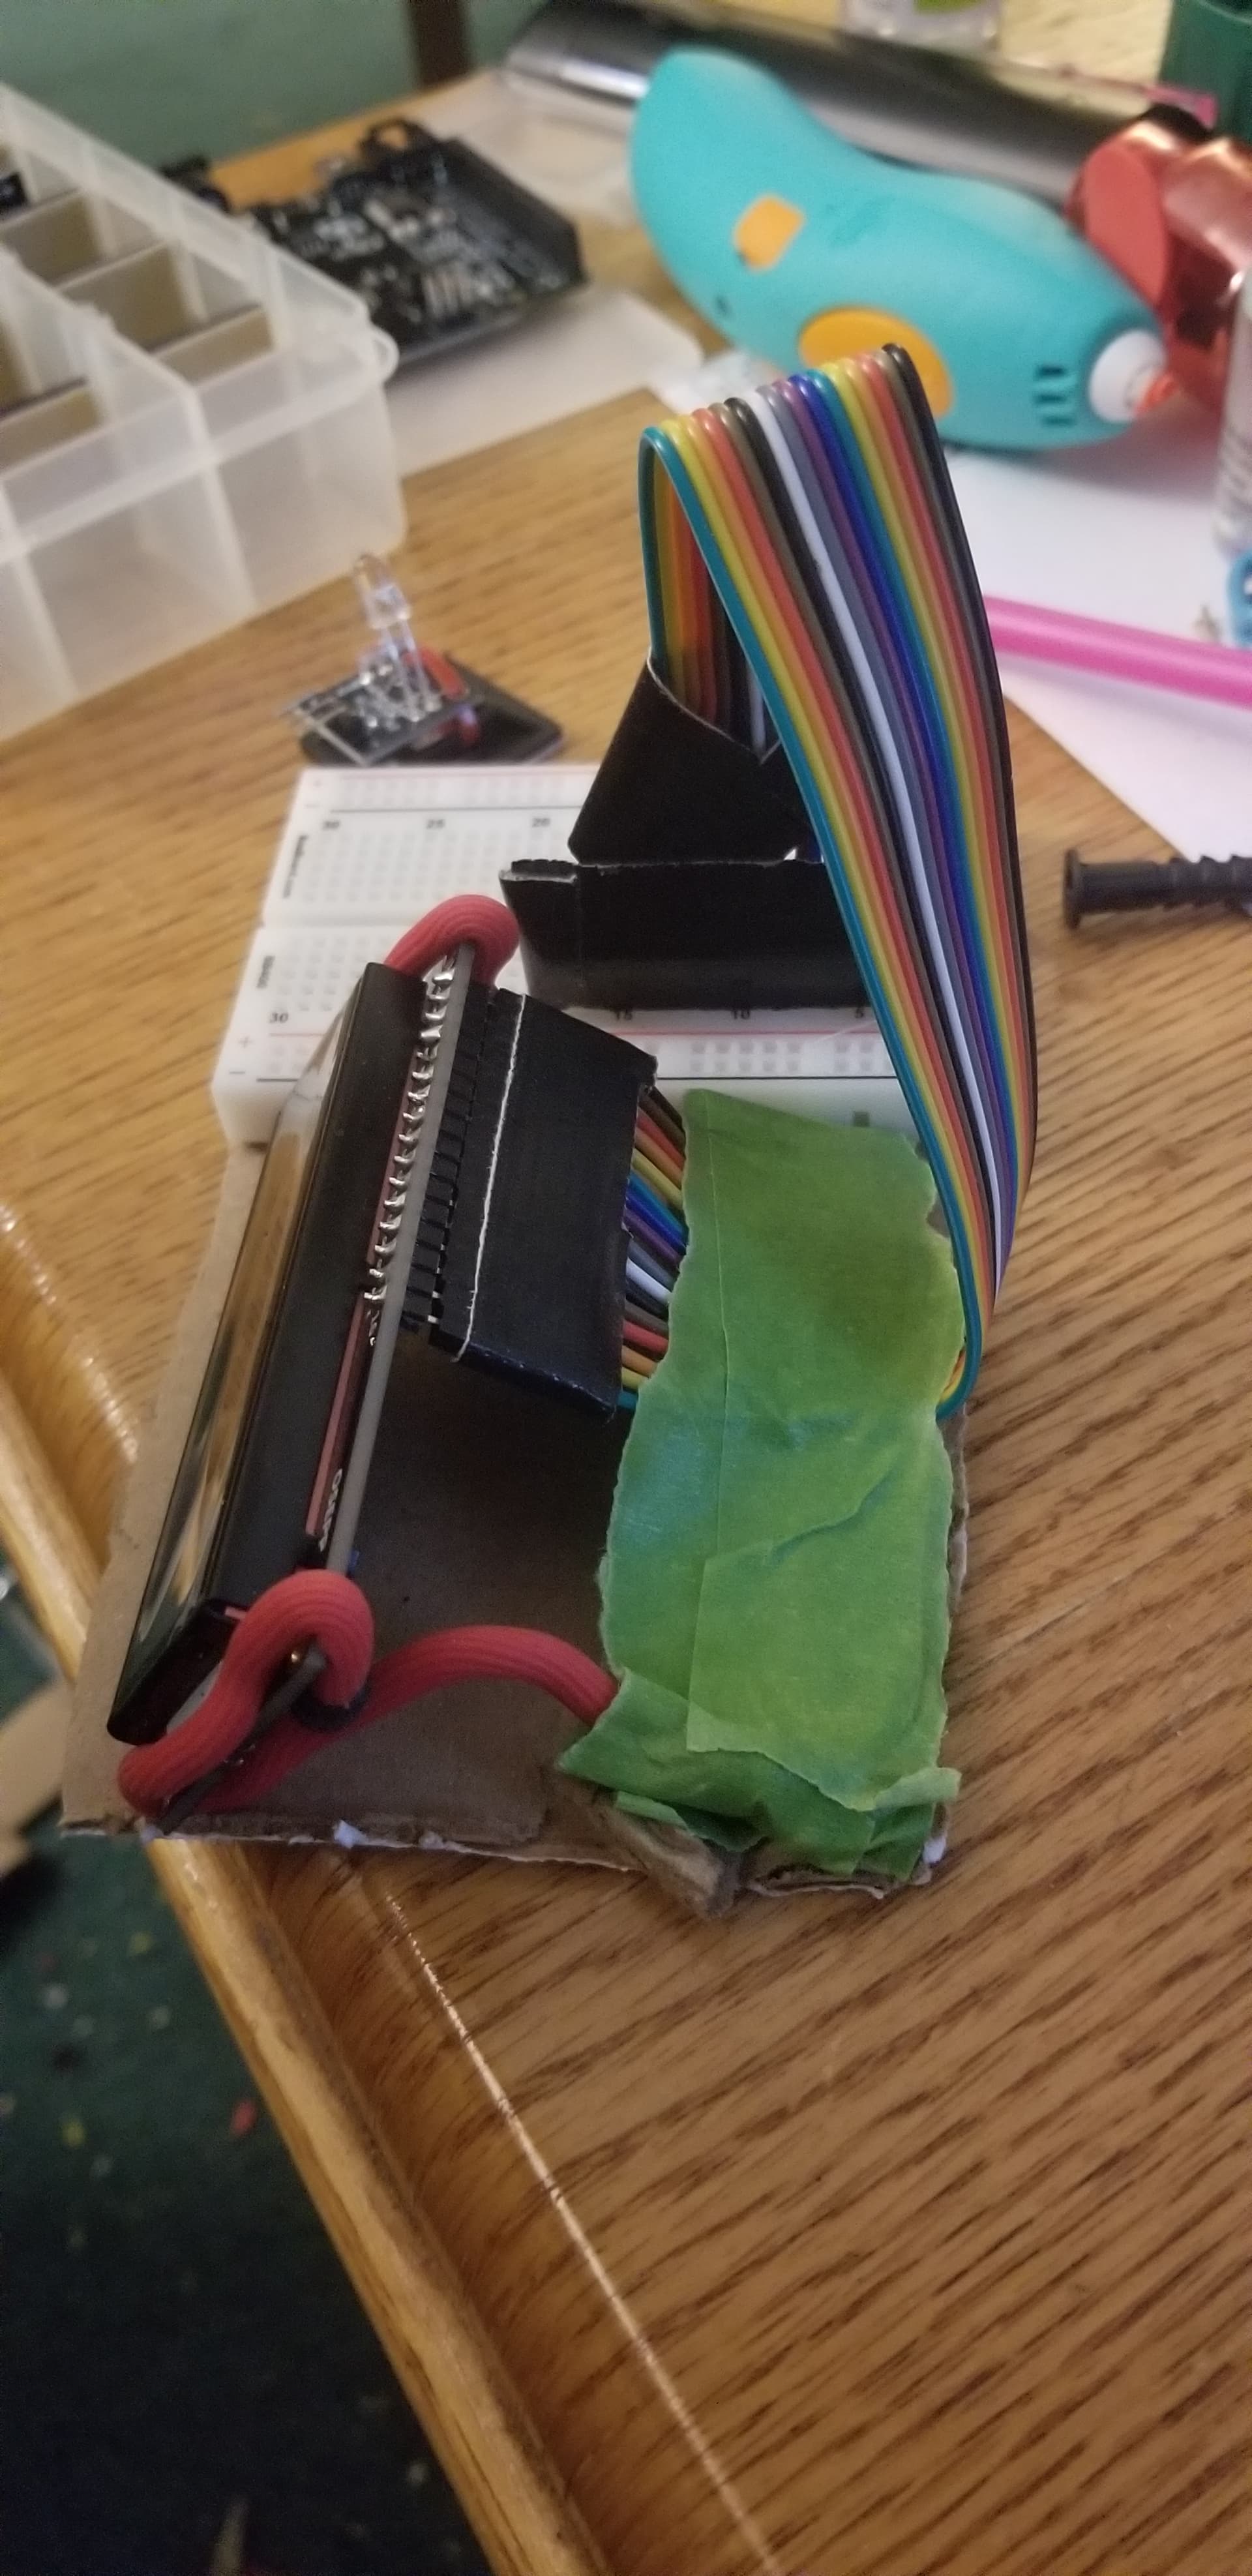
Started by making this using popsicle stick under tape to bind all the pin cubes in a line as if a single peice, then pinched these out of my helping hands pouch for saudering. And 2x side tape.


Then i happened to notice by random luck, these wall stickies meant to mount wired frames without drilling the wall slide in these division slots petfectly.

So i ised the little built in stand off and wire feed to zip tie the finger nail size boards without resorting to drilling or adhesives on the pcb.


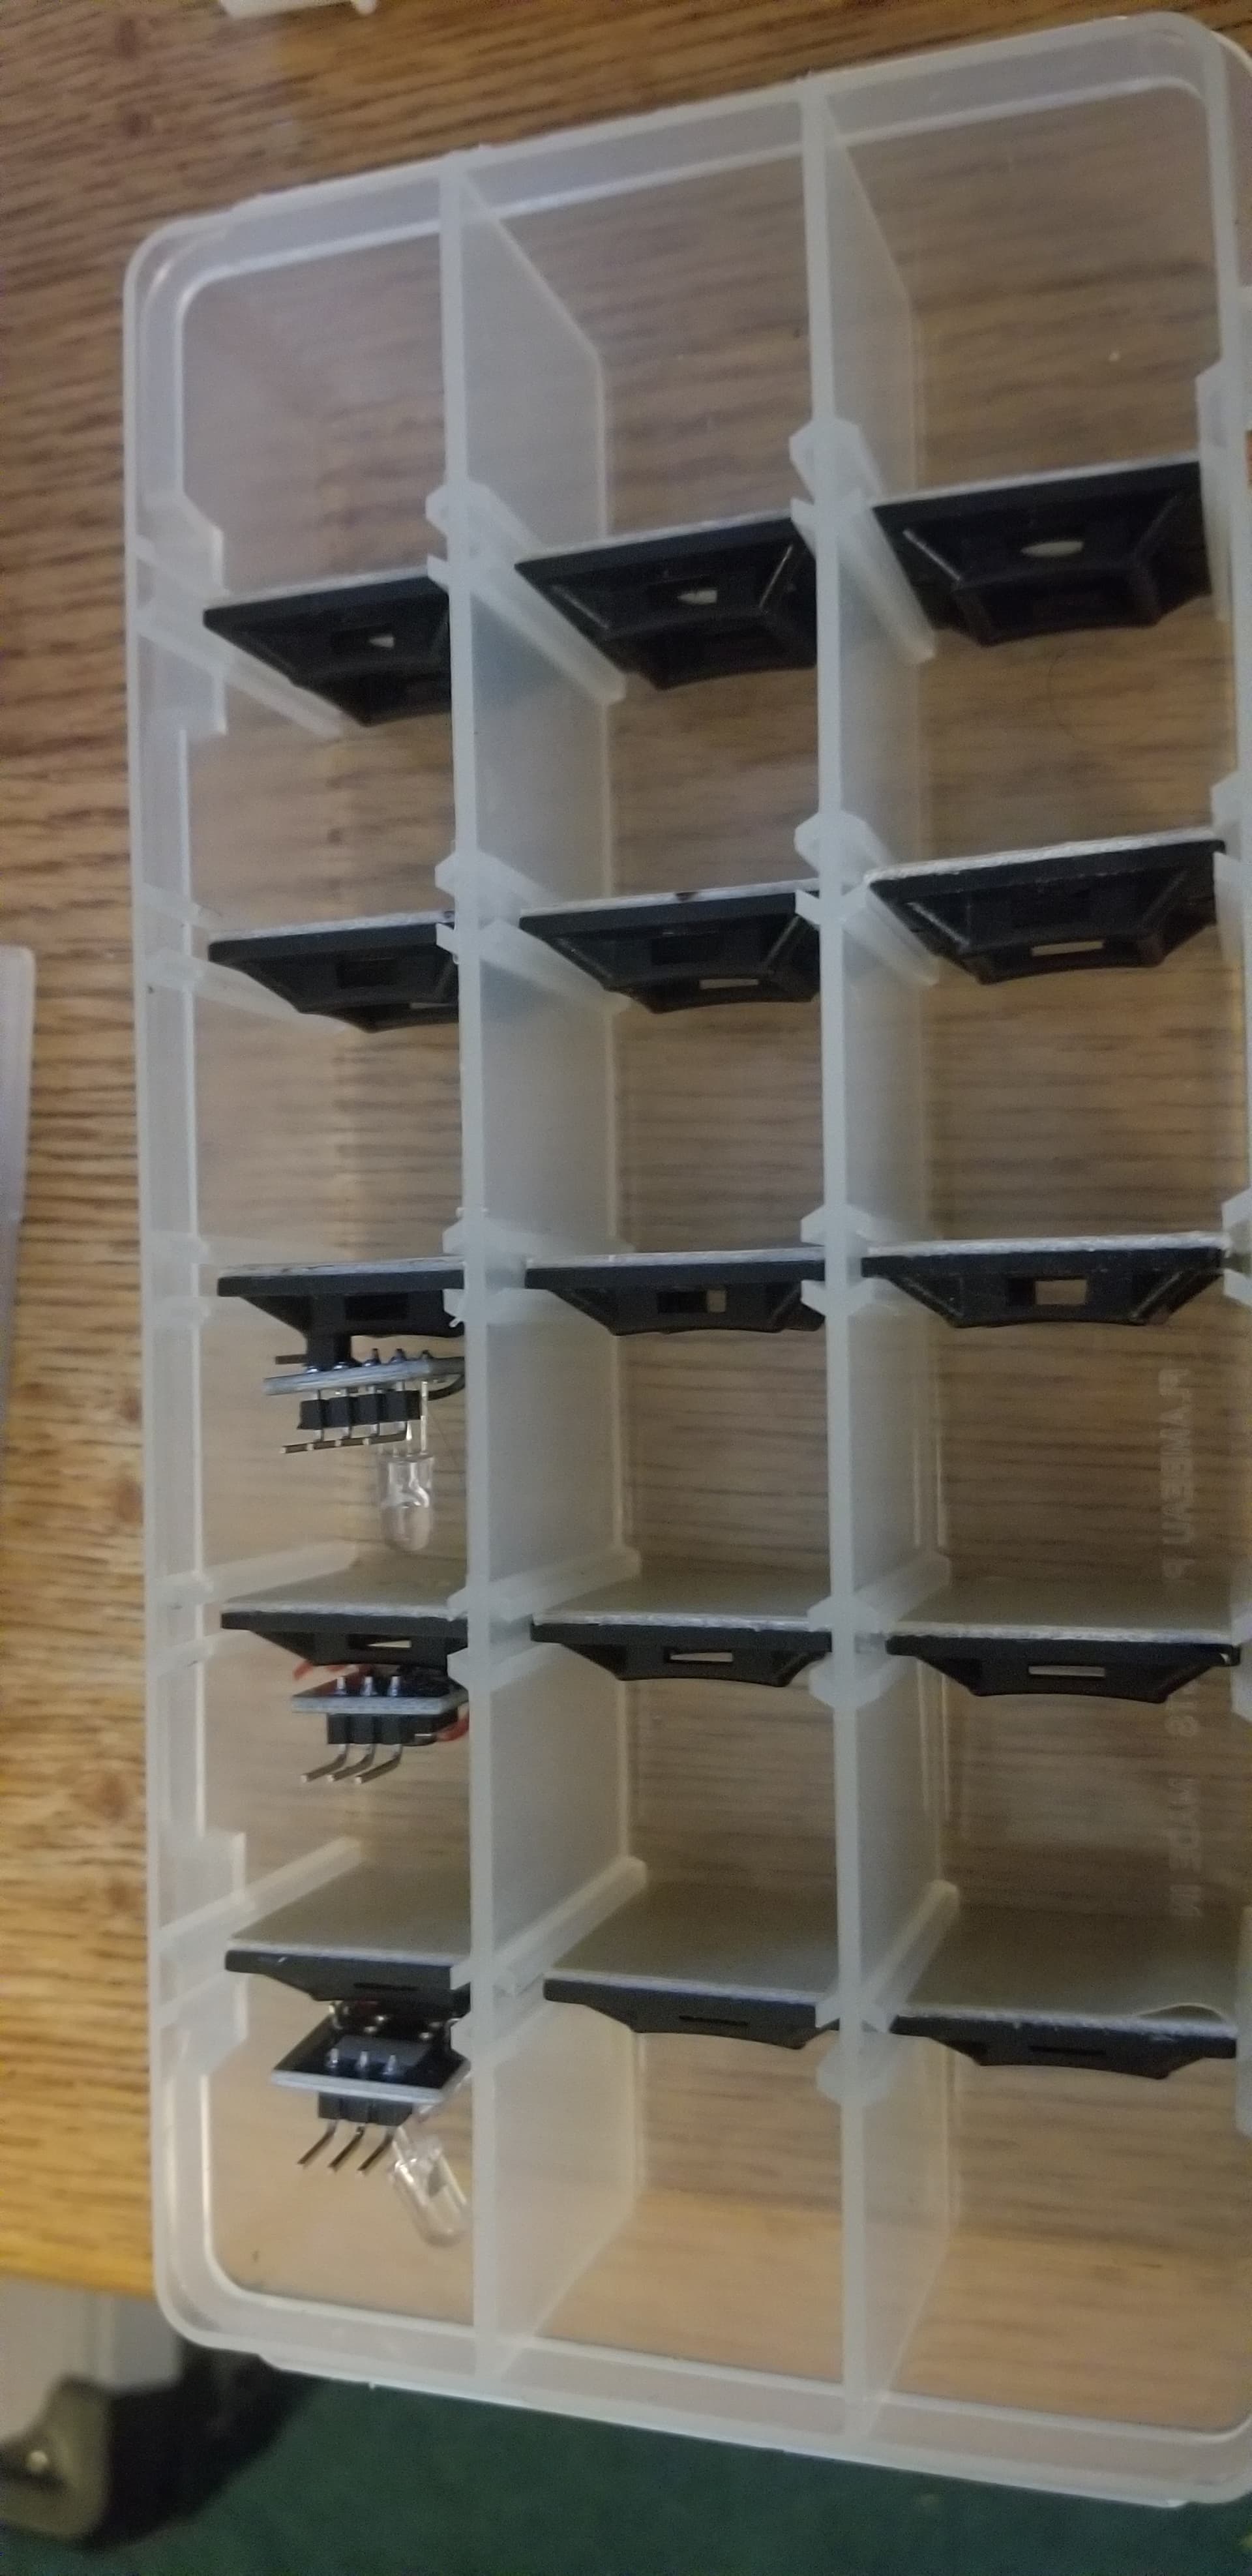
Then i got lucky again with these pegboard claws holding tight to the mounting holes and a popsicle stick feeding through the same wire feed used earlier.
Again zip tie keeping pcb fully clean.

Also i can maybe use thar 2x side tape on those things to stick em to a keeper project.

Now just need to find a solution for my speakers, buzzers, servos and motors.

Now just need to find several more of those divider trays for all the other modules.
I meant to buy a 7" lcd for making a fpv headset, got a 2.4" by accident, then 2nd try i somehow got a 0.96" OLED, so uh yea, no clue what to use them on, and i bought 12 gyros thinking i needed 1 for every axis + speed direction to track.
And 2 mini pro that has no pins at all just sauder pads. So yea, been 1.5 months and ive barely made a dent in identify this stuff, but the next tutorial in the book is using a twisty knob to make a line of led move from none on to all. Lol.

Is this normal collection for getting started?

When i ordered it off amazon i tried to add some of everything i knew at the time i need for sure to swap my rc car and drone pcbs for arduinos.

Would anyone consider being my mentor for all this stuffs?

Well, you have quite a few volunteers on this site that do just that.

Ask your hardware and software questions and you will get a myriad of responses.


For electronic hardware stuff go thru the 1000+ posts on this thread; many suggested techniques that you can master.

2 Likes

If the print shop is looking at that view, a very big cost is that nearly every component is a different color. That means each part is going to be printing individually, followed by an employee spending the time to change filament color. A printer with multiple heads would help, but that would need a more expensive printer and require multiple filament changes between prints.

No they know that tinkercad picks s diff color automatically when imported. Each of those patrs actually has a separate stl, i just did that mash up for the est cost as i file to send them.

Our local library has 3D printers and they charge by the weight of the plastic used. The parts in your image would be under $20 to print. Maybe check with your library.

Wow, never considered gov / community service buildings being a possibility. Thats a great pro tip.

Does anyone know if im only needing to start with blocky shapes, what to be aware of in hints or clues that will make me aware of avoiding even ordering it, so i do not get something that doesn't work what so ever, or if it works good enough, then this price is workable.
Easythreed 3d Printer For Kids Beginners Mini Entry Level With Low Noise Small 3d Printing Machine Use Pla Tpu 1 75mm Filament - Office & School Supplies - Temu Canada

Beware of all the plastic stuff that carries static electric charges to your sensitive microprocessor stuff.

I started a new thread specifically for discussing everything 3D printing here.

mythn7, let's continue this discussion there. Hopefully, you'll get all the info needed to determine if 3D printing is for you and how to make the right purchase.

I might have overlooked something incredibly simplistic in nature.

Would there be any risk in using a paper clip that you would unbend enough to put a very small diameter wire heat shrinking sleeve on and then using your heat gun to lightly make it tight on the paper clip and just using this paper clip to sorta just wrap over the top of the PCB as a sort of roll cage type a bar going over it. Holding it it down on top of some homemade standoffs created from plastic straws just holding it to a small piece of pegboard.

Has anyone mentioned the nylon standoffs that clip onto a PC board?
https://www.newark.com/c/fasteners-mechanical/fasteners-fixings/spacers-feet/pcb-supports

I would say yes, since it could shift position and short out conductors on the PCB.

1 Like

I've had a few of those supplied with some equipment. The main thing I don't like about those, it's a clip on both ends. So if you want to, say, stand off from the wall of enclosure, you have nylon stubs sticking out, instead of standard mounting options like screws going in, and mating with threaded holes on the standoff.

Looks like there are some that screw mount on one end.

post #24

That would work. Not a bad solution.